Purpose
This document explains how to upgrade an existing project folder to use Heyzap mediation. (These steps will likely work for other sorts of upgrades from C10.2 to new feature branches of the project underway by development).
Note: This is page 2 in a series. Please make sure you meet the preconditions listed on page 1.
Applicability
This applies to you if you’ve been tasked with updating an existing project to use the Heyzap mediation features.
Instructions
Videos
https://www.youtube.com/watch?v=pD6hxYiEaU8
Here is an alternate video that does a couple of things differently, and shows how to do the work using version control.
https://youtu.be/c_hN9NJGOHY
Filters (references in video)
Files to exclude:
*.cs
*.cs.meta
*.js
*.js.meta
Folders to exclude:
Editor
GoogleMobileAds
JMO Assets
LeanplumSample
Plugins
Written Instructions
Terminology
You will be using two projects to do this change.
- The original, pre-existing project, or Project Folder. This runs under Unity 5.0. We will call it the ‘old’ project. It will remain unchanged.
- The latest version of the E.1.11 branch of the C Code with the Heyzap mediation feature. This will be the ‘new’ project. You are going to change it into an updated version of the existing project.
-
Save .meta files in Text format (OPTIONAL)
We are going to be taken a few settings from the old project and moving them into the new project. To do this easily, those settings need to be in text format.
- Open your old project’s Project Folder in Unity 5.0
- From the menu, choose Edit -> Project Settings -> Editor
- From the inspector window, change ‘Asset Serialization Mode’ to ‘Force Text’
It’ll take a minute reprocessing small assets. You can quit out of Unity 5.0.
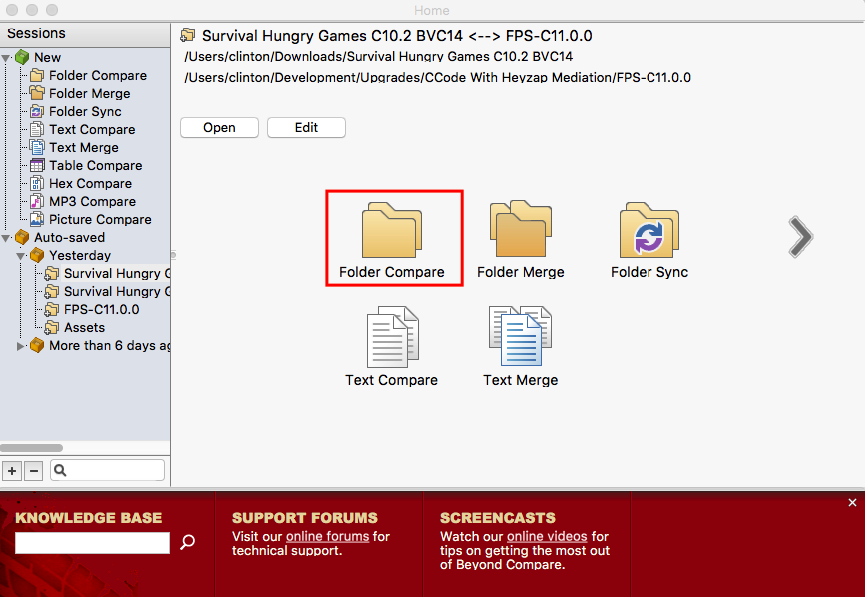
2. Open both projects in Beyond Compare for comparison
Beyond Compare allows you to compare two files or two directories and bring changes from one onto the other. It is an excellent tool for this task, as we’ll be bringing a lot of files from the pre-existing project onto the new version of the project.
There are two ways to do this.
Method 1:
Find the existing project in Finder/Explorer.
Right click on the folder, and choose ‘Services -> Select Left Folder For Comparison’. (I know the wording is really similar on Windows. If you don’t see it on Windows, you’ll need to install a shell integration plugin.)
Find the folder with the E.11 Heyzap Mediation code.
Right click on the folder, and choose ‘Services -> Compare Files’.
The two folders will come up for comparison.
Method 2:
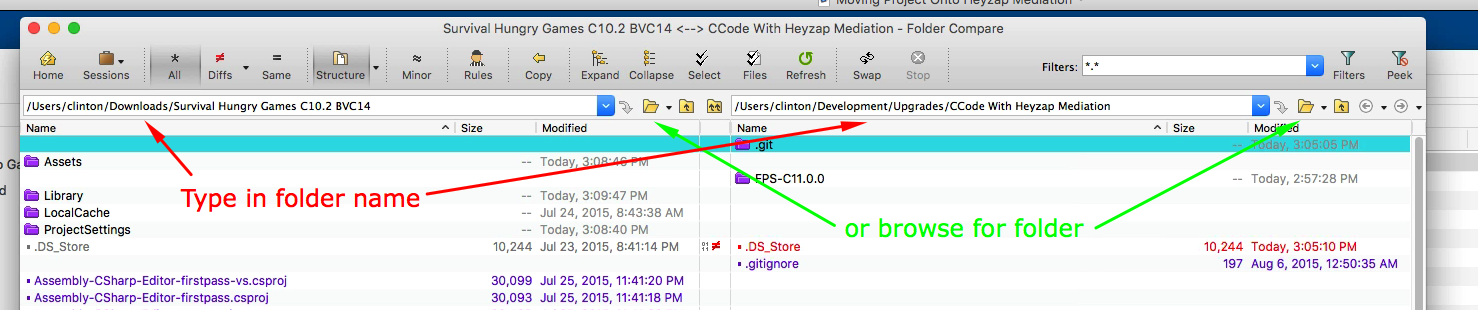
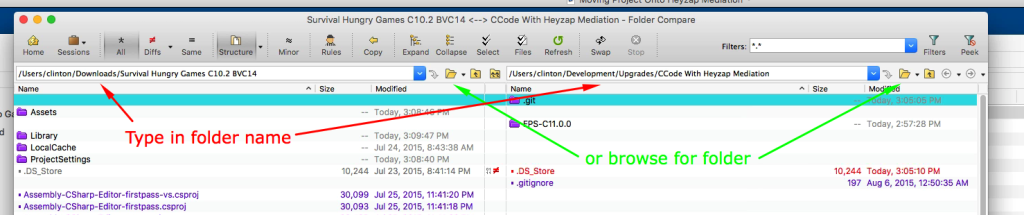
Run ‘Beyond Compare’.
Tell it you want to do a Folder Comparison.
Using the browse button, or just typing in the folder, browse to the existing project on the left-hand side, and the newer version of the project on the right-hand side.
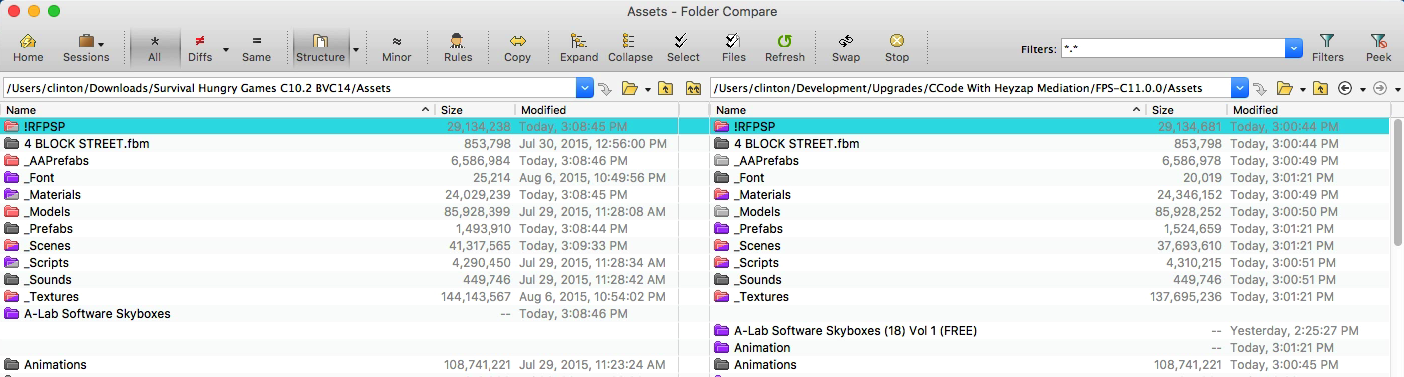
3. Compare the ‘Assets’ folder to the ‘Assets’ folder
Find the ‘Assets’ folder on the left side, possibly opening other directories first, and then right-click on it, and set as base folder.
Do the same on the right-side.
You will end up with something like this:
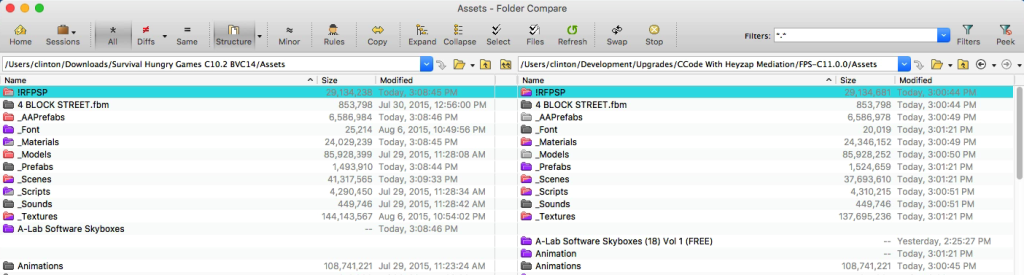
Note that both folders end in ‘Assets’ and you can see that they contain a lot of the same sub-folders.
4. Filter Out Files We Don’t Want To Copy
Click on the Filters button
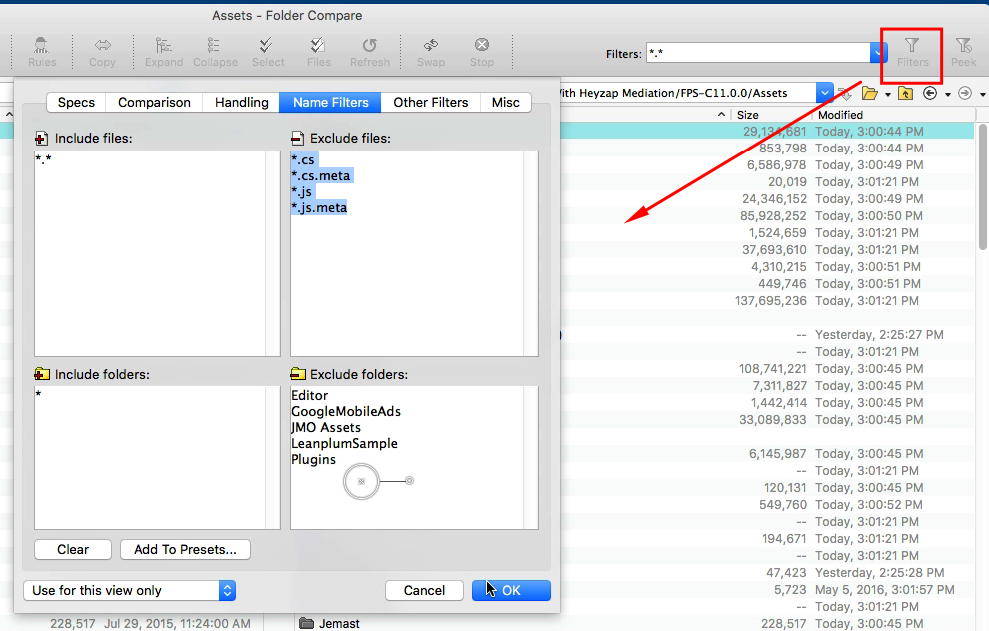
Exclude the following files:
*.cs
*.cs.meta
*.js
*.js.meta
Exclude the following folders:
Editor
GoogleMobileAds
JMO Assets
LeanplumSample
Plugins
This will allow us to copy over level scenes, logos, prefabs, skins, etc, but will not overwrite any plugins (where all the Heyzap Mediation stuff is) or any of the project’s source code.
5. Copy Over Files
With the filter in place, we are ready to copy over files.
- Click on the first line on the left-hand side.
- Scroll down to the bottom.
- Hold down shift and click on the last line of the left-hand side.
- All the files on the left will now be selected (but not on the right).
- Hit the ‘Copy’ button.
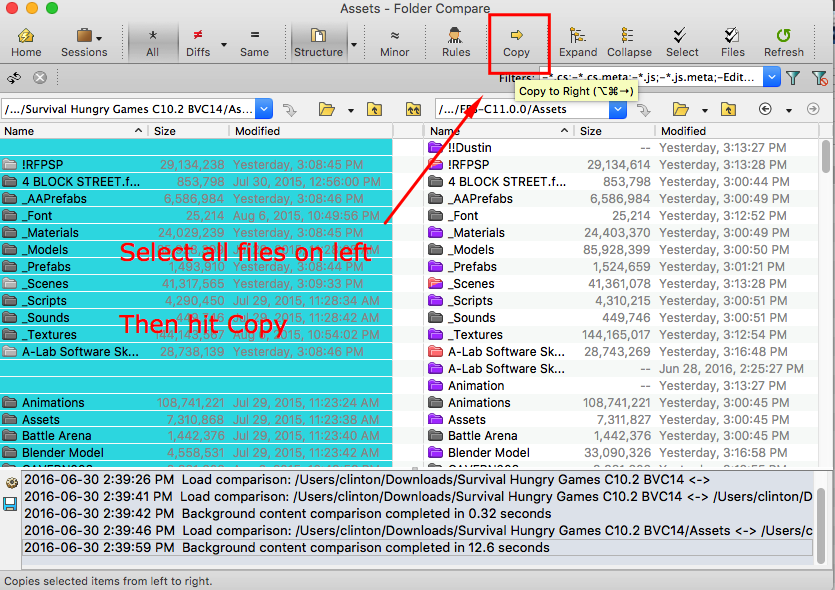
- The defaults are right — copy files from the left to the right, applying our filters. Hit Start.
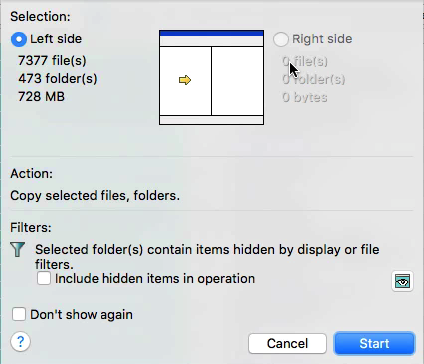
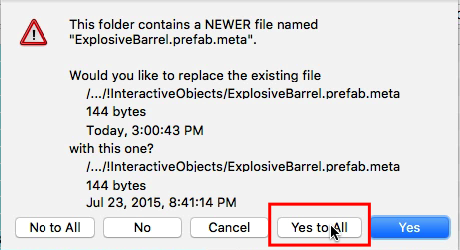
- When asked if you want to overwrite newer files, hit ‘Yes To All’.
The files will take a minute to copy.
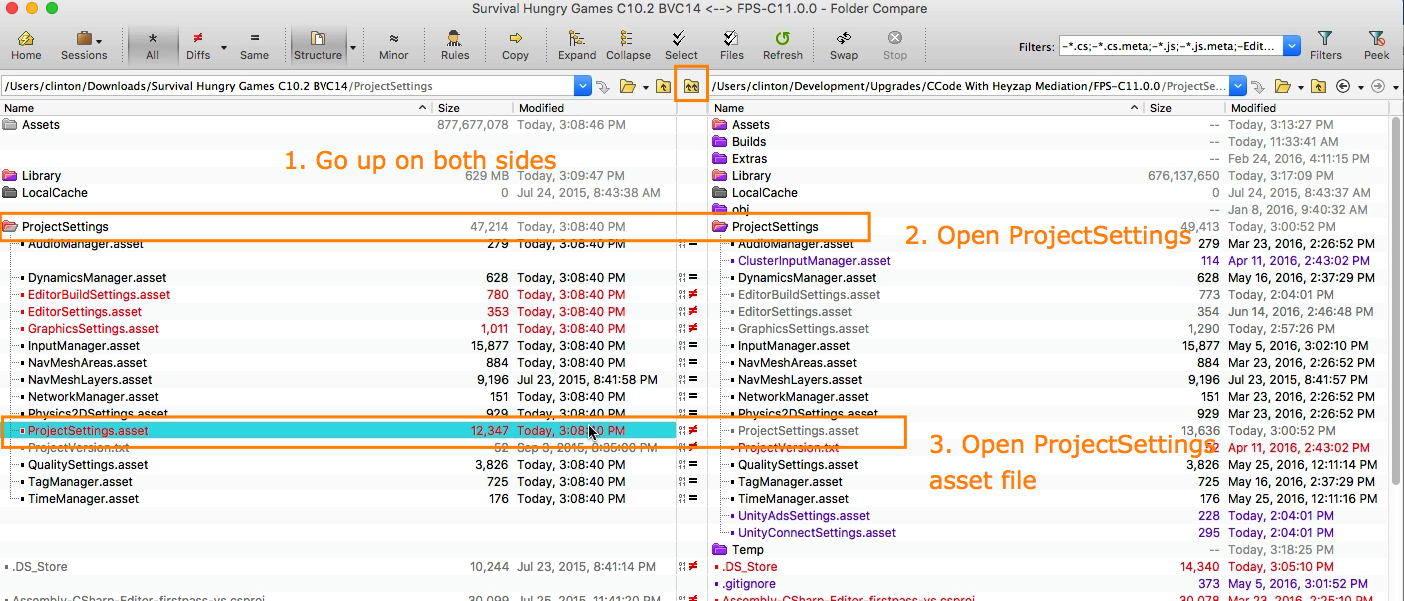
6. Copy over BVC, etc. (Optional method)
You need to get the bundle version code and game name and such from the old project to the new one. You can do it as shown here, or as explained in step 8.
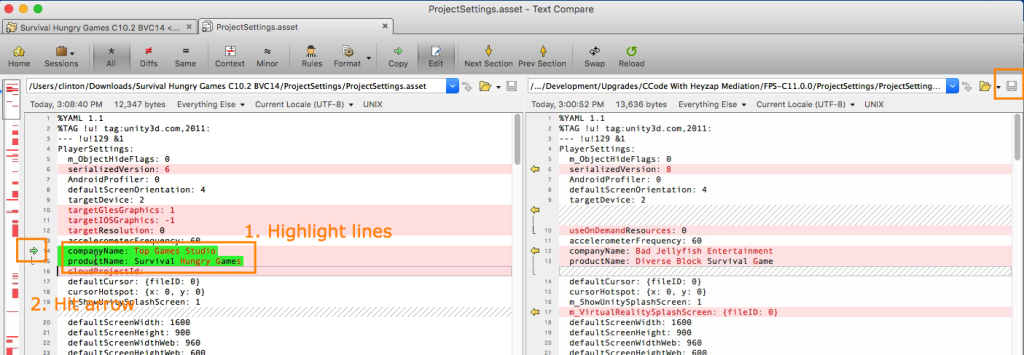
This is shown at the six minute mark in the video, but I thought it’d make sense to do it now. The new project folder needs the name and company name and such from the old project. The settings are stored in a file called ‘Project Settings’ and haven’t been copied over. We do not want to replace the entire file, but we do want bits and pieces from it.
In this method, 1. click on the ‘Up One Level On Both Side’s’ button (two arrows in the middle — see picture), and then 2. double-click on the ‘ProjectSettings’ folder to open it, and 3. on the ‘ProjectSettings.asset’ file to open it.

Now, with the file open, you’ll want to
1. Find lines that are set right on the left that you want to bring to the right, and highlight them.
You’ll want the lines:
- companyName
- productName
- bundleIdentifier
- bundleVersion
2. With the lines highlighted, hit the green arrow off to the left to copy them over.
3. Save the file on the right side.
You may close Beyond Compare at this point.
7. Open the new Project in Unity 5.3
You can now open the new project, using Unity 5.3.
8. Copy over Settings (Semi-optional)
If you didn’t follow the method using step 6, you’ll need to do it here.
Obtain the Bundle ID, Bundle BVC, company name, and product name. It may be easiest to just open the old project folder in Unity 5.0, go to Player Settings, find those values, and then, paste them in the corresponding fields in the new project folder in Unity 5.3.
9. Set the Icon
Get the latest icon from Ponch and set it as the app’s icon.
10. Test the Game
Does it look like the old game, but have new features? Hooray!
Next
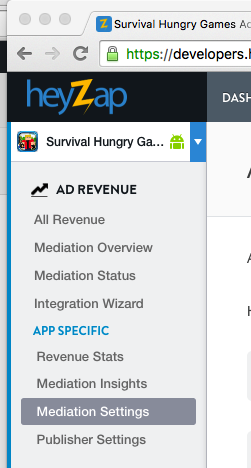
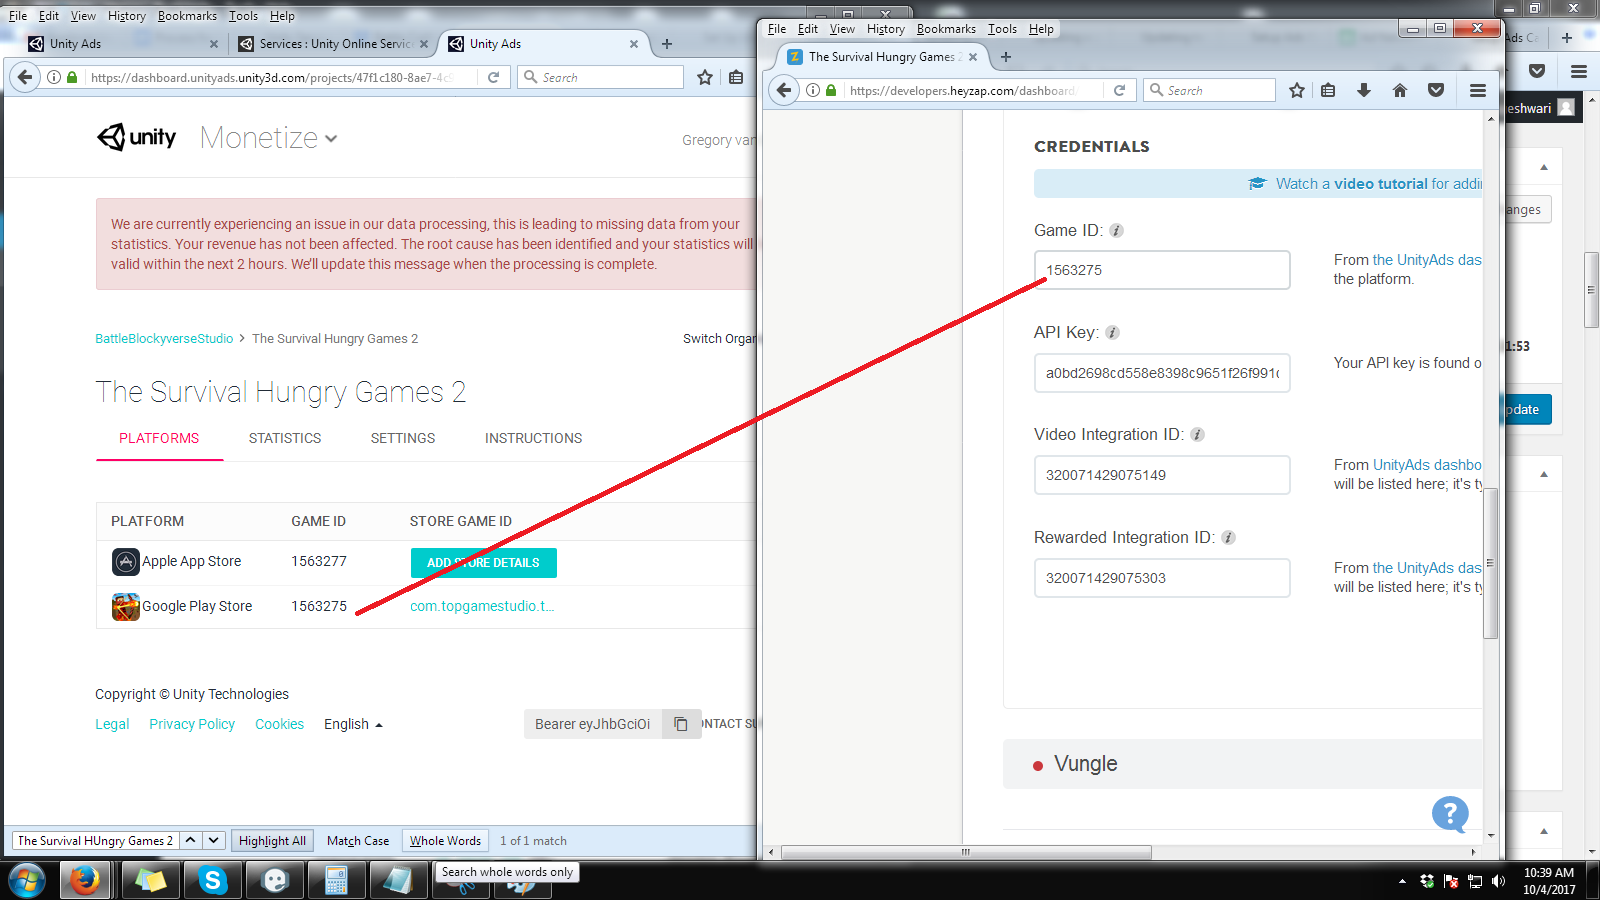
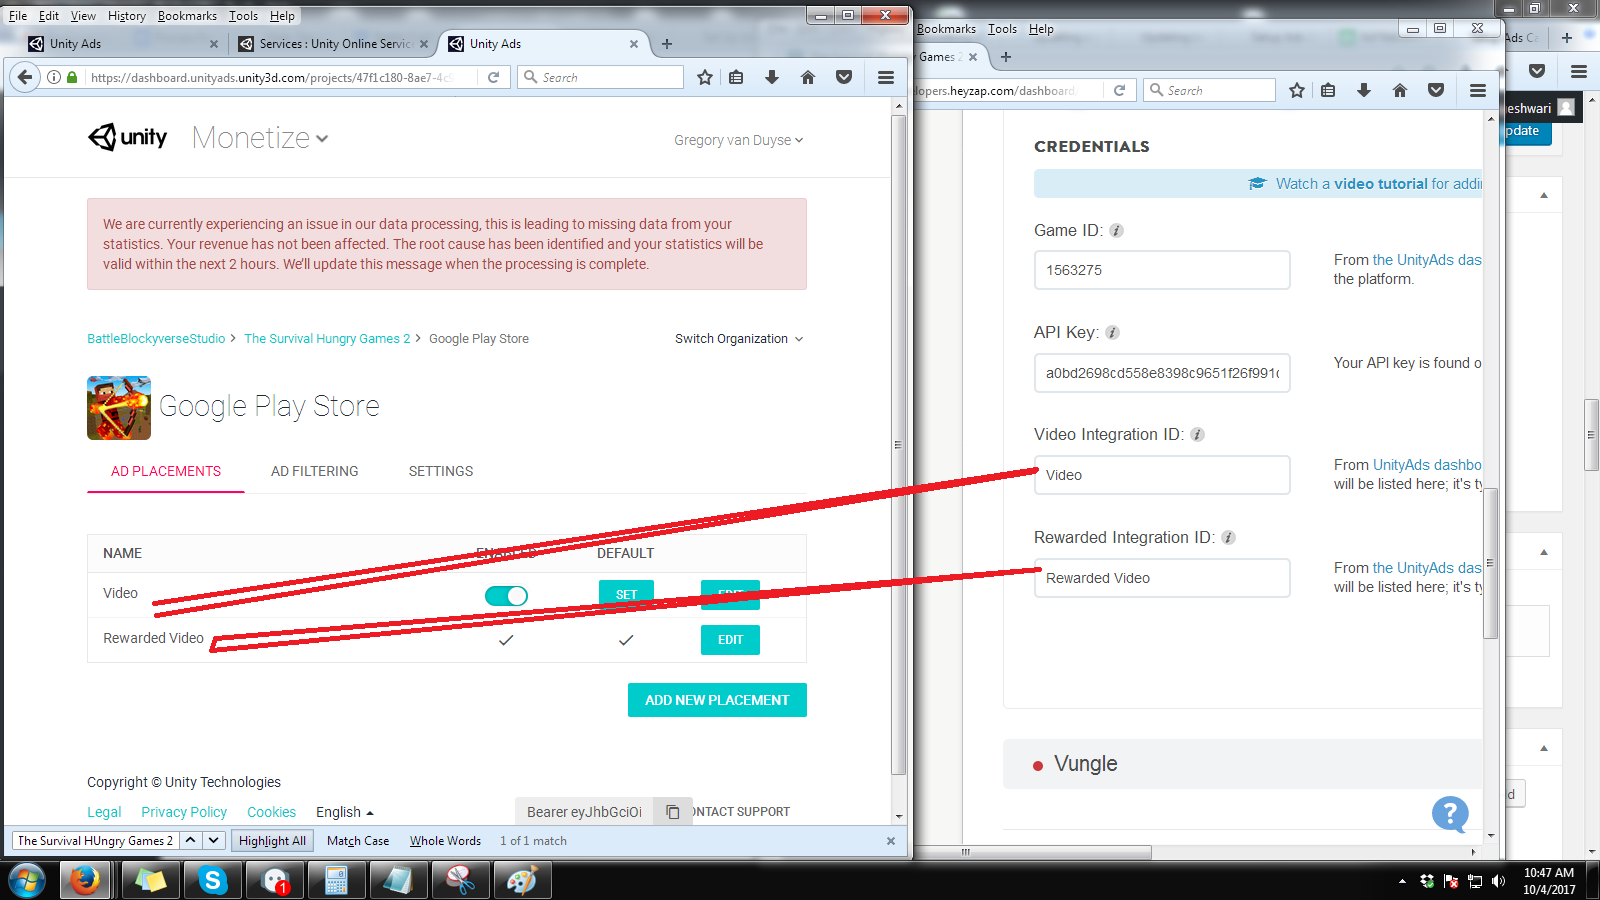
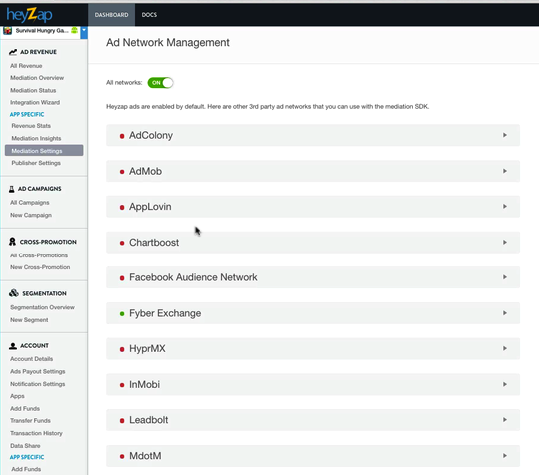
Set up Unity Ads to work under Heyzap mediation