
Purpose
- explains how to turn on Unity Services for use with Unity 5.3
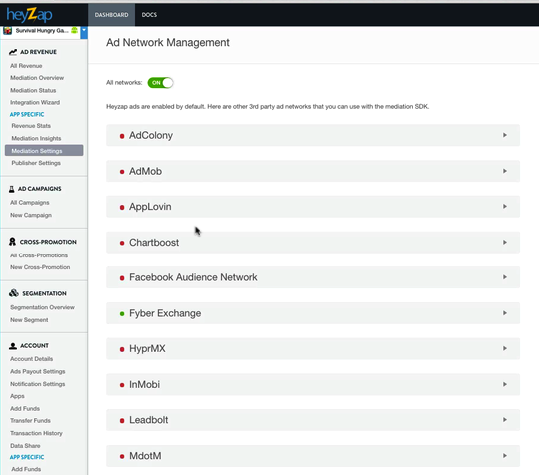
- gives overview of Heyzap mediation settings
- Part 3 in a series
Applicability
This applies to you if you’ve been tasked with updating an existing project to use the Heyzap mediation features.
Video
https://youtu.be/31obCaO-O_E
Notes from Video
Most of the settings in the LaunchController don’t do anything any more. (If they aren’t there when you look at it, it means we’ve updated it to remove the unused settings).
In particular, the Unity Analytics ID isn’t used, the Unity Ads IDs aren’t used, and the Ad Colony Ad IDs aren’t used.
Setting Up Unity Services
Go to Window -> Services
(Sign in to the right game company if necessary)
Unlink the game
Link the game to your proper game, being careful to say we have an existing game to link to, and not creating a new one.
Go to Analytics, and bring up the dashboard. We want to be sure that it is connected to the right version of the game and that we’ll see analytics in the same place we used to see them.
Turn on Unity Ads.
Save the project.
Prep For Heyzap Settings
Bring up the game in the Heyzap dashboard. Heyzap knows the game by its bundle ID. You may need to look it up by its name.
When you find it, note that all the settings are turned off. The only things turned on are ‘all networks’ and ‘Fyber Exchange’.
Follow the setup as explained in the next videos, but do not turn the ad networks on until it is time to test them (and turn them off right after!) or the game has gone live. [We should test this more. Heyzap in the old versions of the game tries to use the settings and run mediation. It looks like this causes lost ad revenue. It does work with the new version of the game, and should be turned on shortly after it goes live.]