Purpose
This post explains how to update an existing game in normal C20 code (cascade system) to C20-Iron-Source. You should be using for this update an existing C20 game and open it with Unity version 5.6.2p1. You should have talked with your team or Production team in order to know if it’s doable to update the game you want to Iron Source mediation. It’s a good idea to check the current ecpm of your game and if it’s lower than $2.00 may be you might update to a different mediation than cascades system.
Create packages
Once you have your C20 game opened you will to export first the packages needed. To do that go to
- Tools > Exporter > Use C18 Mode > Enable
- Tools > Exporter > Minimal Mode > Enable
- Tools > Exporter > No Ads Mode > Enable (this one is very important)
- Finally export all the packages by doing click on Tools > Exporter > Export > WithoutAd Networks
There will be two packages created. Save them in your local computer for now.
Create new branch
Open on github the branch called C20-IronSource and clone it with the name of your game: e.g. C20-IronSource-Cops-Vs-Robbers-Prison-Escape. Open the new branch and import the two packages you just created from the normal C20 game. Then follow the normal steps from the C20 process in order to Import and Set the new packages. You will replicate:
- Step 10 (the only change here is that No Ads Mode should be ENABLED)
- Steps 12-20
Configure app on IronSource
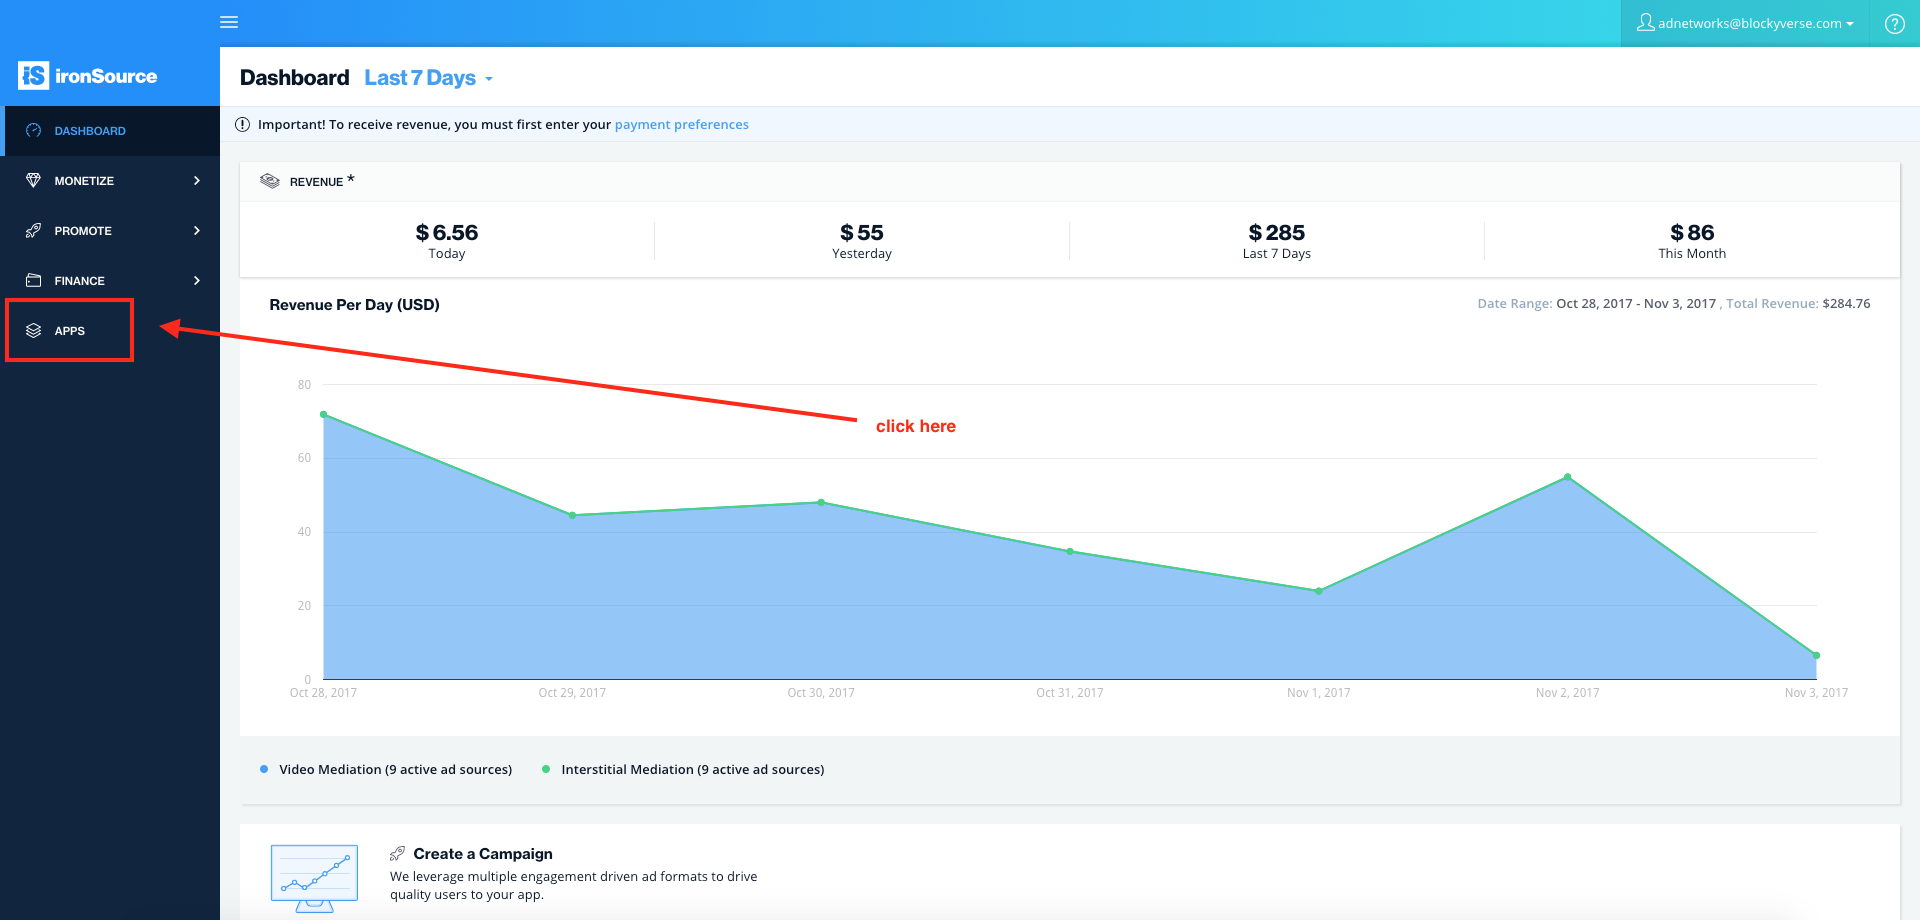
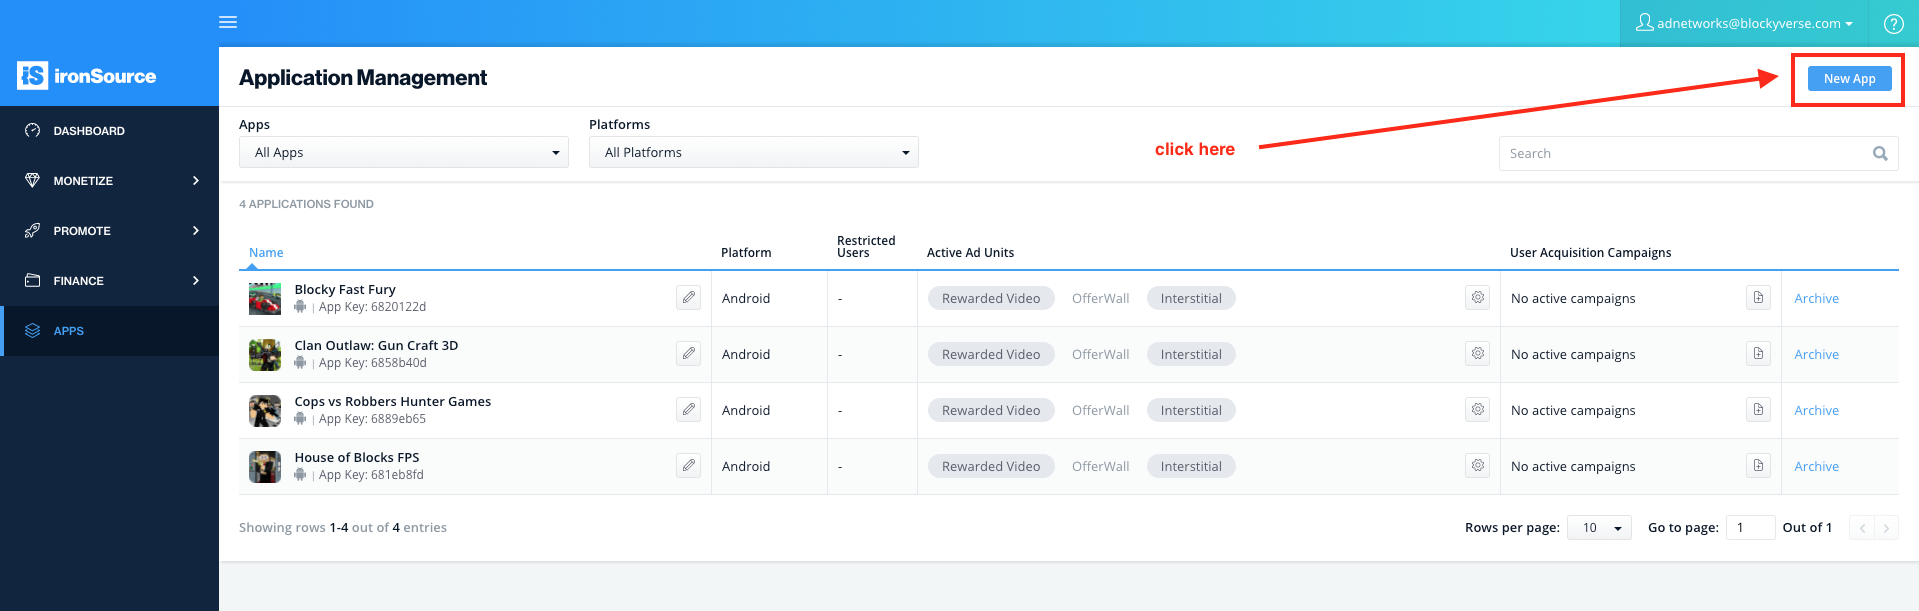
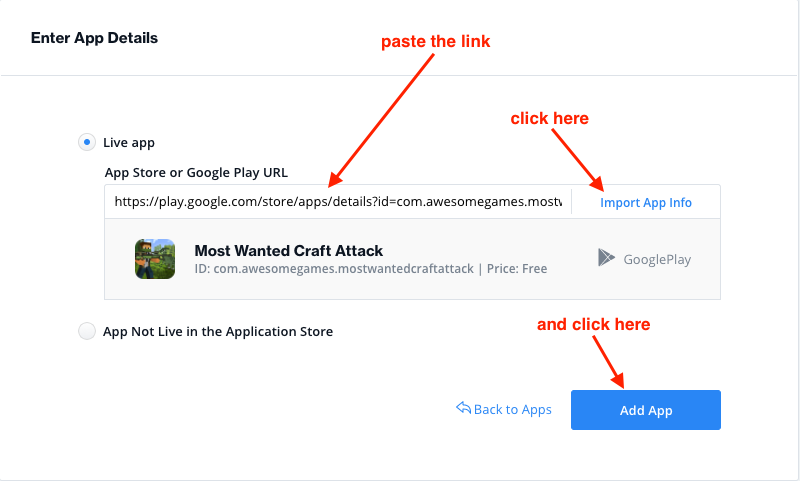
In this step you need to login in IronSource webpage. Please contact any member from Management and ask for the correct username and password. Once you have access, you should add your app in the main dashboard:
Then you need to retrieve your app’s link from Google Play and paste it in the next section:
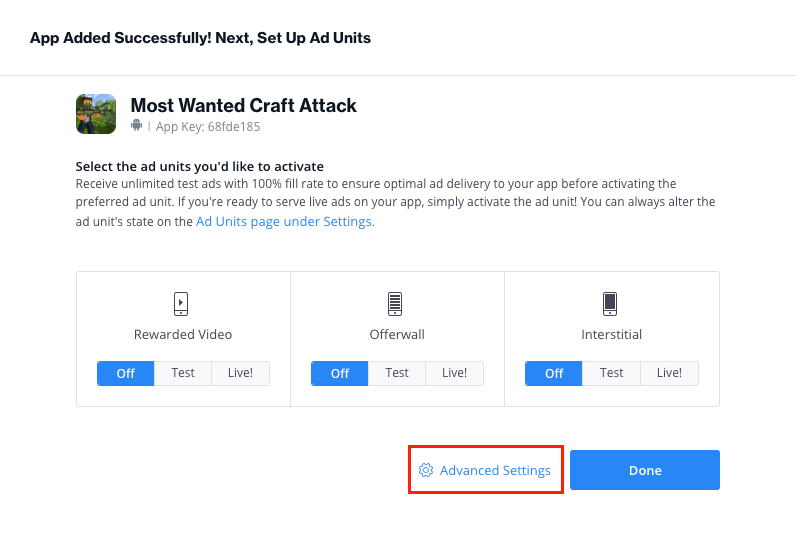
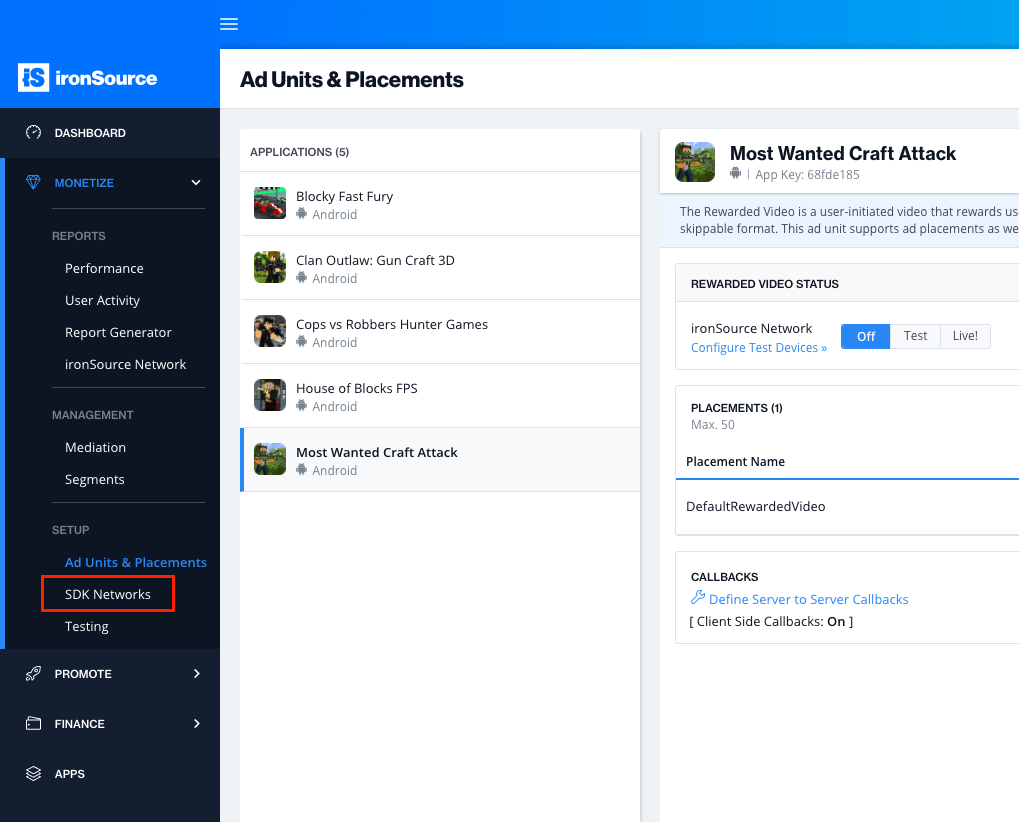
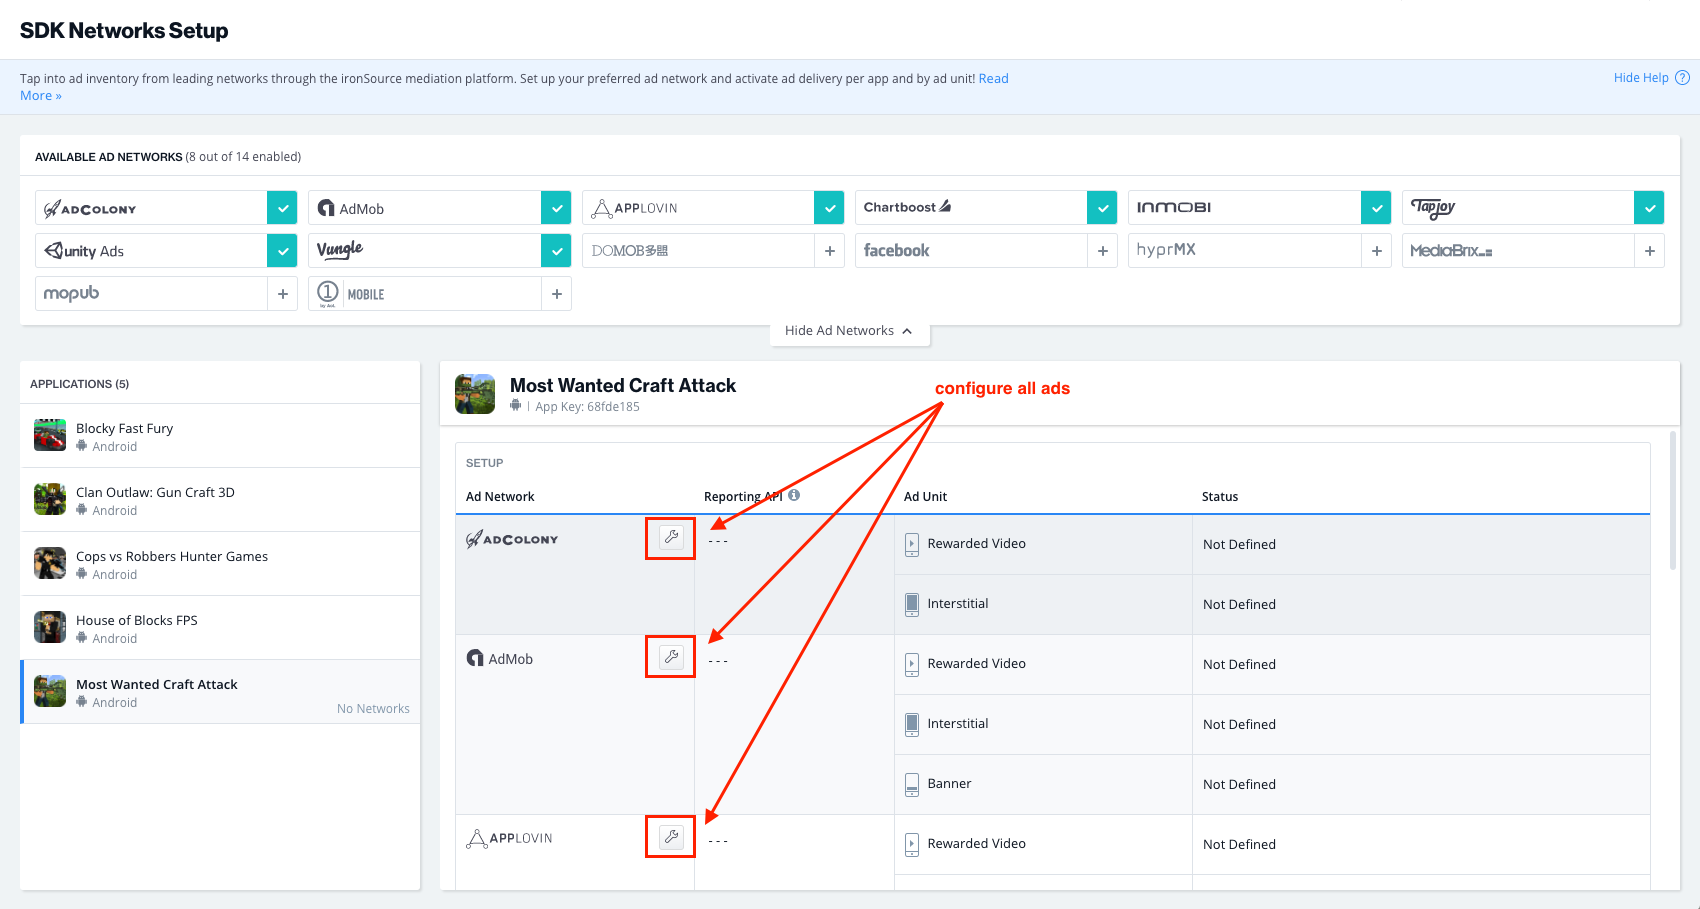
Once you see the confirmation screen, go to Advanced Settings and then, on the menu on your left, go to SDK Networks. Make sure you have selected the game you’re adding:
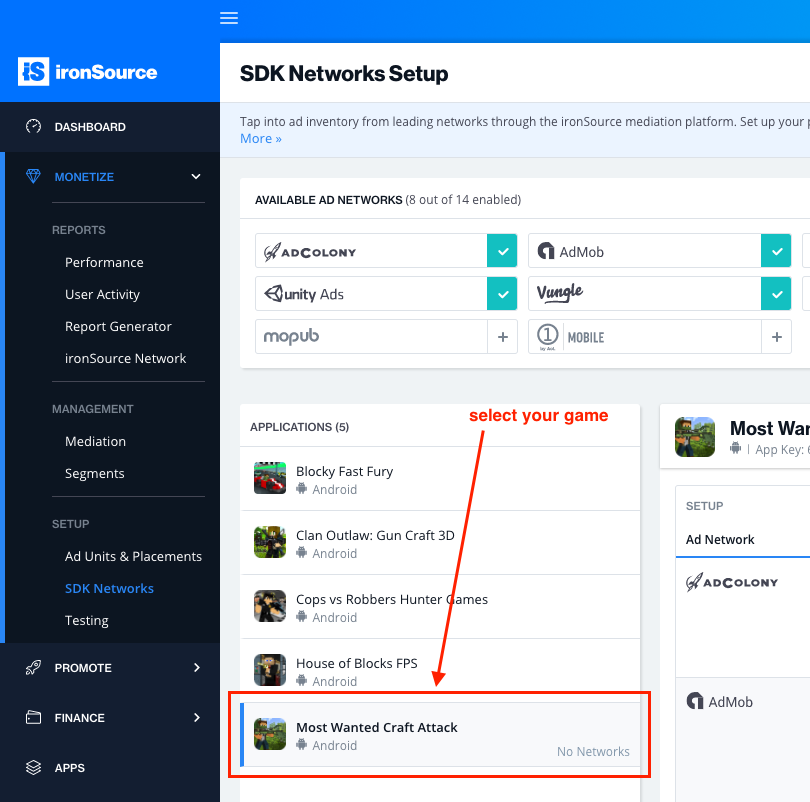
Configure each Ad Network
On your right you will see a list with all the ad networks we use. You should configure everyone of them by pasting the current information from Ad Networks Master File in the corresponding section:
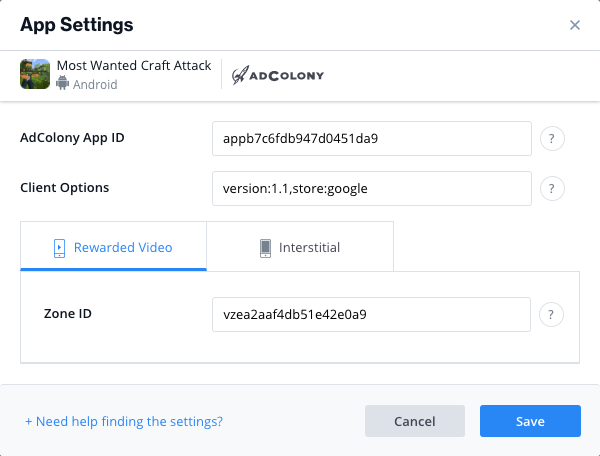
- For AdColony you will find the current data on the Ad Networks Master File for the game you’re updating:

Then you just need to paste everything on the corresponding input. On the Client Options just paste this text: “version:1.1,store:google”
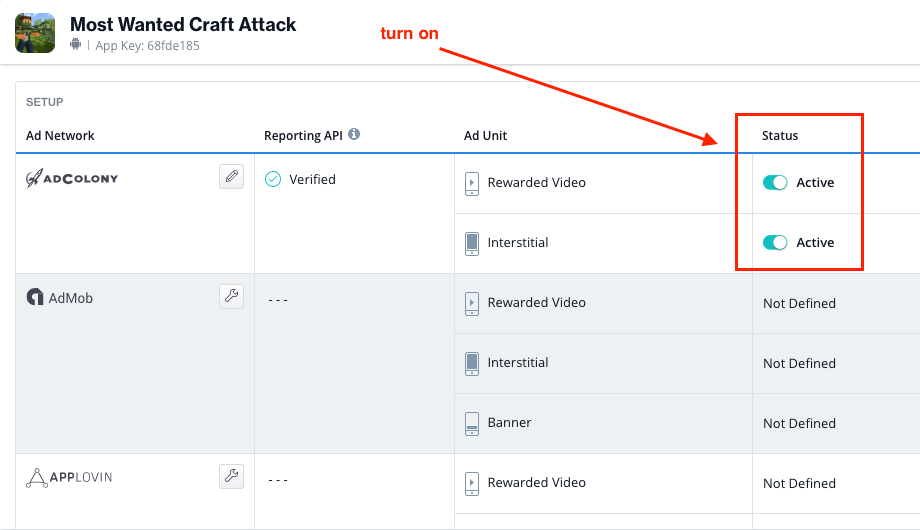
Then Save and turn on the switches on your right (only the once that are defined). Click OK if you see any confirmation popup. You will need to do this for all the ad networks:
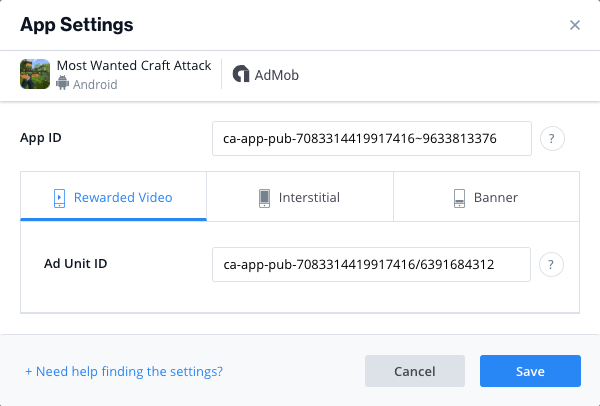
- For AdMob you will find also all the data on the same document. Just paste everything on the corresponding section. Leave in blank the Banner tab. Then Save and turn on the Units.
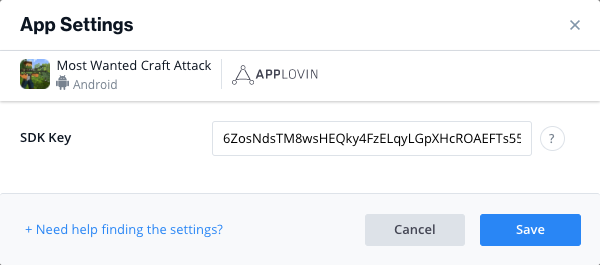
- In AppLovin section you only need to paste the SDK Key, which should be the same for every app. Save and turn on the Units. Banner section should be Inactive by default.
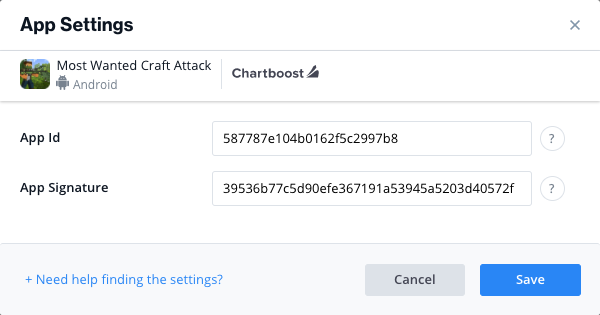
- For Chartboost you can find all on the same document. Save and turn on Units.
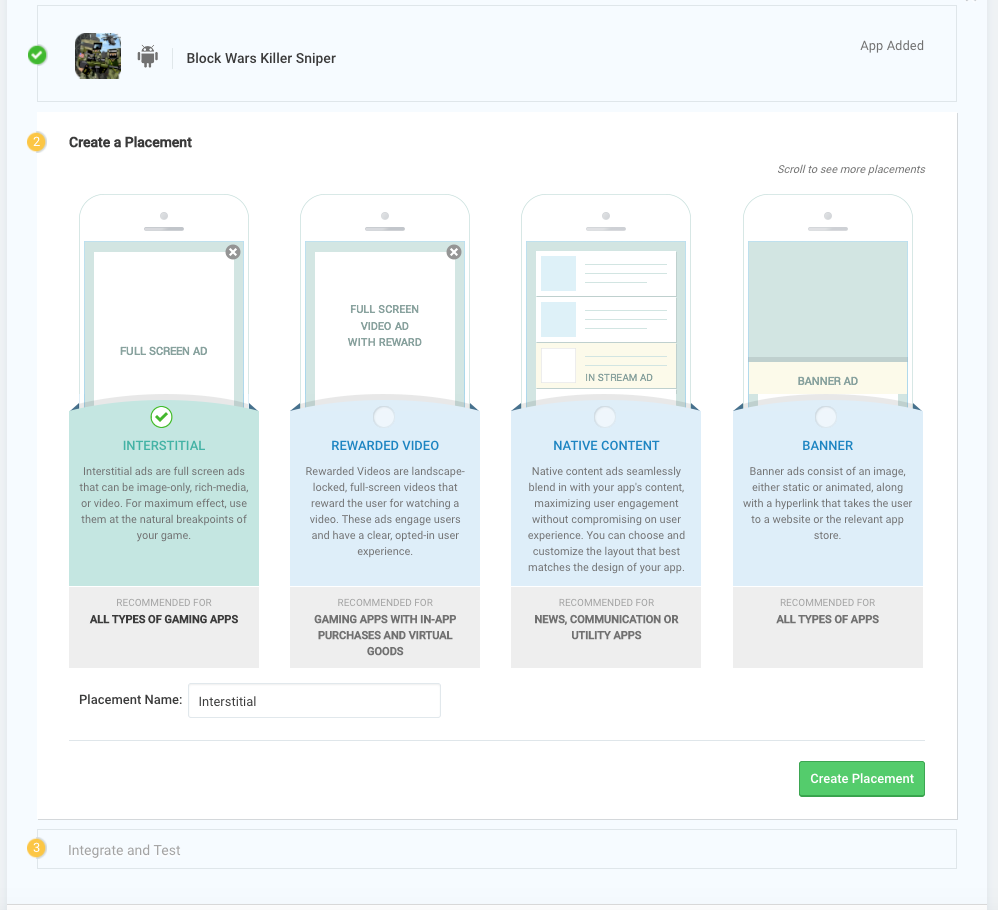
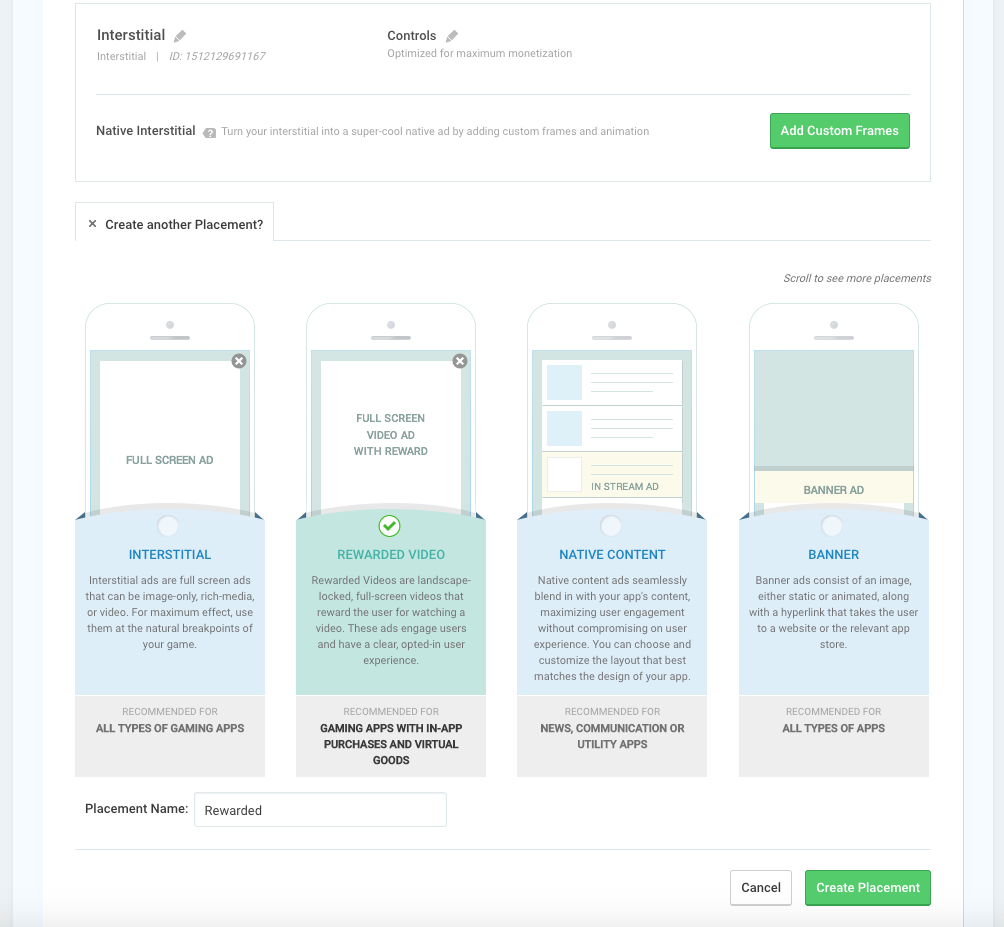
- Then, you need to login into the Inmobi wepage with the same credentials. Then on the top go to MONETIZE, then click on Add an App and paste the link of the Google Play URL of your game and click on Look Up. On the “IS YOUR APP COPPA COMPLIANT?” section, select NO. Then click on Add App. The Interstitial placement should be selected by default, you just need to write its name. Click on Create Placement.
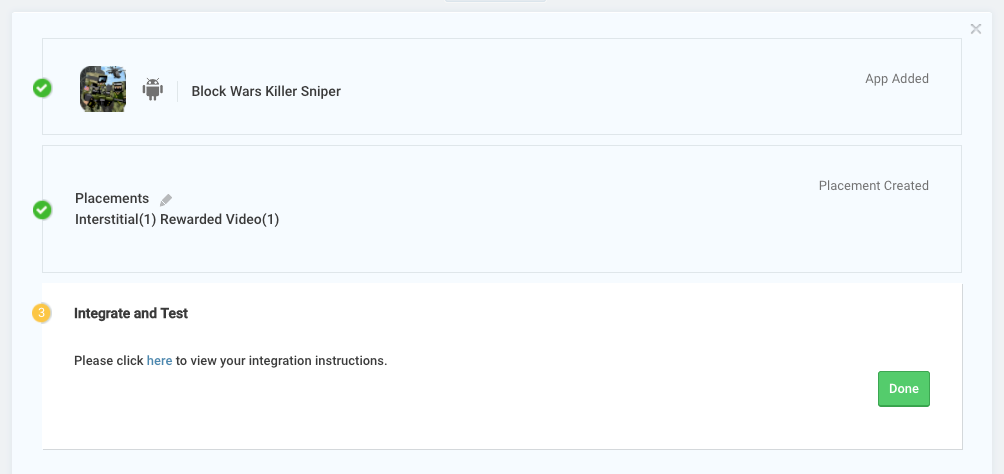
Then click on +Create another Placement? and do the same but with the Rewarded Video placement. Finally click on Done, Proceed to Integration and Done again.
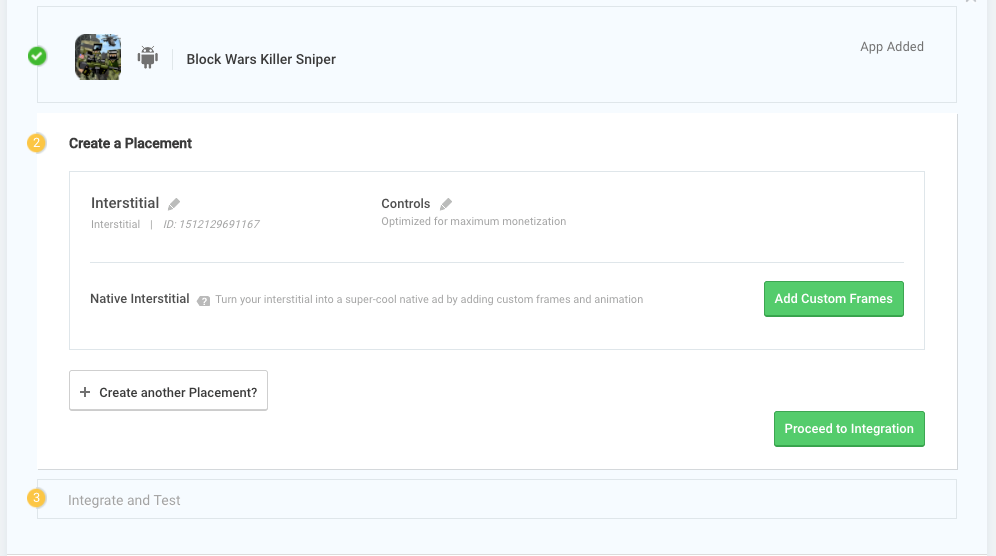
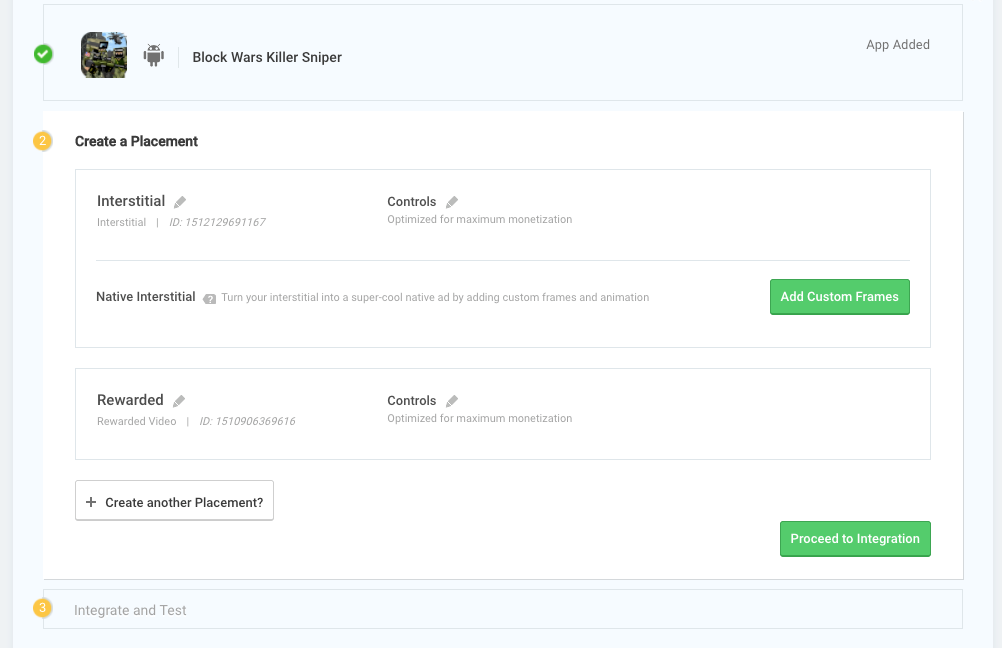
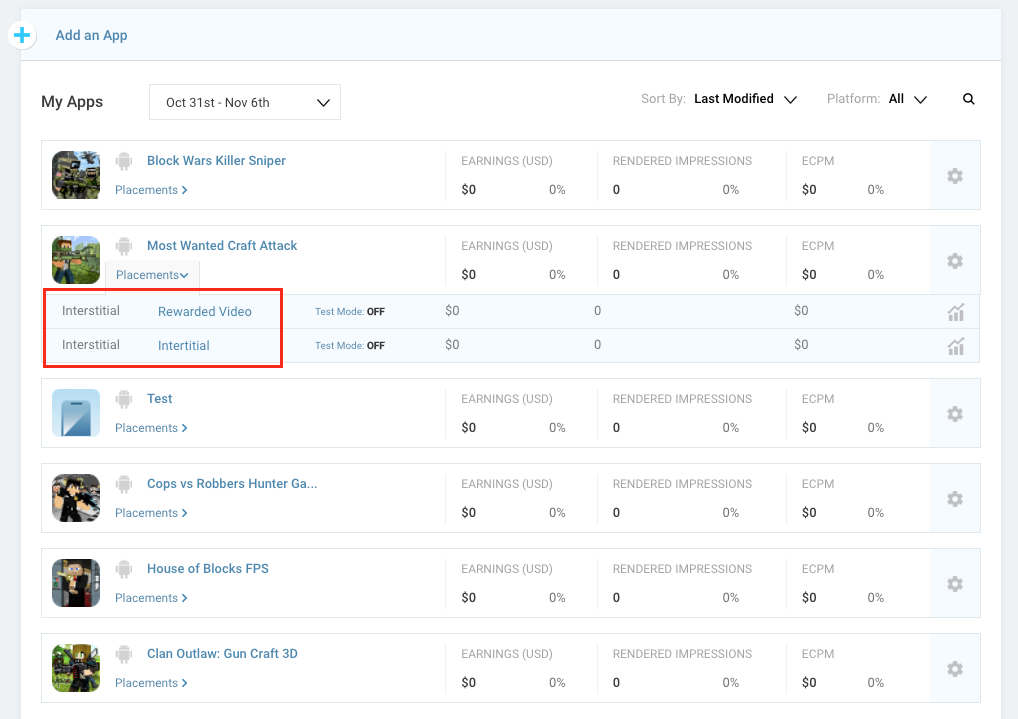
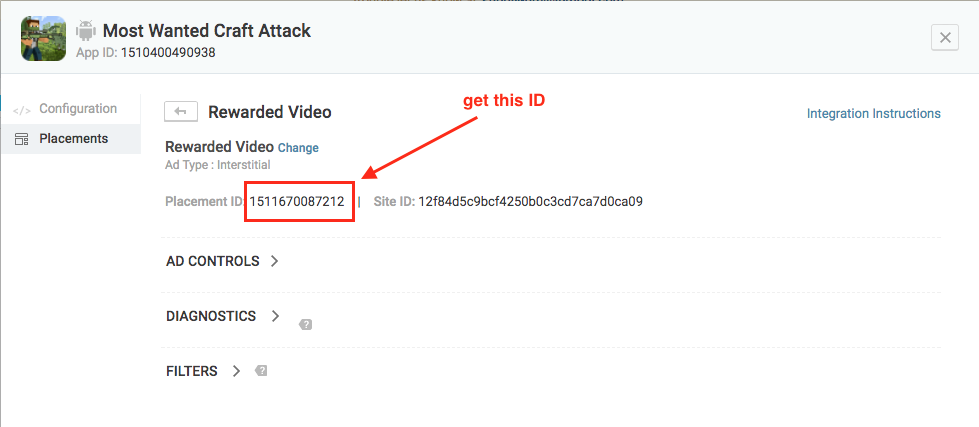
If everything is done correctly, you’ll see the two placements below your game. Click on each one and get both ID’s. Paste them in the main document and in IronSource:
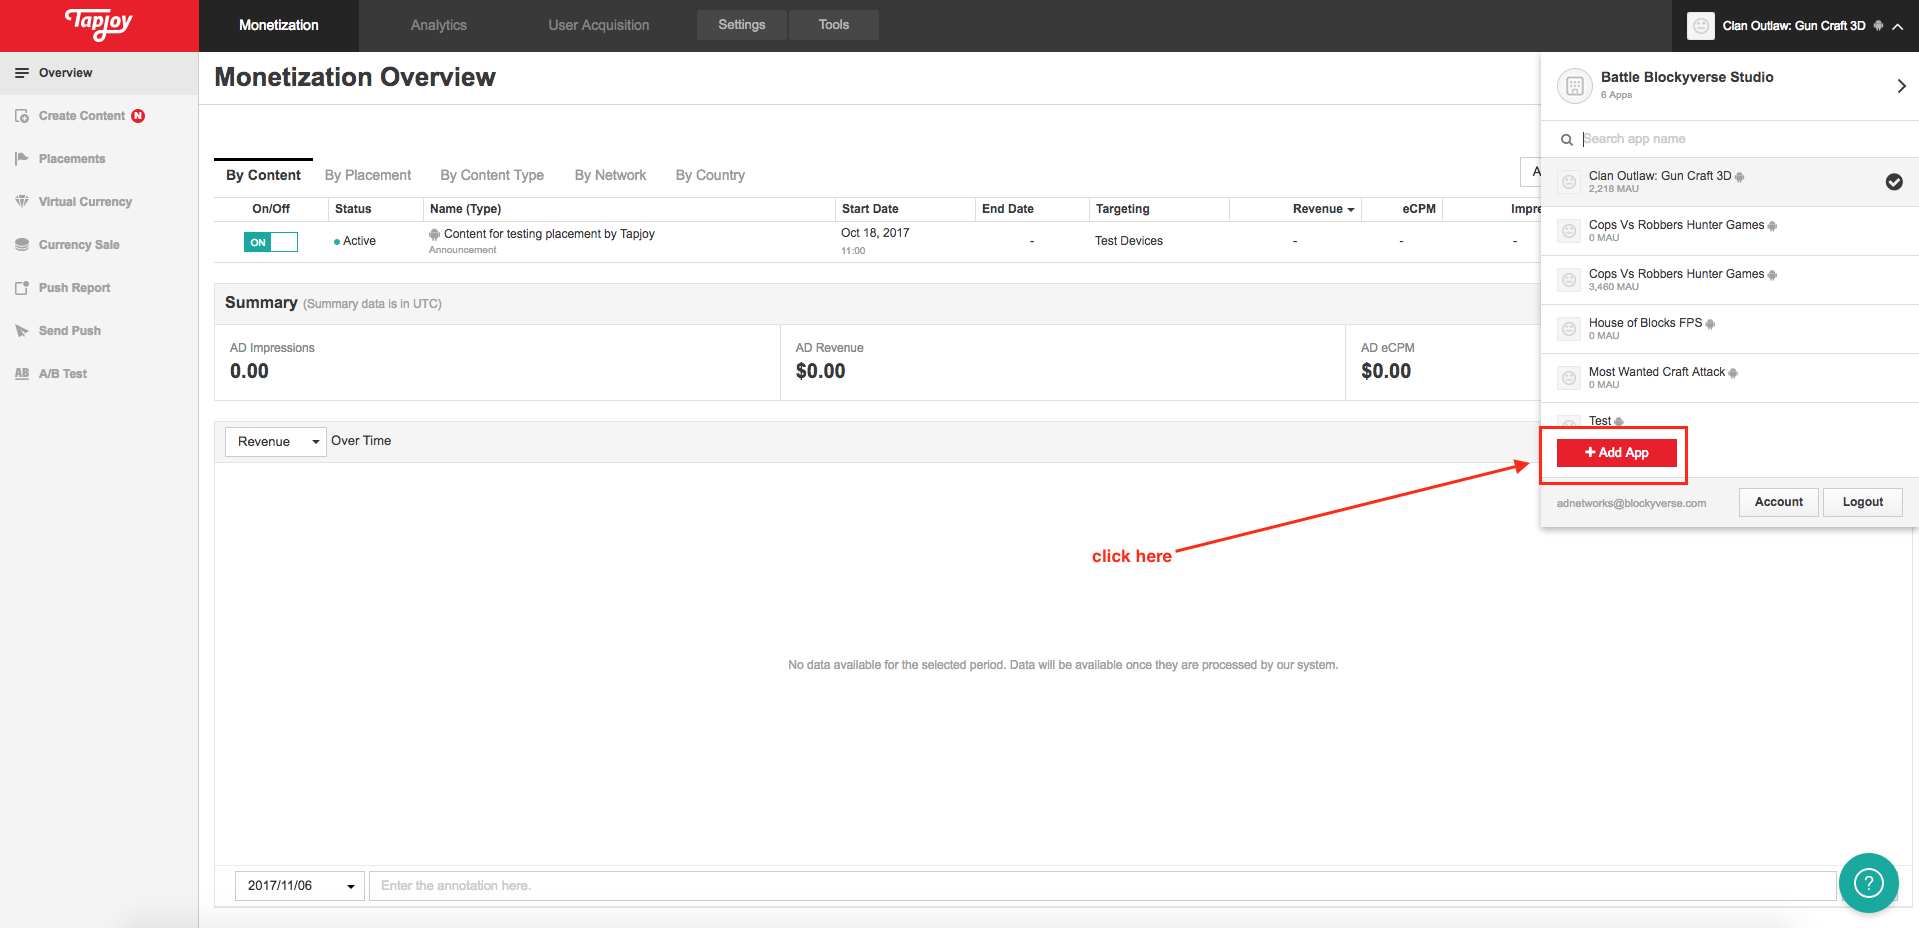
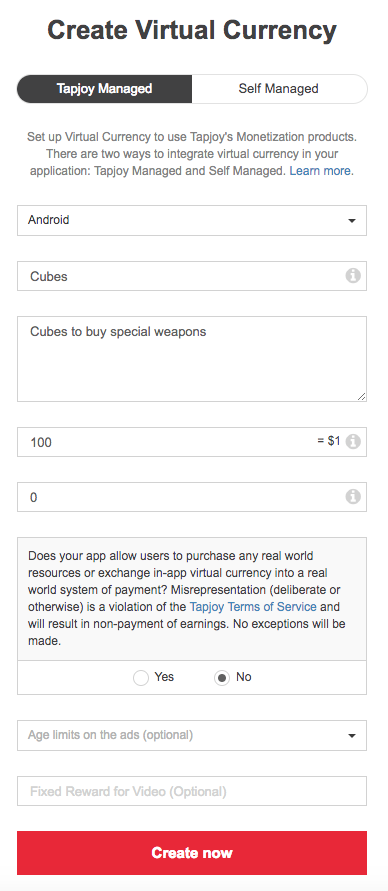
- Now, in the next one, login into TapJoy and go to the dropdown on your right and click on Add App. Then select Android and fill the corresponding data as the image shows.
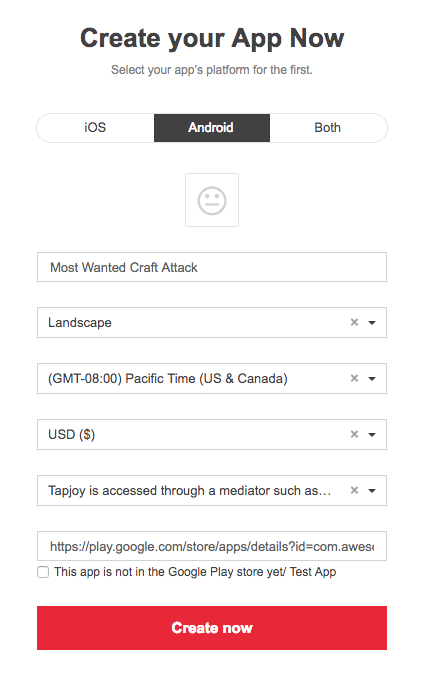
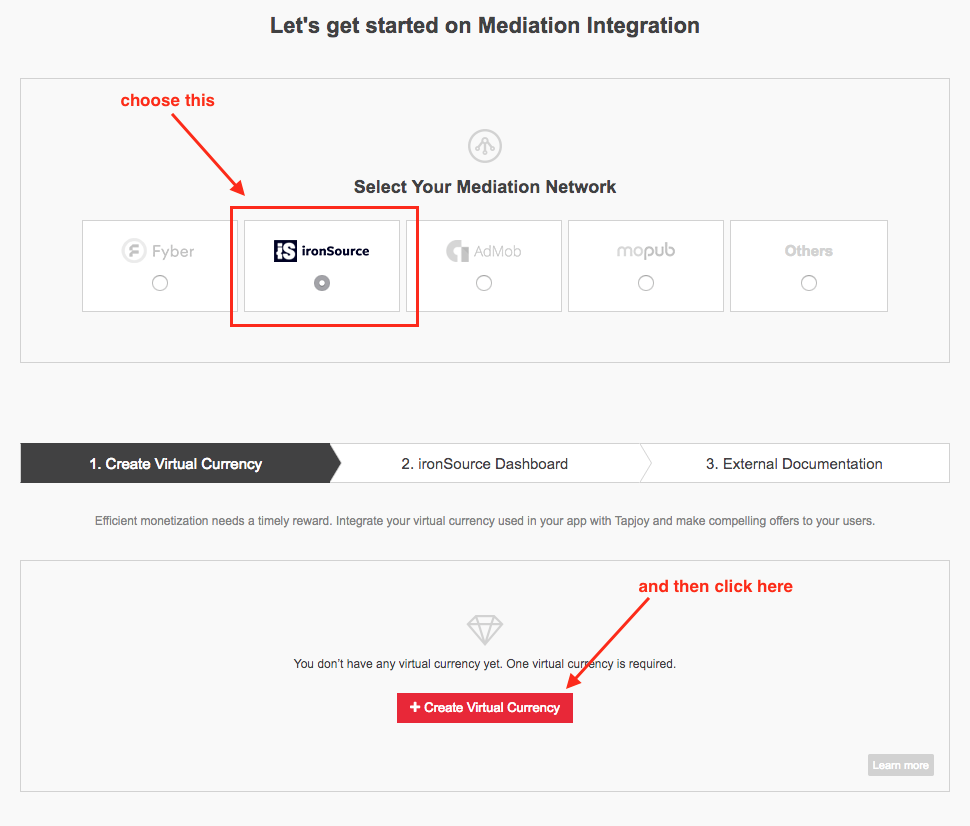
This step is necessary for the correct configuration on Tapjoy, but this won’t be used on the games, so don’t worry about that. Fill the same data as the image. Then click on Create Now and once the Virtual Currency is done, click on Next Step.
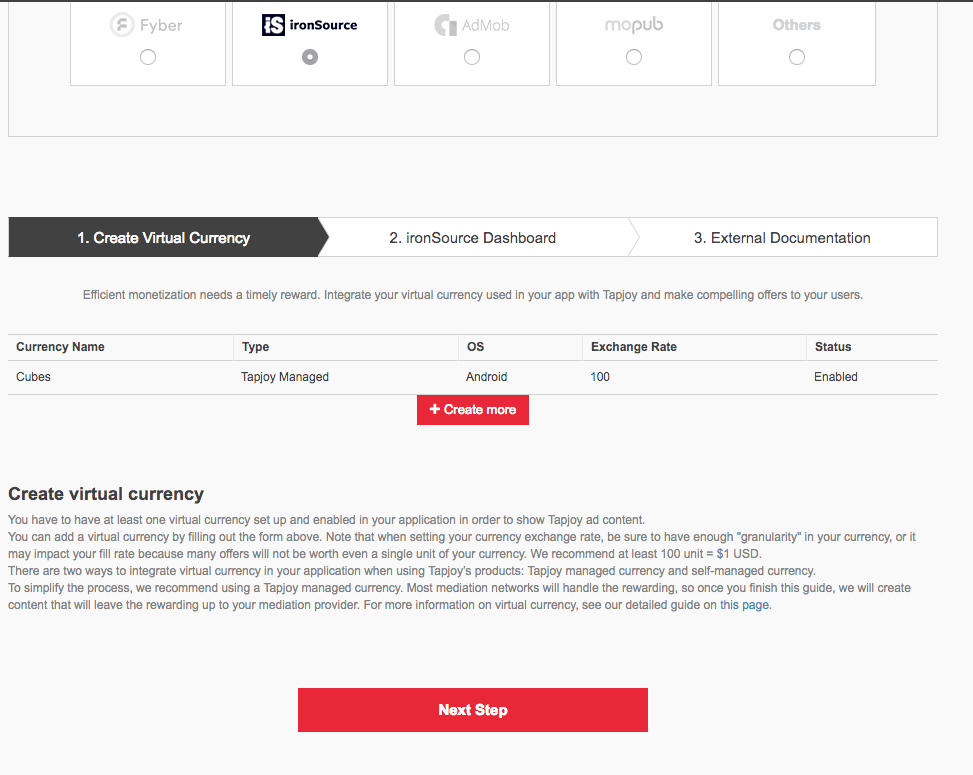
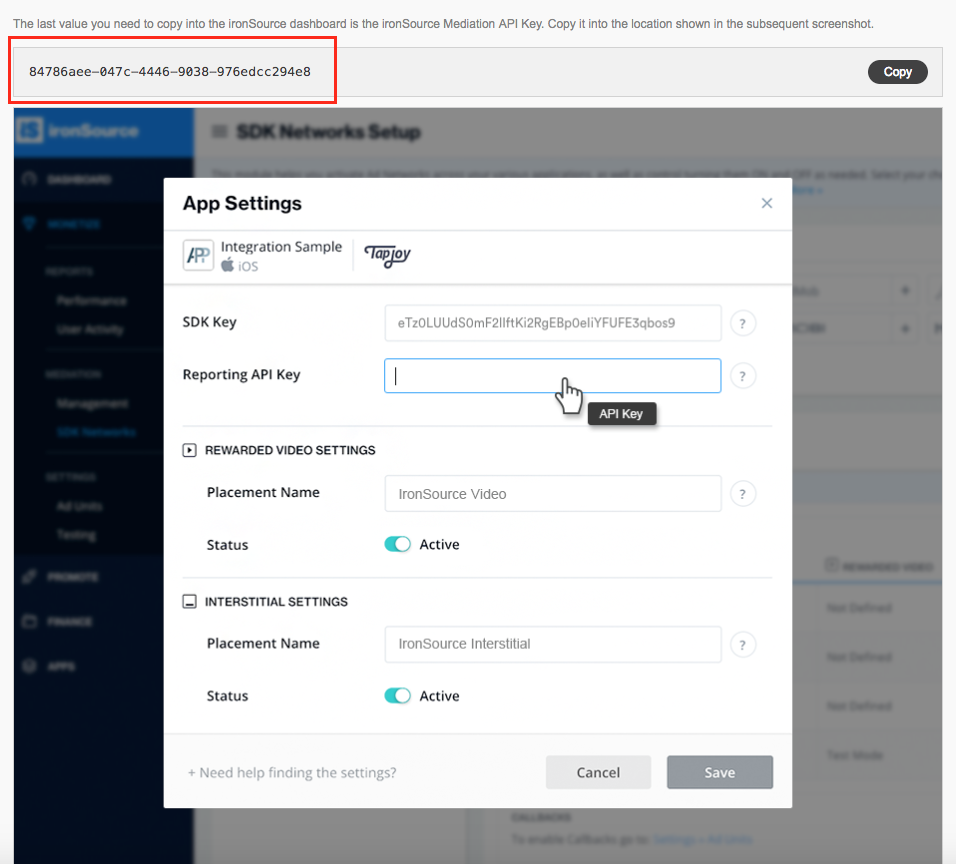
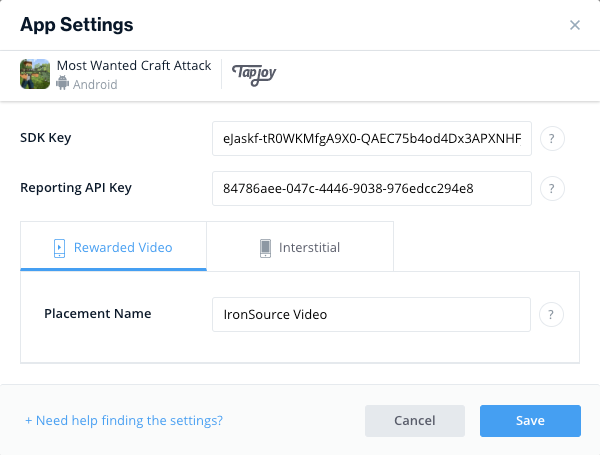
Then you will see this page. Here you need to retrieve the SDK Key. Please paste it in the Ad Networks Master File. Later you will paste this Key inside IronSource as well.
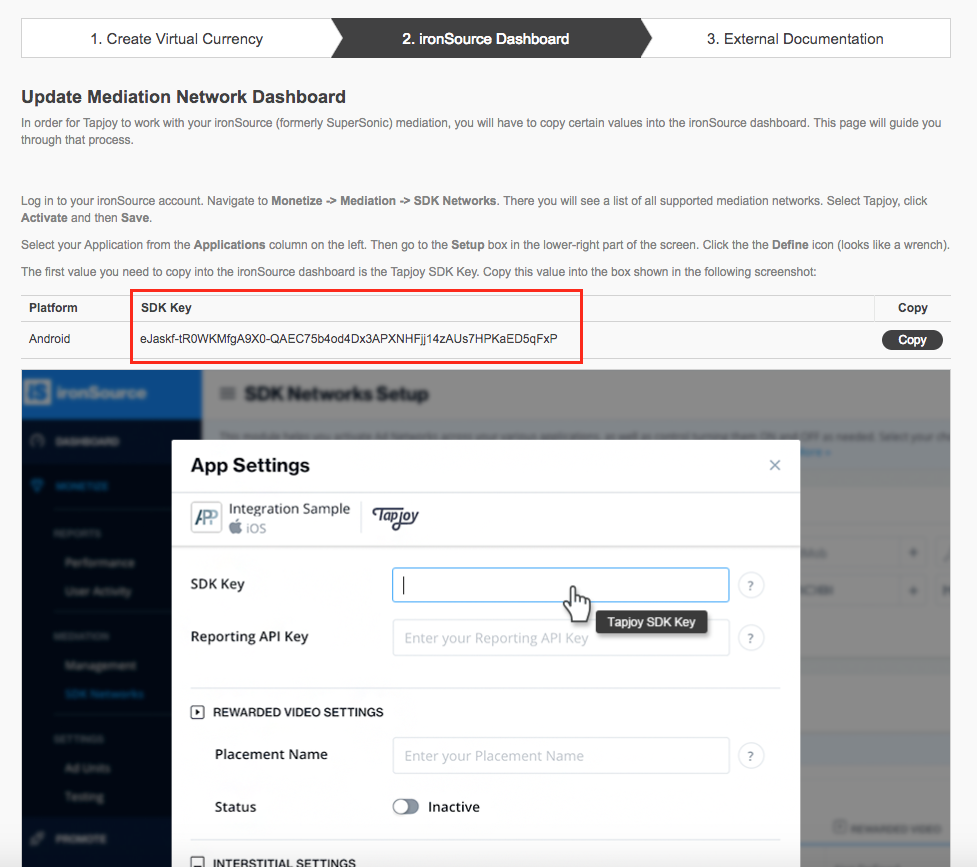
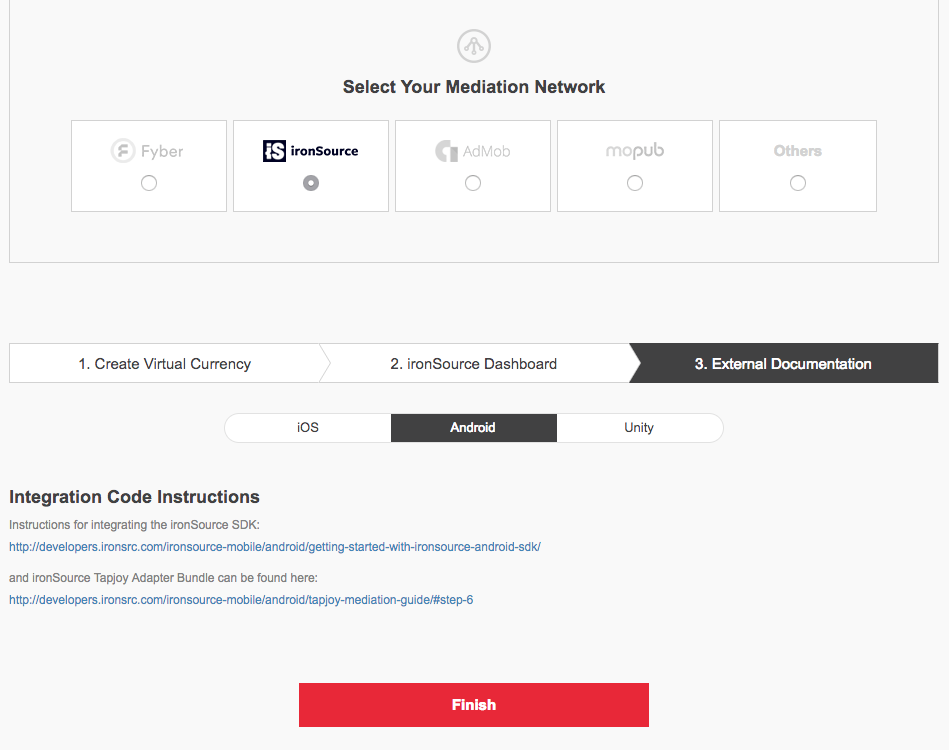
Scroll down a little bit a you’ll find the Reporting API Key, that you’ll use for IronSource and you should paste it inside the Master File. Then click on Next Step, choose Android and click on Finish.
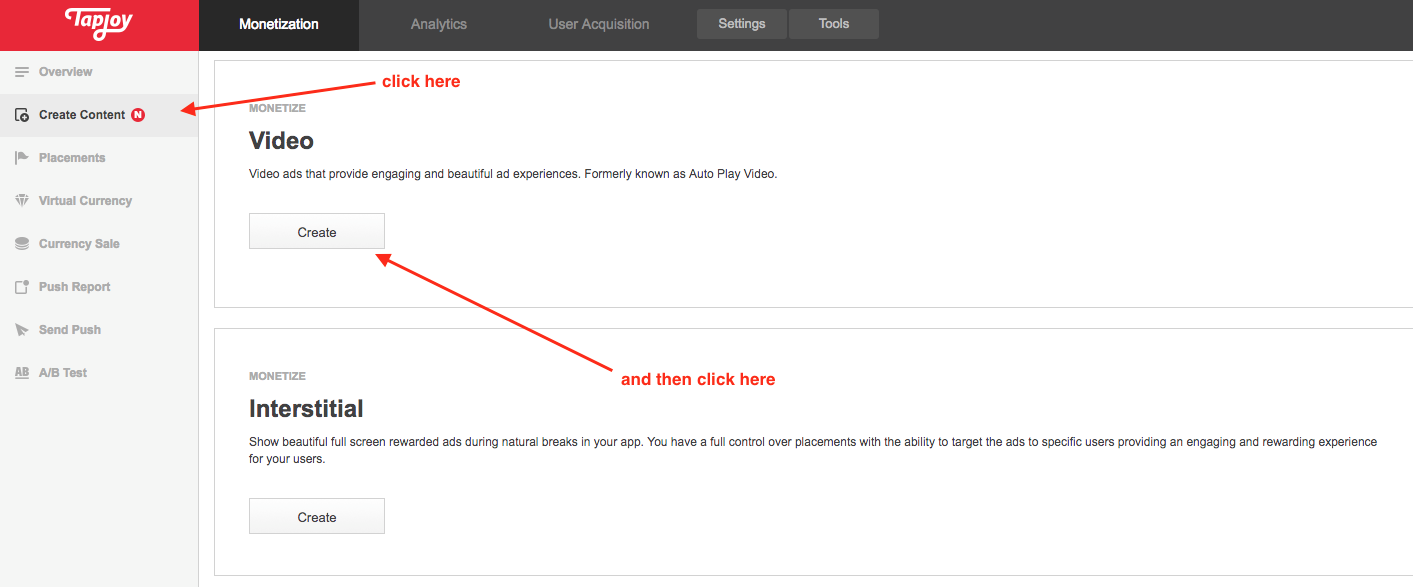
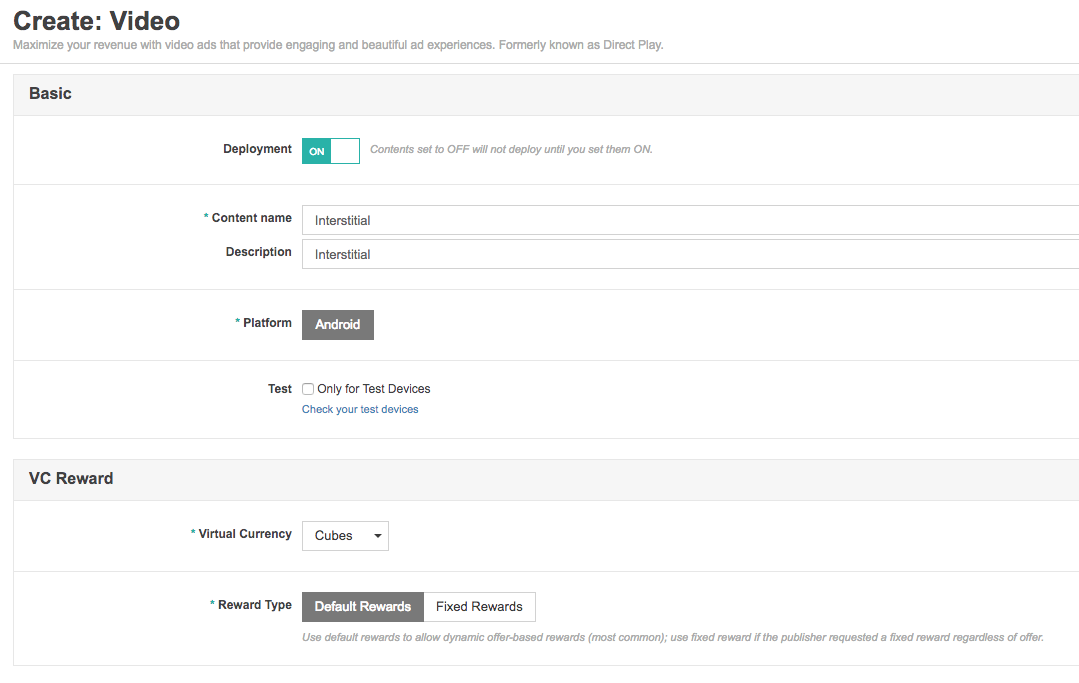
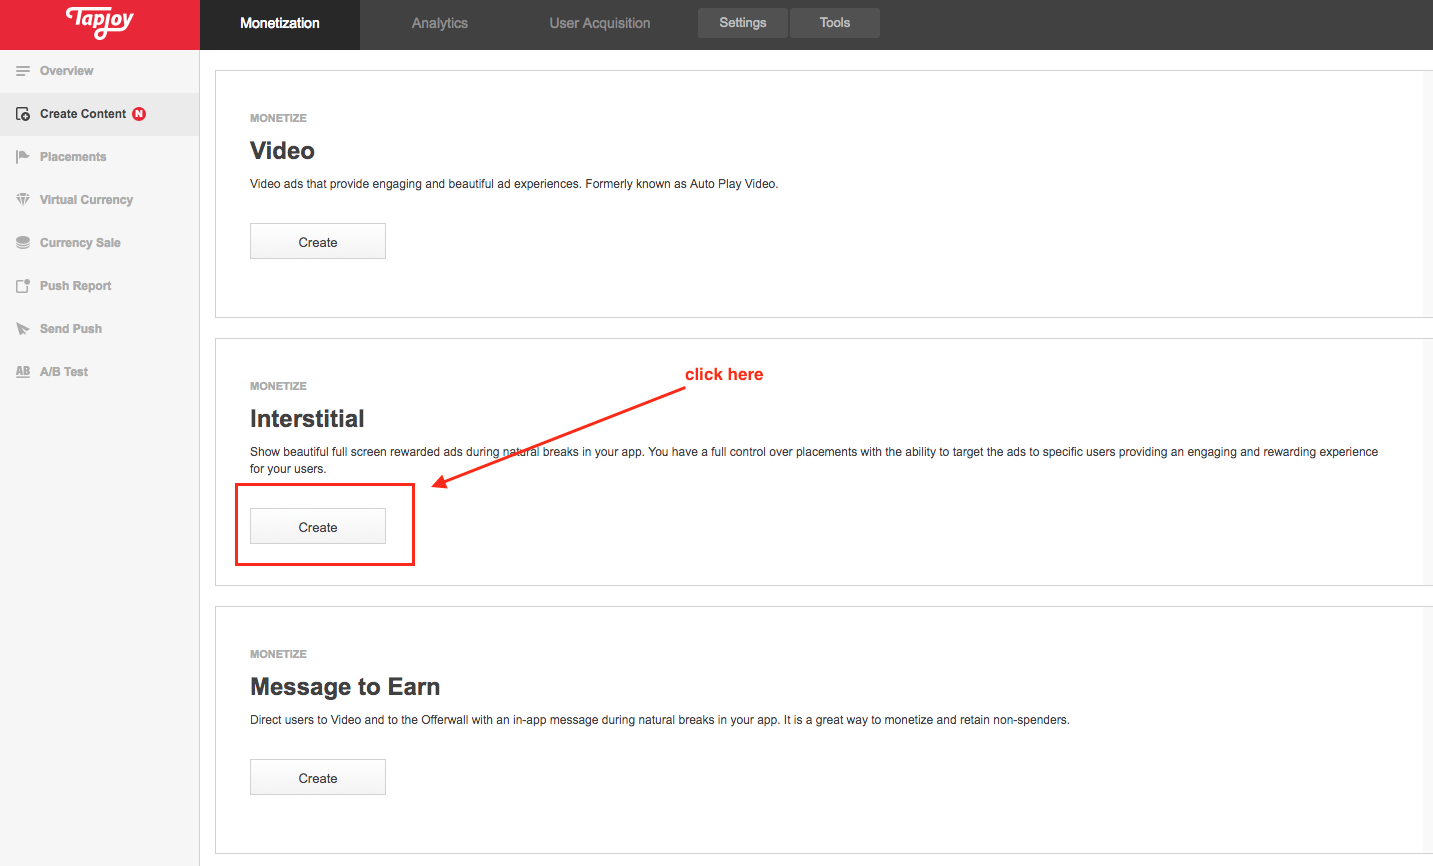
After that, on the menu on your left you should click on Create Content and then scroll down until you see the Video section. Click on Create and then fill the data as the image below.
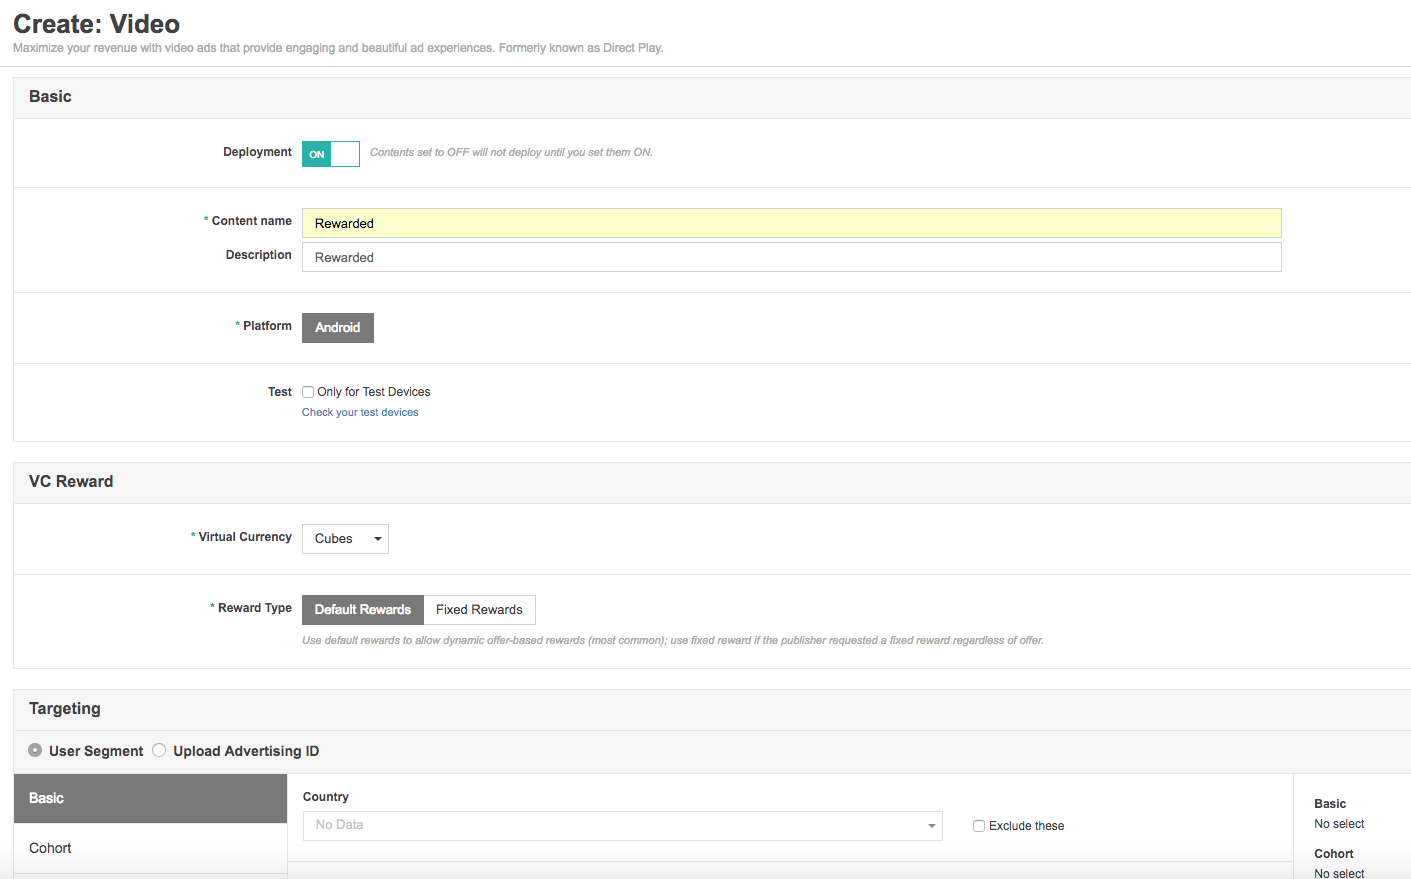
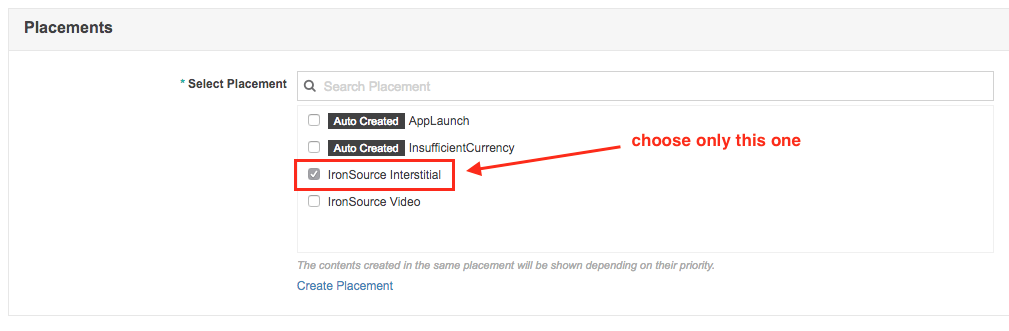
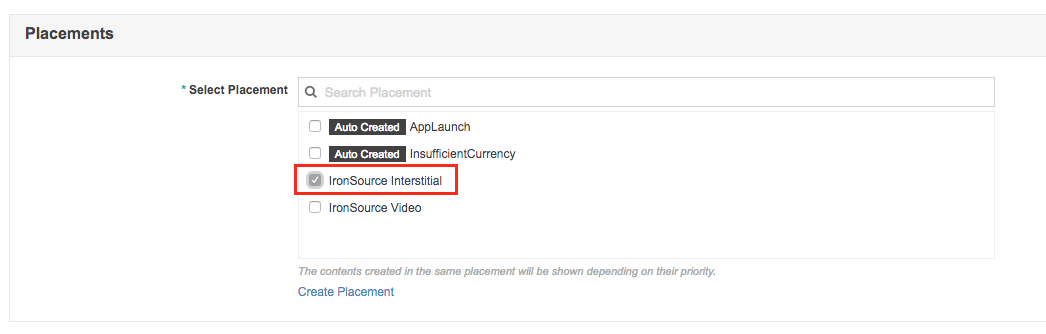
Scroll down until the Placements section and choose de Video option. DON’T change anything else from this Content. Finally click on Save.Click again on Create Content, you need to create a second one, and click again on Video. This one is gonna be for the Interstitial placement, so note the new changes. Once you are done, click on Save.
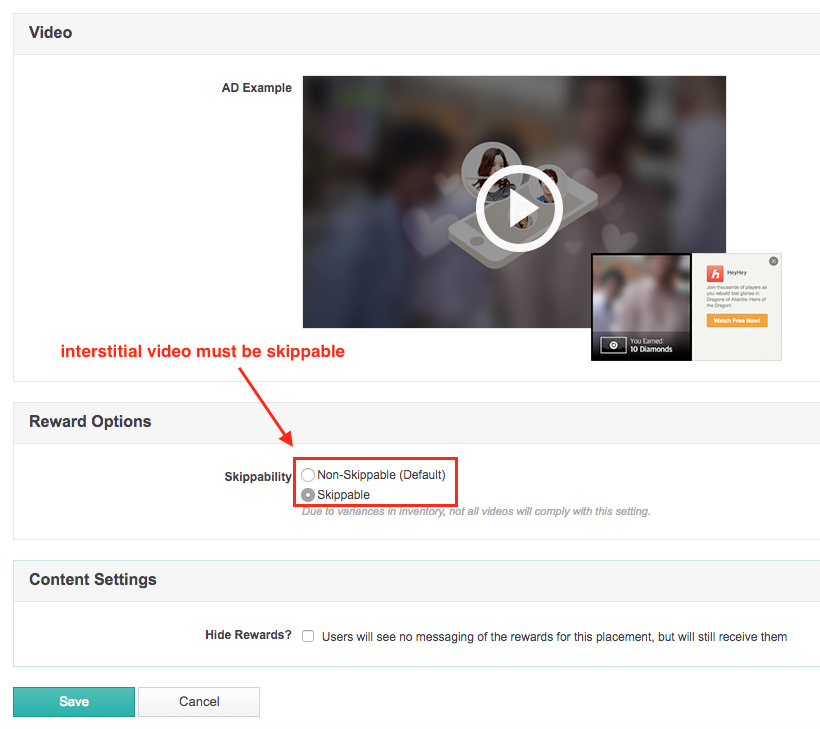
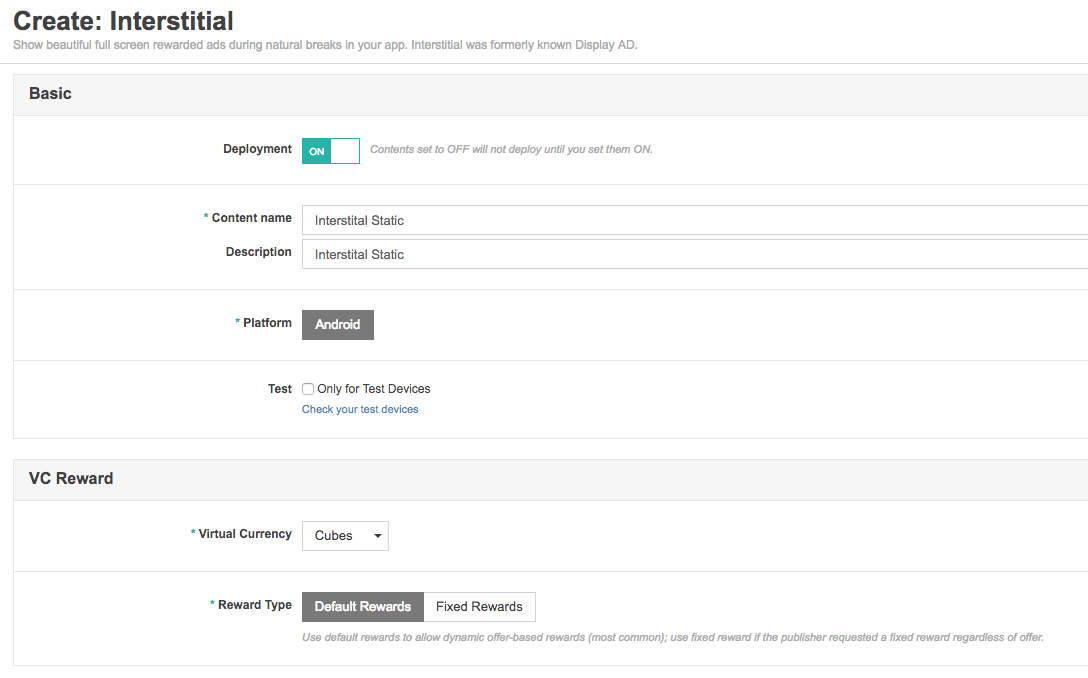
Finally click again (yes, again, three times so far) on Create Content but now choose the Interstitial option:
Then do the same by filling in the corresponding data as the images below. Then Save.

Now, if on the menu on your left you go to Placements, you should see something like this:
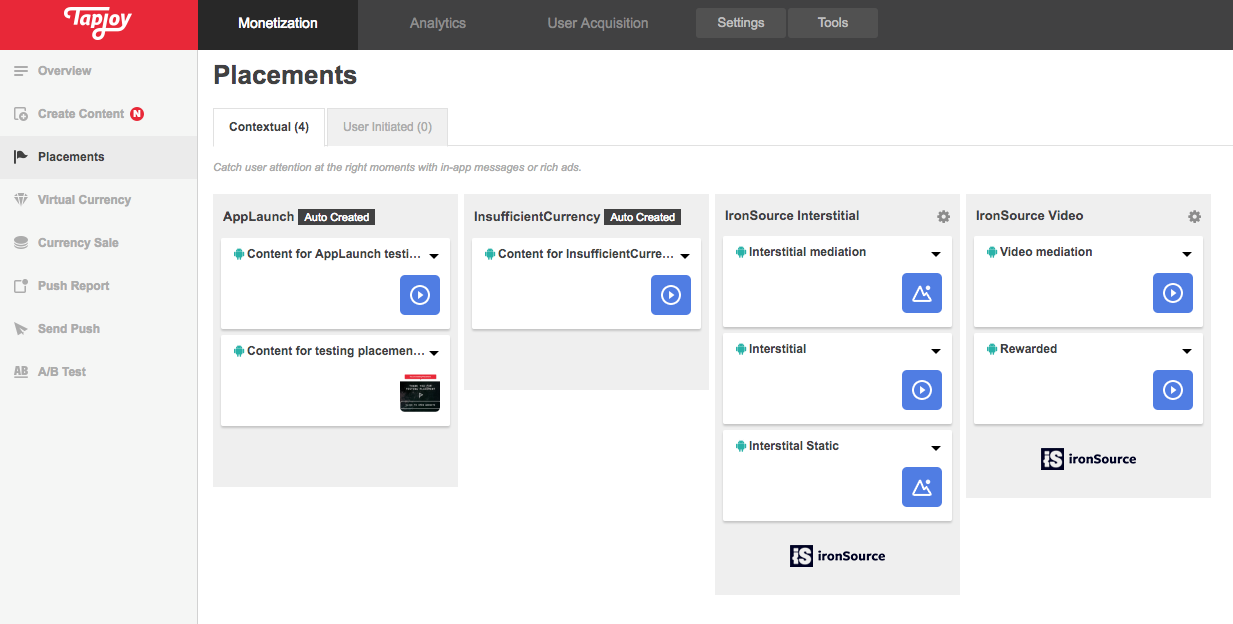
If everything looks the same (no matter the order), then you can proceed to IronSource, where you need to paste the ID’s you got in the first steps for TapJoy. Please note that if you were using the same naming style, then the name of the Rewarded Video should be “IronSource Video” and the same for “IronSource Interstitial”.
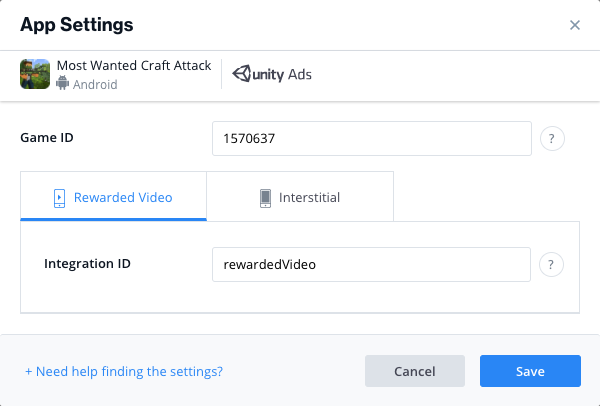
- Do the same with Unity. Please note that the Integration ID’s should be named the same for all the games: Rewarded Video ID should be “rewardedVideo” and Interstitial ID should be “video”. Then Save and turn on everything.
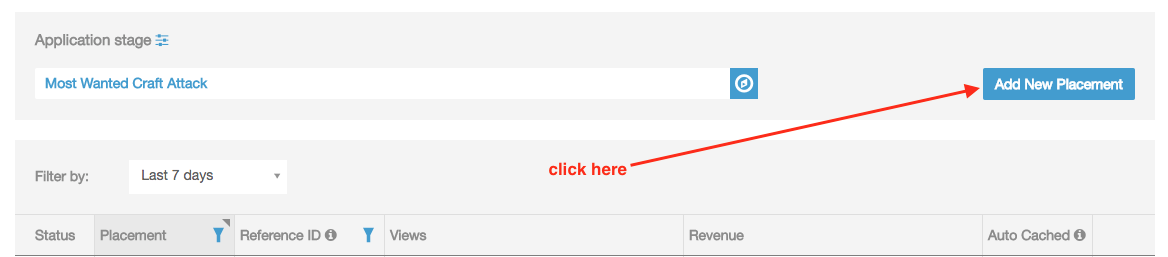
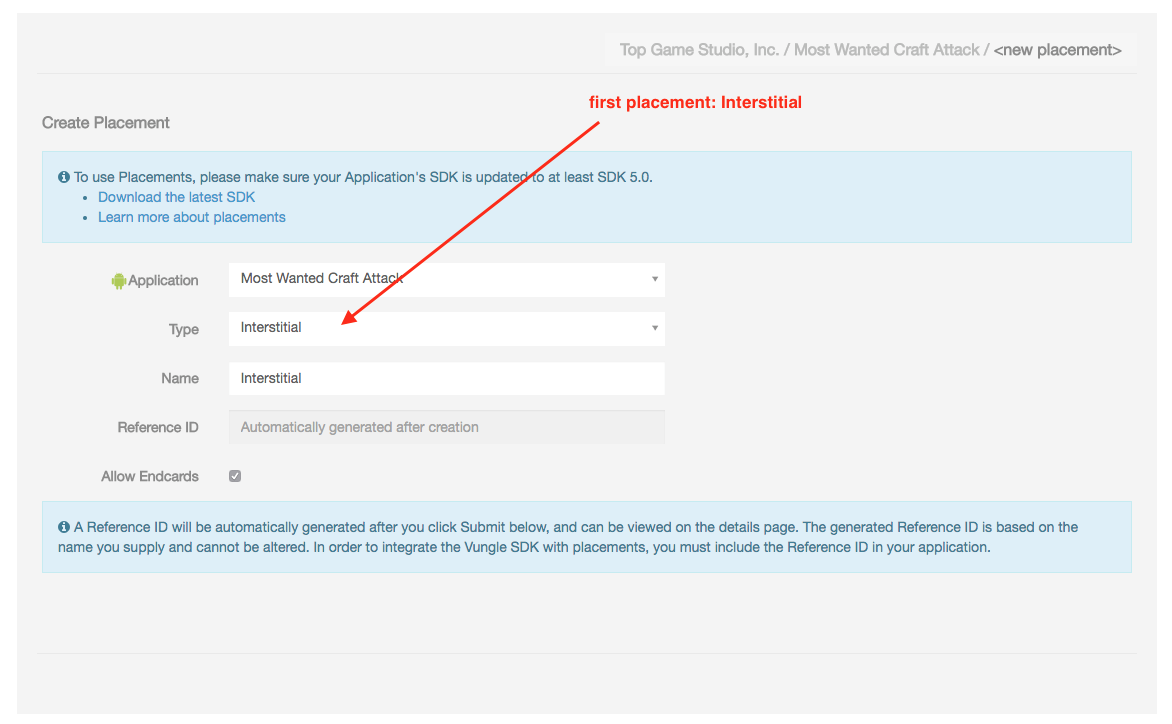
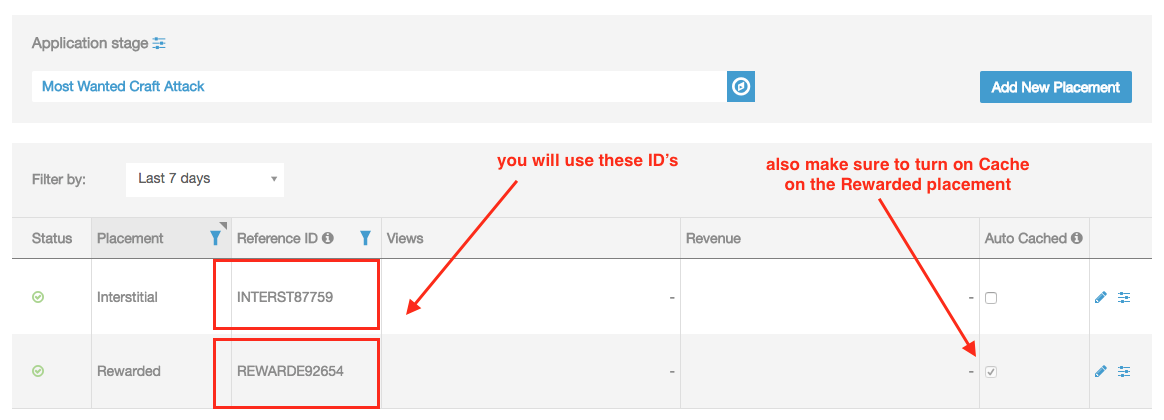
- With Vungle you’ll need to login into the correct account on the Vungle Dashboard with the old company in which the game was linked. You can know the correct company fro your game in the column C in the List of Apps. Then, on the main dashboard, find your game’s name and click on it. Then click on Add New Placement and choose Interstitial type and write the same on the Name. Then submit. Finally do the same but now with the Rewarded type.
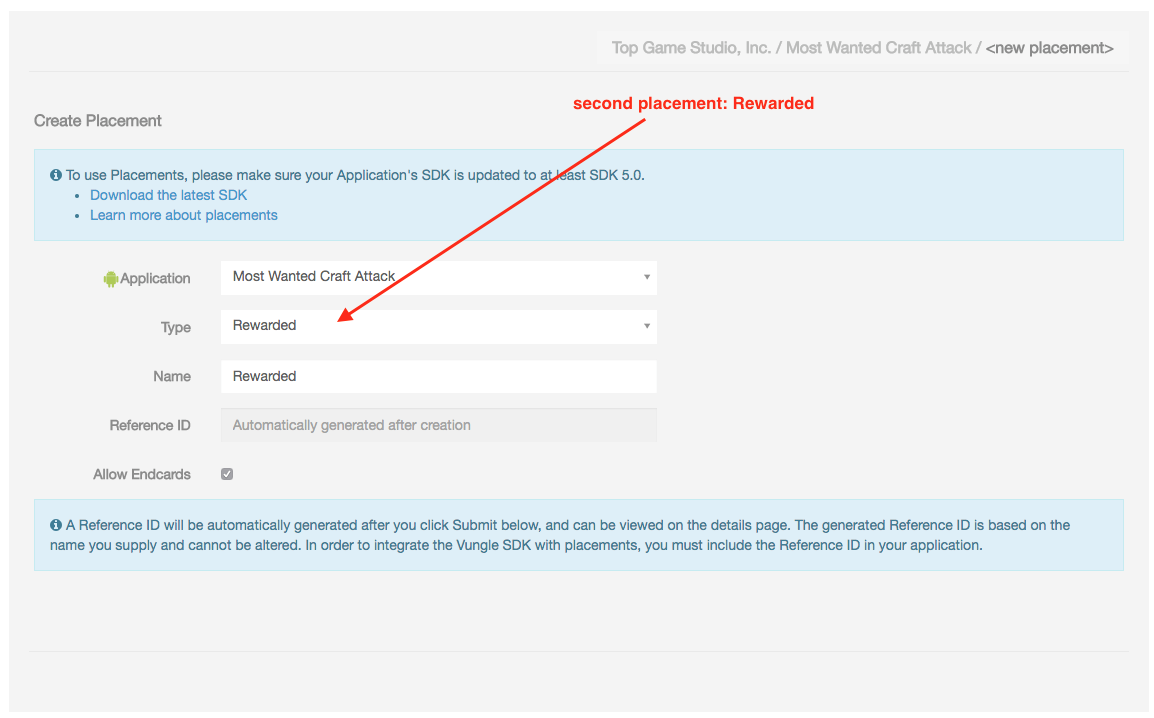
If everythins is set correctly, you’ll see the two new placements you just created and there you can retrieve the Reference ID’s. Please paste them in the correct section of the Ad Networks Master File.
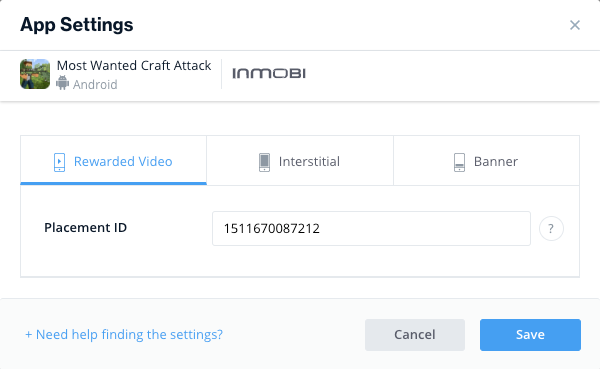
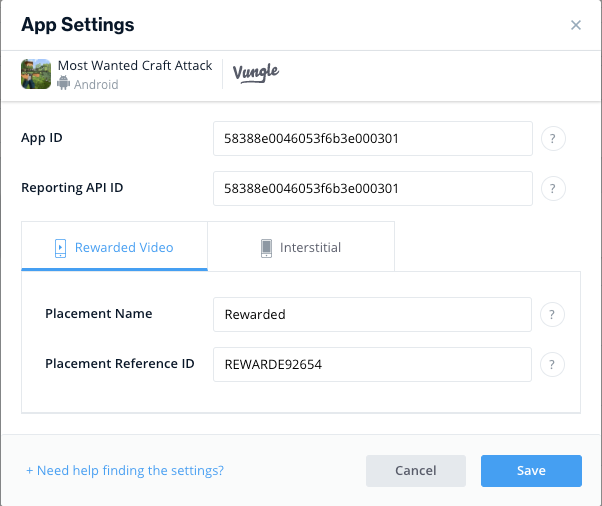
Going back to IronSource, you need to paste the current App ID and Reporting API ID that you already have and the ones that you just created on their corresponding tab:
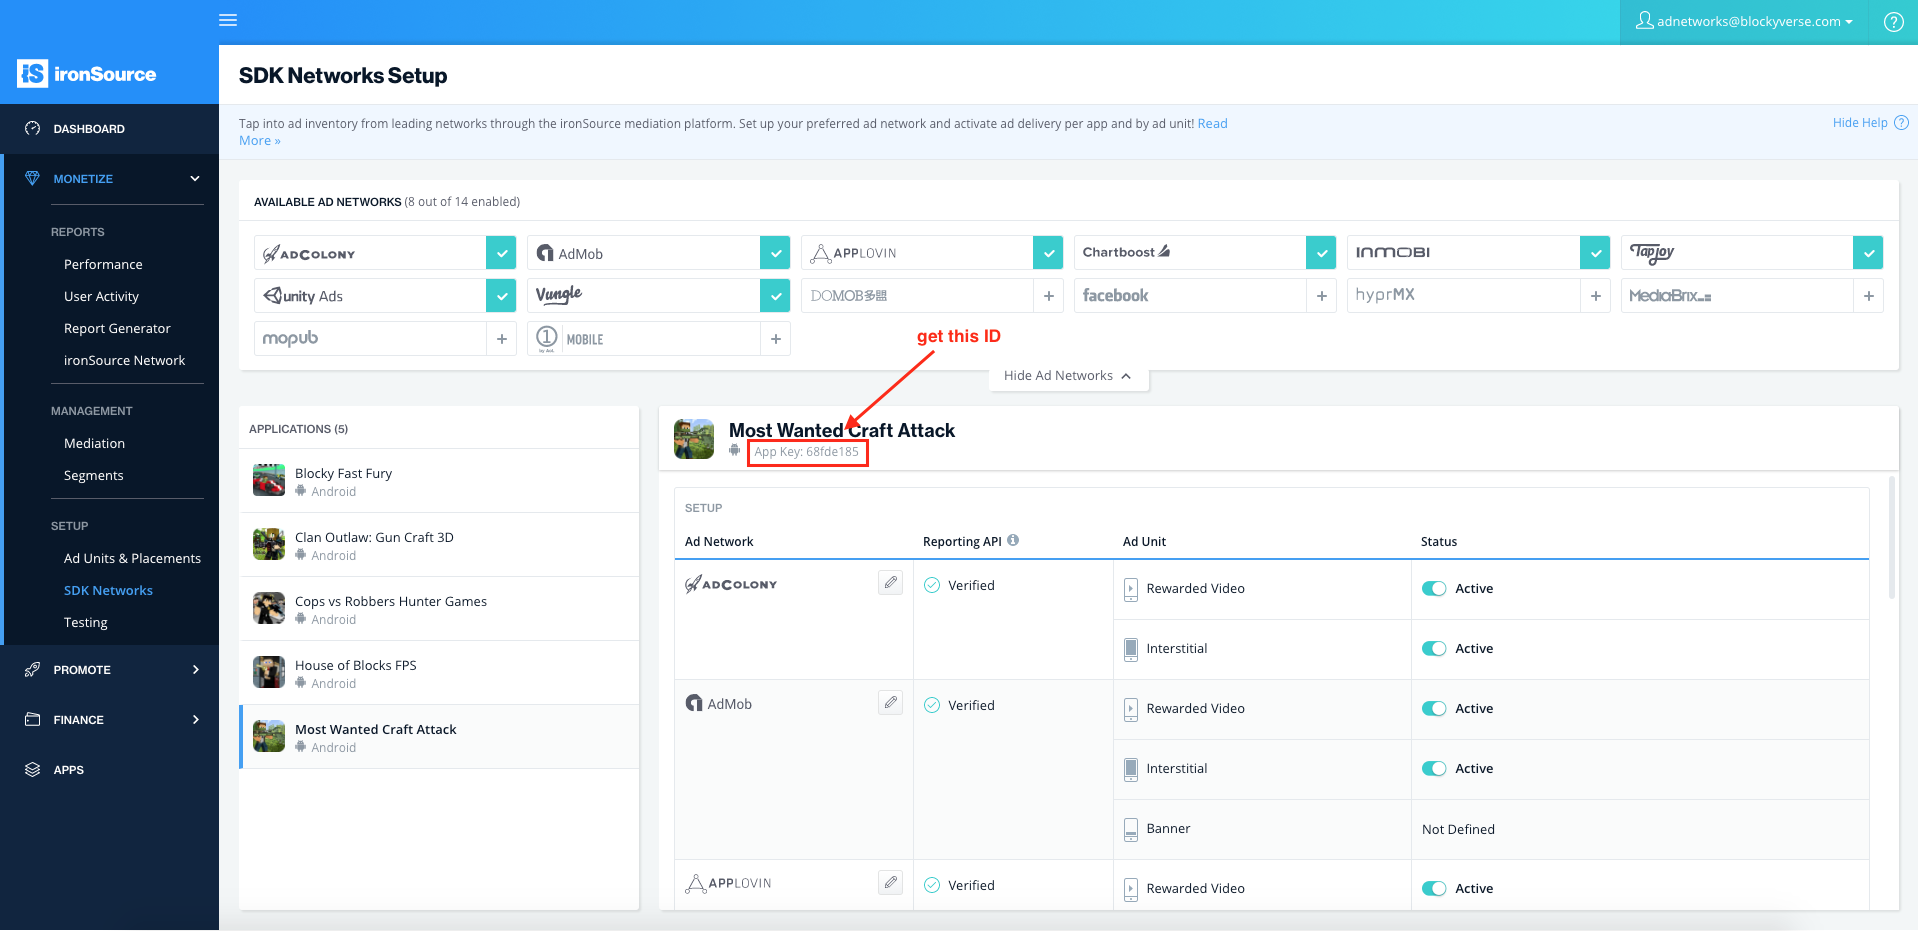
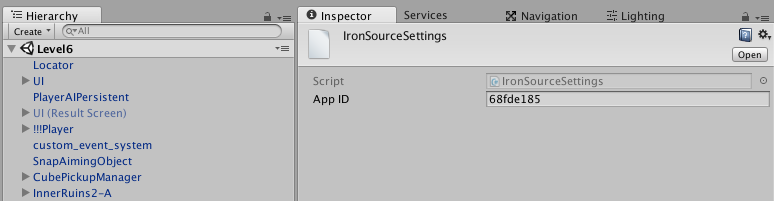
Edit IronSource ID inside Unity
Finally get the App Key of your game from the main SDK Networks on IronSource. Go to Ad Networks > IronSource > Edit Settings… and paste there the App ID of your game.