MCedit – Minecraft resource pack

Tutorial – Create resource pack for MCedit / Minecraft

  1. Go to Minecraft folder

Windows

“C:\Users\*Username*\%AppData%\Roaming\.minecraft\ resourcepacks”

Mac

“~/Library/Application Support/minecraft/resourcepacks”

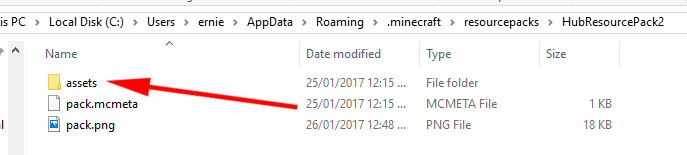
  1. Create a folder and rename it as you want
  2. Create a new file and rename it “pack.mcmeta”

NOTE: Make sure you don’t have an extra “.txt” after the file like this “pack.mcmeta”, also if you are in mac use Latin-US (Dos) or Western(Windows Latin1) for Plain text encoding.

  1. Inside the file put this information and change the description with the desire name for the resource pack

{

               “pack”:{

                               “pack_format”:3,

                               “description”:”Hub resource Pack”

               }

} 

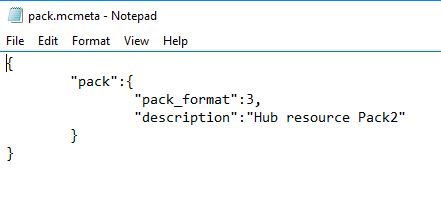
NOTE: pack_format: “x” If this number does not match the current required number, the resource pack will display an error and required additional confirmation to load the pack. Requires 1 in versions before 1.9, and 2 as of 1.9 and 1.10. 1.11 also requires a new number, 3 .

  1. Create a new image file with size 128×128 (or any square resolution) and save it as “pack.png” this will be the icon shown in minecraft


 Go to this folder (where x.x.x is the version you have installed)

Windows

“C:\Users\*Username*\%AppData%\Roaming\.minecraft\version\x.x.x\”

Mac

“~/Library/Application Support/minecraft/version/x.x.x/”

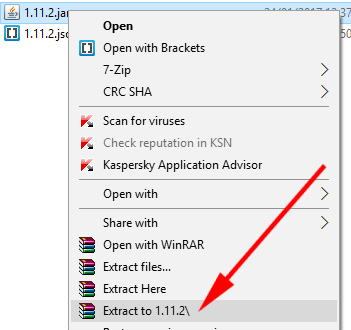
  1. Extract the x.x.x.Jar file


  1. Inside the folder you just extracted copy the folder “assets” to the folder you created inside the resourcepack folder.


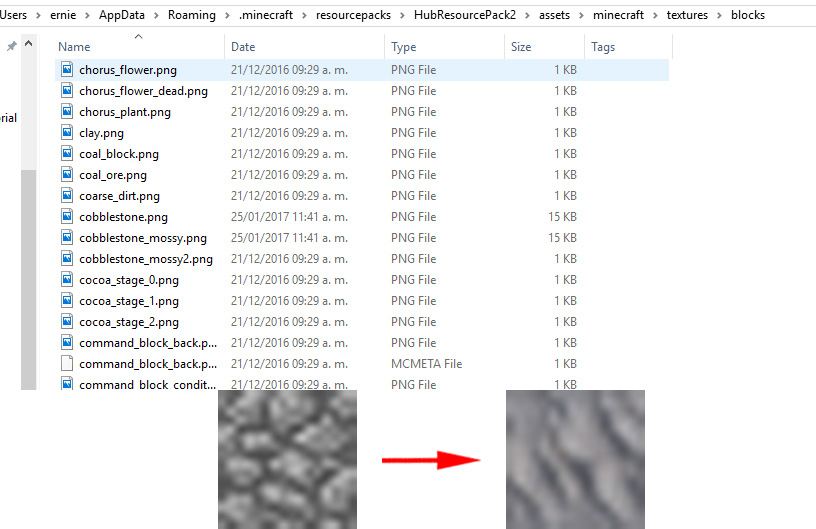
  1. Go to this folder (where x.x.x is the version you have installed) and change the block textures you need using a image editor.

Windows

“C:\Users\*Username*\%AppData%\Roaming\.minecraft\resourcepacks\Resourcepack folder\assets\minecraft\textures\blocks”

Mac

“~/Library/Application Support/ resourcepacks/Resourcepack/folder/ assets/minecraft/

textures/blocks”

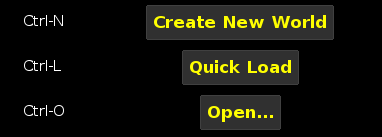
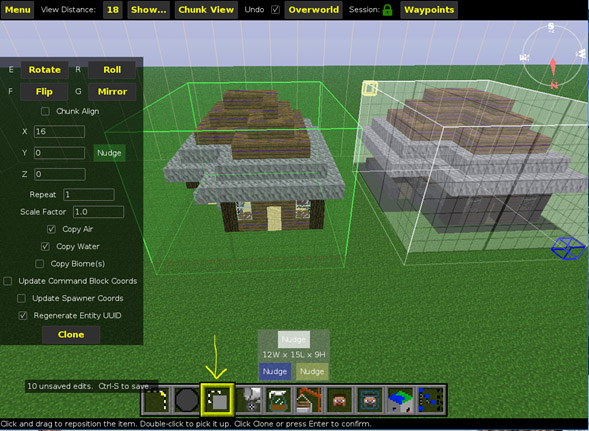
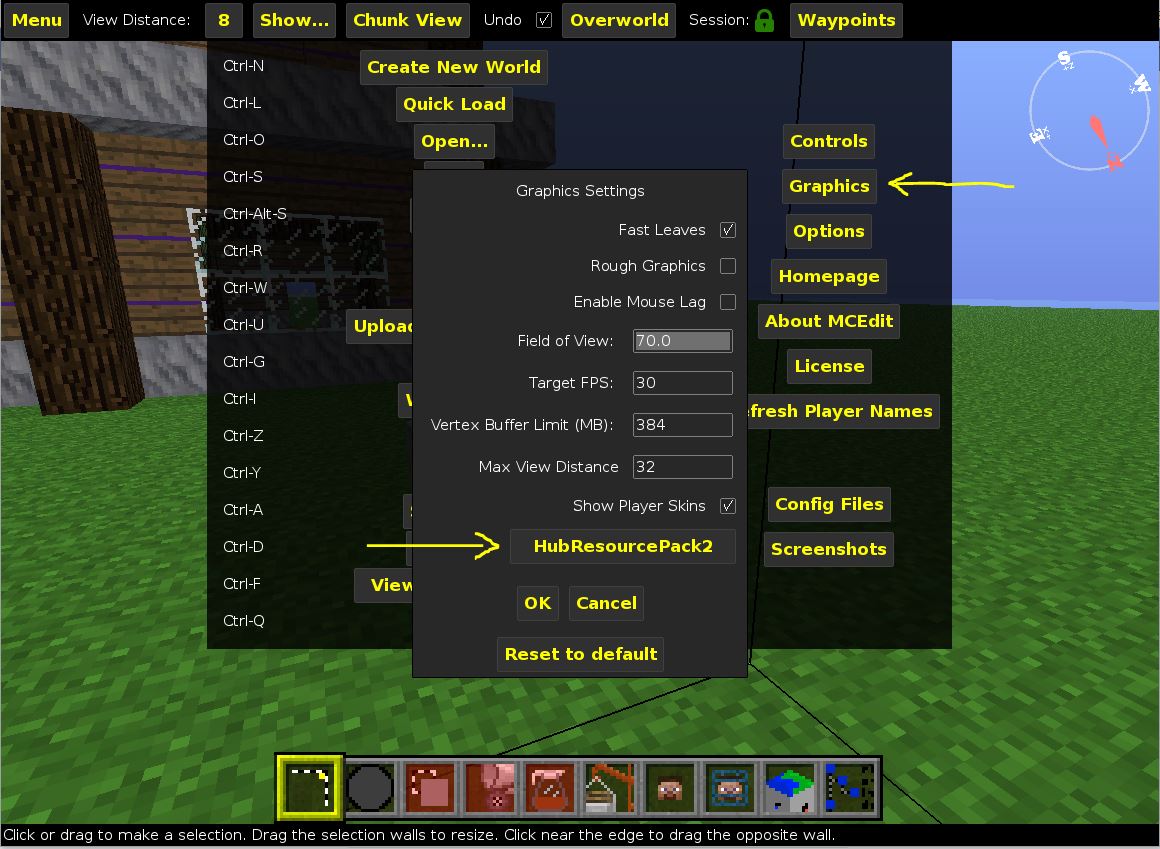
  1. In MCedit you can change the resource pack in the menu->graphics

if you have a problem you can follow this video on youtube:


MCedit – Quick Start

Tutorial – How to use MCedit 1.0

1.- Download MCedit (old version) in this link:

http://www.mcedit-unified.net/

NOTE: Mac and Linux users hit the little button “Click here to view other platforms“

Start Mcedit.exe


2.- Open / Create a level

NOTE: if you open a level you need to go to and select the “level.dat” file

Windows

“C:\Users\*Username*\%AppData%\Roaming\.minecraft\saves\*LevelName*\level.dat”

Mac

“~/Library/Application Support/minecraft/saves/level.dat”


3.- Movement

Use W/A/S/D to move around

Use Shift / Space to go down / up

Use right mouse click to rotate camera

4.- Select tool

Click or drag to make a selection.

You can edit the selection by dragging the selection walls.


NOTE: the orange face is the selected one.

With the selected area you can delete the objects (Delete key) , copy (Ctrl+C / CMD+C) and paste (Ctrl+V / CMD + V). Also you can save the selection as a schematic by clicking on export or save in the top right corner.

NOTE: When pasting objects you need to click import (or “enter key” after placing the object in the scene ( if you don’t do this the object will be deleted and need to start again the paste process)


5.- Brush tool

Click or drag to place blocks.

You can change the mode to different ones (schematic to paste previous saved objects) and fill with a Height, Length and width of 1 to place 1 block. You can change the type of the block by clicking on the block.

Change cube layout

5.- Clone tool

With the object previously selected click the tool clone and drag the object to the position you want, change settings if needed and hit “Clone” or “Enter key”

NOTE: If you have the “Copy air” option enabled you copy the empty spaces and if you place the object intersecting other cubes the empty spaces will be delete the objects in the space of air

Ej.


7.- Fill and Replace tool

With a selection you can fill it with the selected block or replace specific block with another one


Voxel Engine Tutorial

Voxel Engine is a powerful plugin for Unity, that will let us create 3D worlds right away in a Minecraft style, with random terrains.

It is important to know how this terrains are made:

Maps are the terrain itself, they contain the built world in which the player is going to be. They contain CubeSets and Trees. This cubeSets are a group of blocks, for example, if we have a world based on a forest, this group of blocks may be conformed of blocks  maybe with textures of grass, dirt and any other fauna. We can create different cubeSets for the same world. In a hierarchy, it will look like this:

organigramaAfter undestanding this, it’s time to build our own world.

  • Creating a Map

**Recommended: Copy prefab of map and modify arrays of blocksets and Flat map arrays**

We need to create a new GameObject,  and assign it the next scripts:
-Map Manager.cs  (and add Blocksets if we already have them)
-Map.sc
-Direct Sun Lightmap.cs
-Sun Lightmap.cs
-Glow Lightmap.cs
-Flatmap Generator.cs (and add Flora and Trees if we have them and want them)
-World Builder.cs

map01

  • Creating a CubeSet

To create new cube type:
-Right Click / Create / BlockSet / _Blockset

blockgroupset01

After that, just rename it and fill it with the blocks that you want.

To Assign new cubes set:
-In the map manager, there is an array with the blocksets
-Add a new element and assign your blockSet

blockgroupset02

  • Creating a Tree

There 5 different types of trees (each one of them is only different in how it is randomly made)

**Recommended: Copy a prefab and change only Wood and leaves**

Create a new Gameobject and assign it ONE of the next scripts:
-BirchTree.cs
-OakTree.cs
-PineTree.cs
-RedTree.cs
-SakuraTree.cs
Then, assign the wood and leaves (this ones should be cubes of type “CubeBlocks” and not normal prefabs).

tree

  • Creating Blocks

These Blocks are what is actually going to be visible in the world. For them we need a texture (most properly an Atlas containing many textures), a material, and if we need it, an Icon.

To create new cube type:
-Right Click / Create / BlockSet / and select type of new cube…

blockset01
Add Textures:
-Select the newly created cube
-Assign a material

blockset02
-Assign each of the Corresponding texture elements for each side of the cube by selecting part of the texture the material has.

blockset03
-Add an icon if necessary.

blockset04

After the Block is complete, we will need to assign it into a CubeSet to be used:
-Go to the BlockSet folder (Assets/Third Party/Voxel Engine / Resources / Blockset) If you want it in another directory, you can have it.

blockset05
-Select the group where you want to add your new cube
-Add the new cube just by dragging it to the container.

blockset06