
This process is very simple if the game is already published and you need to change the vungle ID.
Step #1
First you need to sync to the correct branch of the game (they have windows on the name).
NOTE: The windows games were created in Unity 2018.1.6f1 but sometimes when switching to a branch of windows and open it, it will say that you need to update scripts form a 5.6.2p1 unity version, just go ahead and click continue.
Step #2
Open the file “VungleAdManager” and edit these lines with the new ID information from vungle:
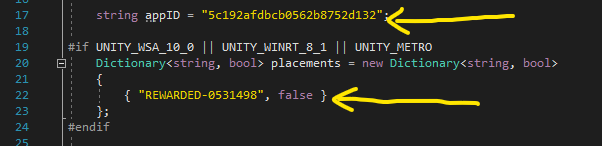
The first one is the App ID from vungle and the second one is the Placement ID from vungle.
Step #3
You are all done. You just need to do the build in unity .
NOTE: before doing the build you need to go to the menu “Tools > Vungle > Prepare Windows 10 Build”, and you need to do this thing every time you open unity and want to create a build. If you don’t do this, you will get an error after trying to create a build.

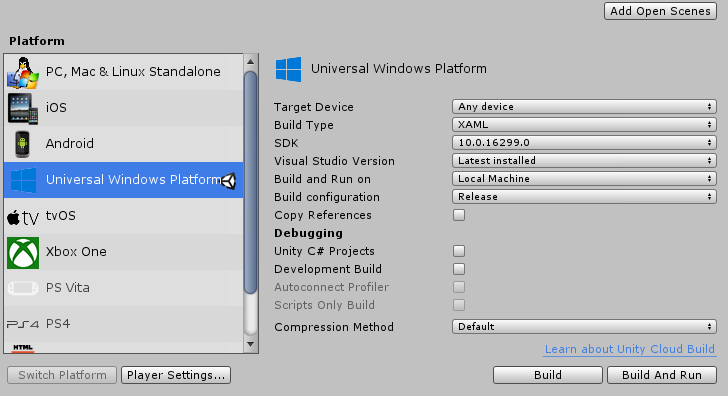
Here are my settings for the build in Unity.
Step #4
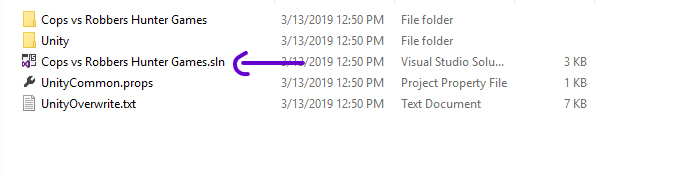
After finishing the build in Unity you need open the visual studio project by opening this file:
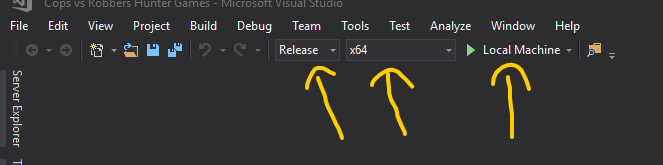
Then in visual studio you need to set the project to release, x64 and click “local machine” to test the game and check that you have ads (or test ads) and everything works.
Step #5
If everything works you need to do the association to the windows developer game, in the solution explorer (right bar) right click on the project and select “Store > Associate app with the store”
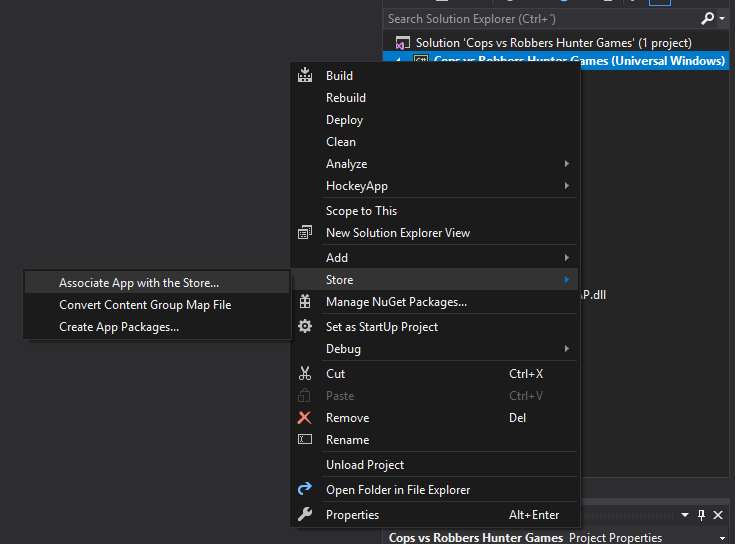
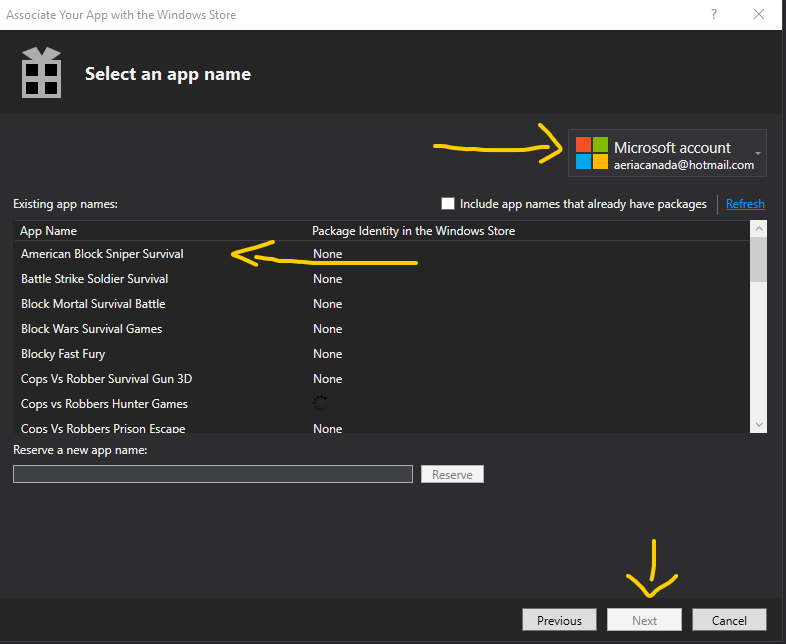
Then with the Aeria account logged (ask Eduardo, Jorge or Ernesto for account Info), you select the game (already published) and click next then associate
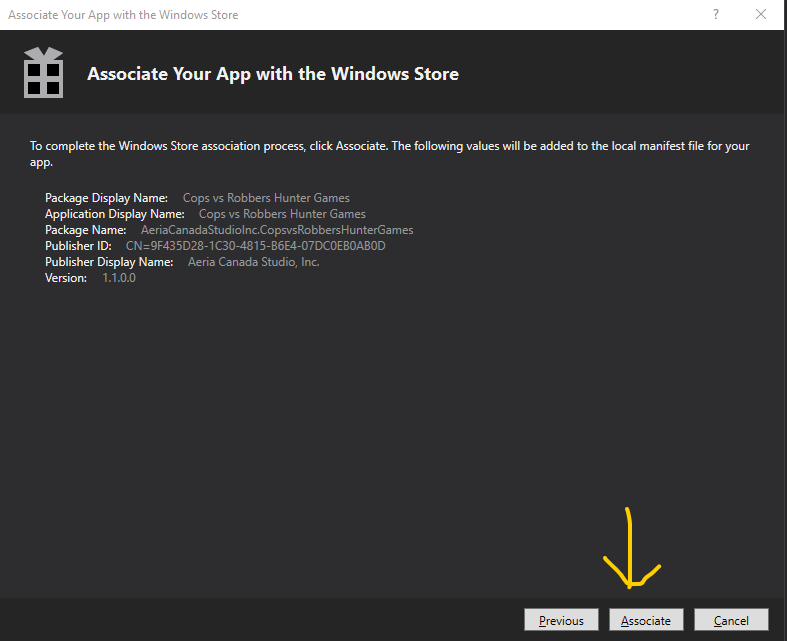
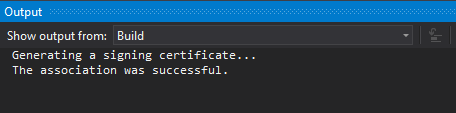
If everything was correct, you should see in the output window “The association was successful.”
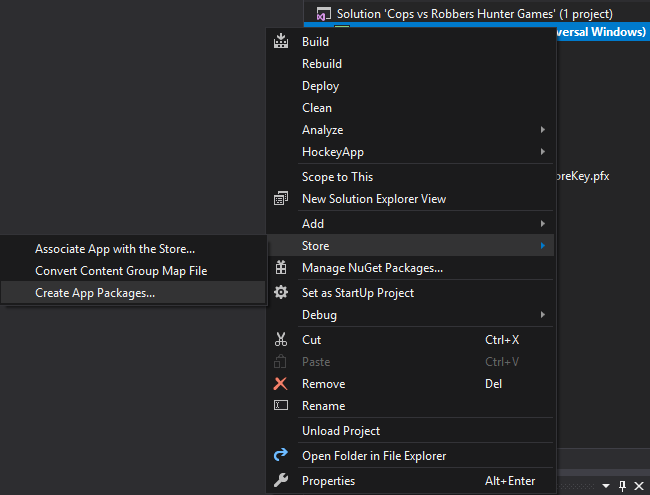
Step #6
After this you need to do the final build for the game, in the solution explorer (right bar) right click on the project and select “Store > Create app package”
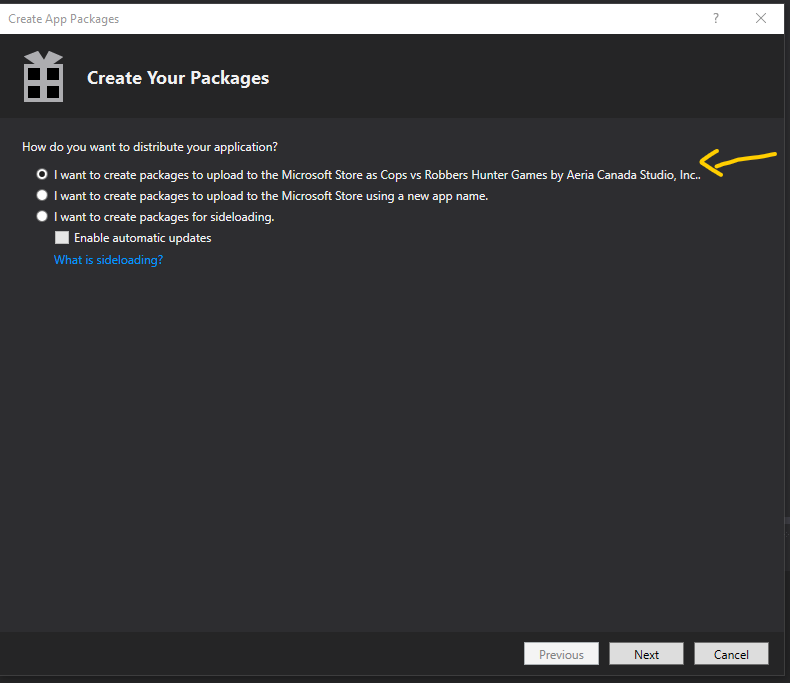
You should have something like this and you need to select the option with the already published game and click “Next” (if it doesn’t appear, that sometimes happens, you need to re-do the association (step #5 and #6) until it appears, sometimes it is at 1st, sometimes at 3rd time) and click next
In the next part you need to set up the version and all releases as “Master” as shown below:
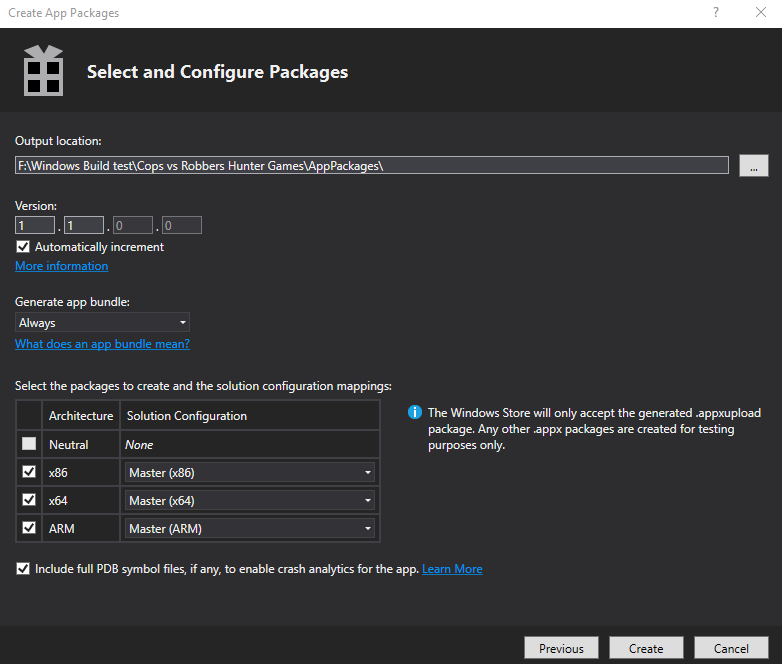
Then hit create and wait for the build to finish (it can take 15-30 mins)
NOTE: If you get an error of a win file .dll, you need to disable your antivirus and try again
After that, you can follow this tutorial to upload the final package to the windows developer account
http://iactivebooks.aeriacanada.com/?p=1292