This process follows the same for updating a game to C16.2.2.
This code contains (C16.2.1/2 + Ads Cascades System + X code Games[new prefabs])
Pre-requisite
- Create roll back apk before doing the update. (+2 on the BVC of the live version)/(+1 on the BVC of the current update) and upload it in the corporate dropbox, folder name 7-Rollback APKs.
- Old project folder for game.
- Exporter package (varies for the version of your game)
- For X code games, check this document to see changes for the game. (refer to this link for game changes – 3D Prefabs Team doc)
What exporter version to use:
1.0.8 version – this version is applicable to games that are currently on C16 and the ones on E.1.11 and C10 codes (Pre-C16 Games).
Branch off of the latest version – Latest branch is called C16.4
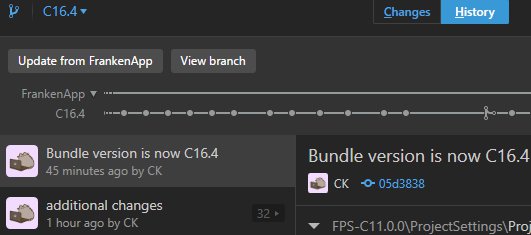
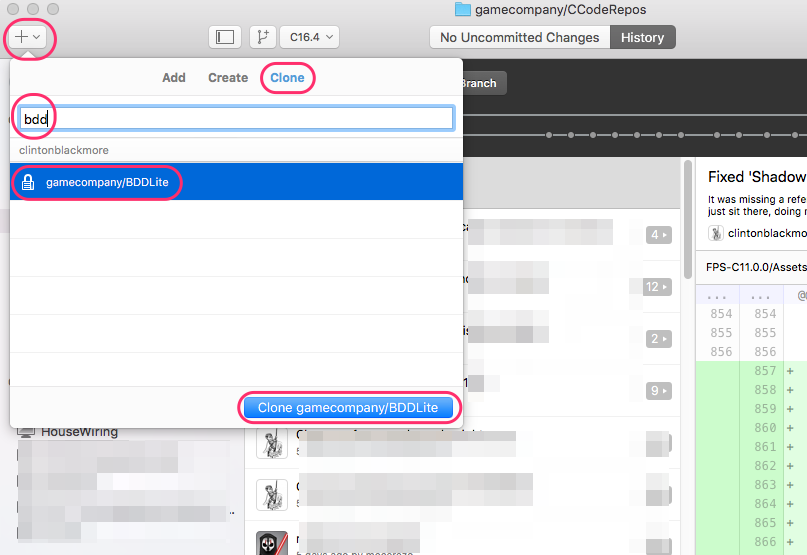
Open GitHub Desktop, and switch to the branch that has the features you are updating to. At the time of writing, you’d want the “C16.4” branch but your task instructions should tell you which branch to use. If you aren’t certain, ask. Switch to it and sync up to the latest version of the branch.
Install Enemy Exporter
If the game you’re updating has the last data in the 9-App Asset Packages folder in the corporate dropbox, use that instead and skip this step.
Export the Exporter
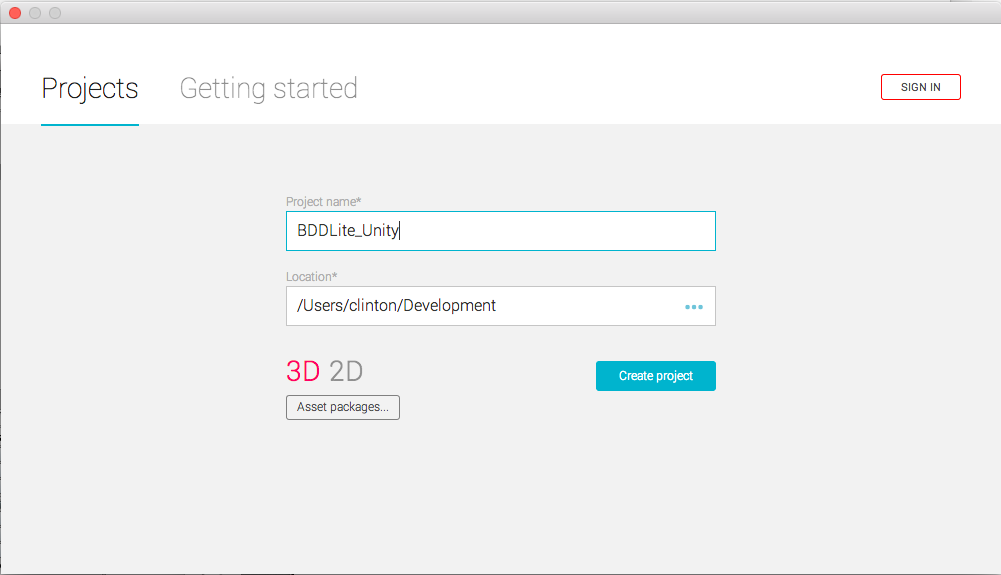
Open the new project in the appropriate version of Unity. C16 projects are designed to be used with Unity 5.3.1p2. (If you use a different version, it causes problems.)
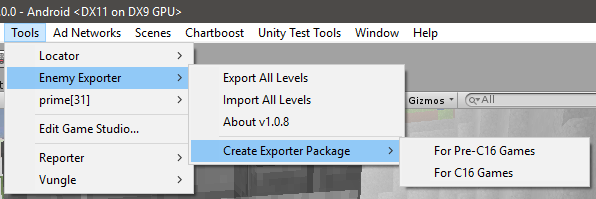
New, in Export v1.0.8. From the menu, choose Tools -> Enemy Exporter -> Create Exporter Package and then choose to create a package for C16 games, or for earlier (C10, E11) games.
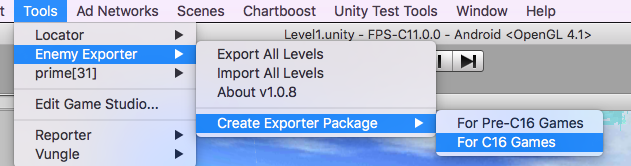
(Previously, you’d choose Tools -> Enemy Exporter -> Advanced -> Create Enemy Exporter Package, and it would create a package that didn’t work for updating C16-style games.)
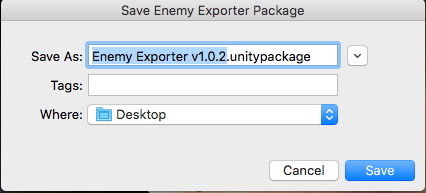
You’ll be asked to save it. By default, it’ll use the exporter’s version, the version of the game the exporter works for, and save to your Desktop.
Import The Exporter
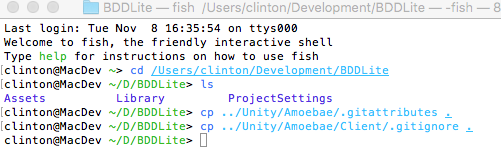
Now, import the exporter into your older project. 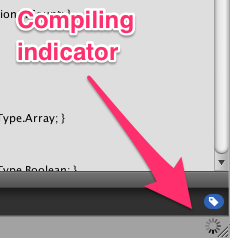 [How To Import]
This import contains a lot of scripts (and nothing else).
It’ll recompile for a bit. Unity tells you it is recompiling by showing a spinning circle in the bottom-right corner.
After it recompiles, you’ll have Tools -> Enemy Export in your menus.
Understanding What The Exporter Does
This page is optional, but I advise looking at the ‘Notes’ section.
It may be useful to understand what the exporter does.
 When exporting, it:
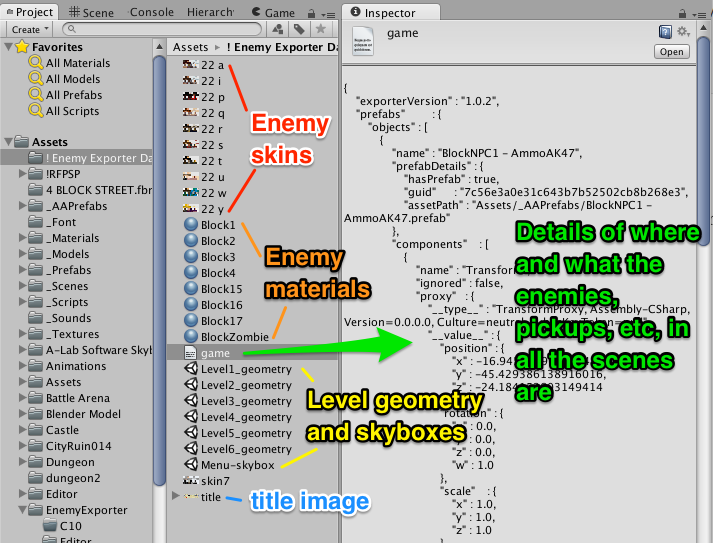
- Saves the bundle ID, company name, etc
- Loads the menu scene, grabs the title image, deletes everything else, and saves it as ‘Menu-Skybox’
- Goes through each level:
- Exports all of the enemies, with their settings
- Exports the player start point and pickups (without any settings)
- Gets rid of everything in the scene that has a script on it and saves the scene as ‘LevelX-Geometry’
- Collects a list of all enemy prefabs used in all the levels and saves their settings
- Saves copies the enemy skins and materials
What does the importer do?
- It sets the company name, and the bundle version code (and even bumps it up for you)
- It applies the changes to the enemy prefabs
- It takes the menu skybox, adds in the C16 menu stuff, and saves it over the existing menu scene
- For each level:
- it takes the LevelX-Geometry file
- it adds in all the new C16 stuff that should be in every level
- it imports all the enemies with their settings
- it places the player start point and pickups
Notes
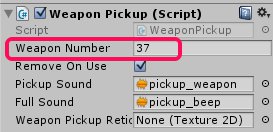
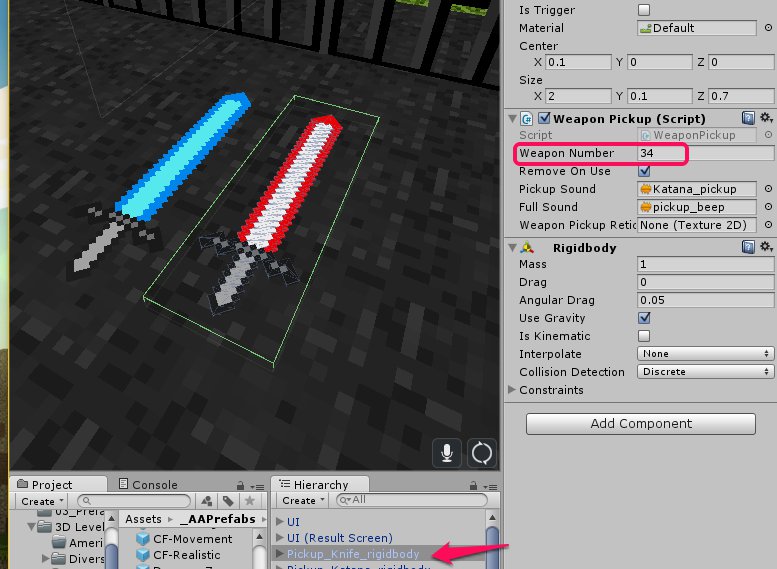
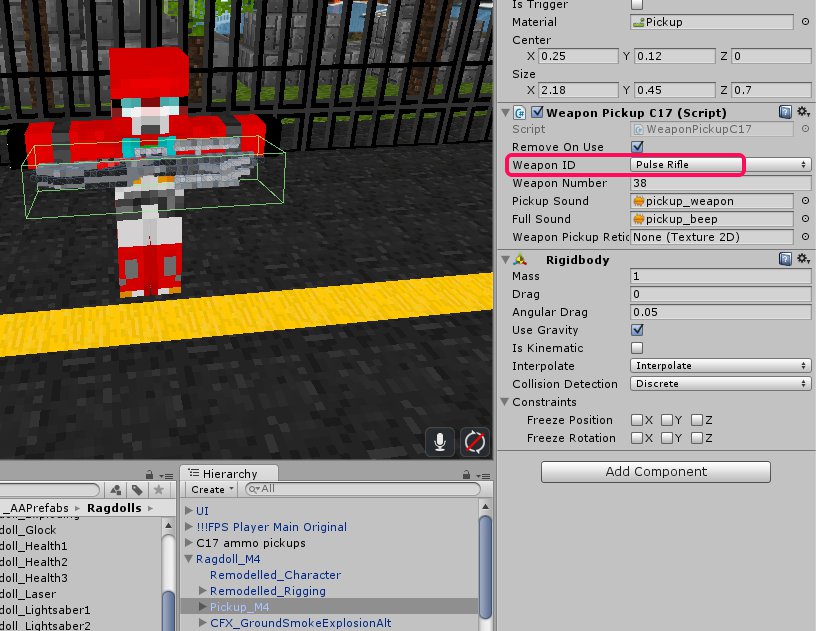
- When something is exported (like, say, a pickup, or even an enemy), the exporter remembers the unique ID of the prefab used for that game object. When it imports it, it instantiates the latest version of the prefab.
- the enemies placed in the scene will be C16-style enemies. (The exporter has special code to update the saved data for the enemies from C10-style to C16-style).
- the player starting point and pickups will all use the latest versions and artwork in the branch that you started from.
- You may want to go through your levels beforehand and make sure that the buildings and other level-geometry items do not have any scripts on them. You may need to break prefab references. (Look at the troubleshooting steps for the levels for more details).
- Things that use scripts in your scenes (like elevators and particle effects) will not come over during the import. You’ll need to re-add them manually.
- The game’s icon isn’t exported, but that is just as well as you’ll want to get the latest version available for the game (as explained in a later step).
- Spiderbots aren’t likely to export at the moment.
- The exporter should work as-is for C10 and E versions of the game, and should work for games generated from C16.2.2 or newer. It will need tweaking to work with earlier C16 games.
Export The Data
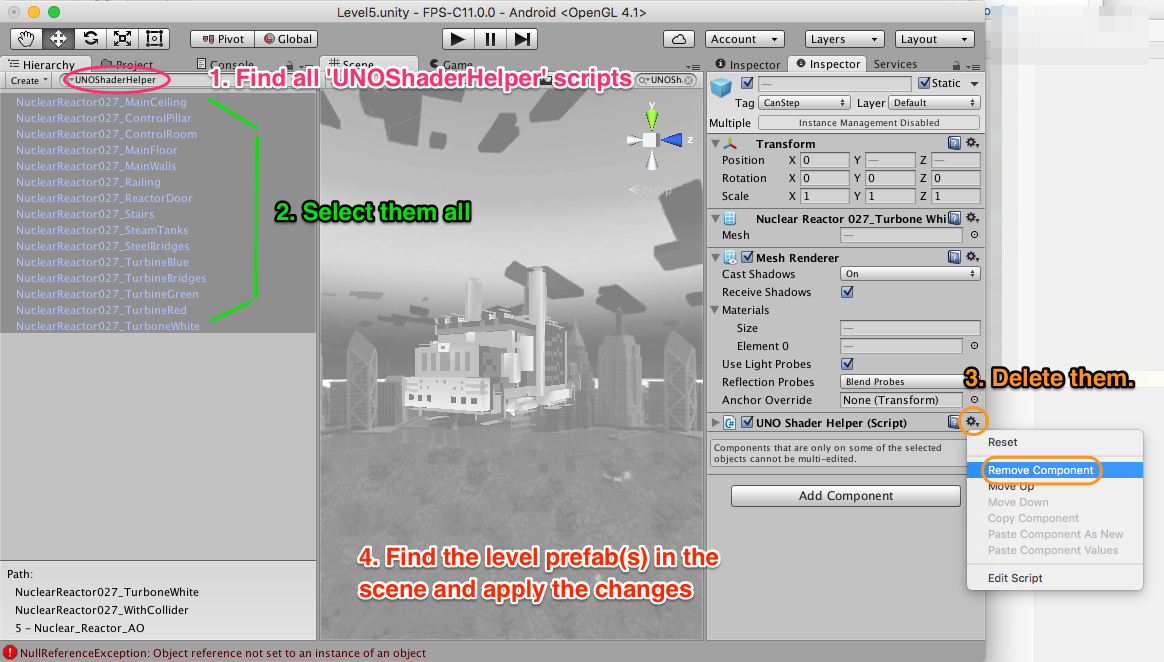
For X code games, you need to remove all shader scripts in the levels before you export it. (refer to this link for additional details – Level Prep)
From the menu, choose Tools -> Enemy Exporter -> Export All Levels.

A progress bar comes up, showing you which level it is currently exporting.

Then, Unity is unresponsive for a couple of minutes, and you see a spinning wait cursor. …
Finally, it asks you where to save the exported game data.
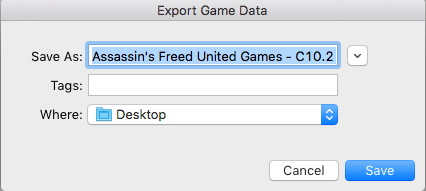
You may need to tweak the name. Spaces and dashes are fine, but colons and slashes may cause it to refuse to save.
Using the defaults, it created “Assassin’s Freed United Games – C10.2 – BVC 7.unitypackage” on my desktop.
[DO WE WANT PEOPLE TO SAVE THIS INTO DROPBOX?]
Production team agreed that it is better if the data exported from the old project folder will be uploaded in the corporate dropbox.
The folder for these packages is called 9-App Asset Packages.
All the assets for the game should be in this neat little unity package.
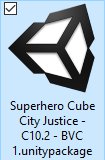
Tada! Everything that we need from that game, in one tidy import file.
(you need to do these steps first before importing the data from the exporter.)
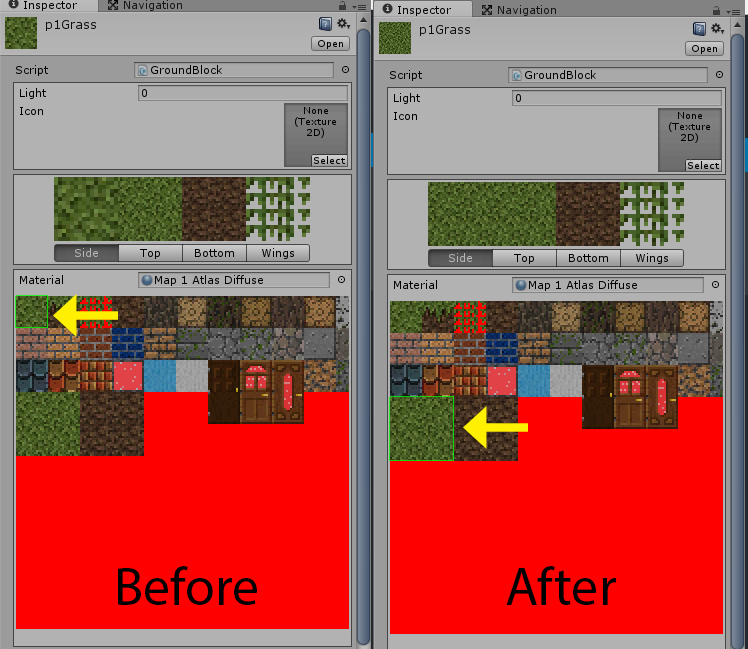
Don’t forget to export the player skin from the old project and import it on your C16.4 project.
(Find for the SteveArmy material [Assets>_Models>_Weapons>BlockGuns>Materials>SteveArmy.mat], click on the texture applied for you to find your player skin)
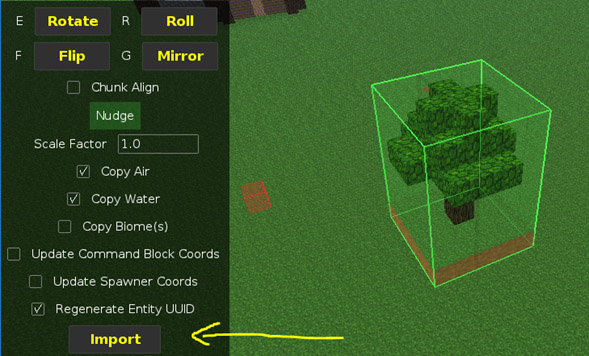
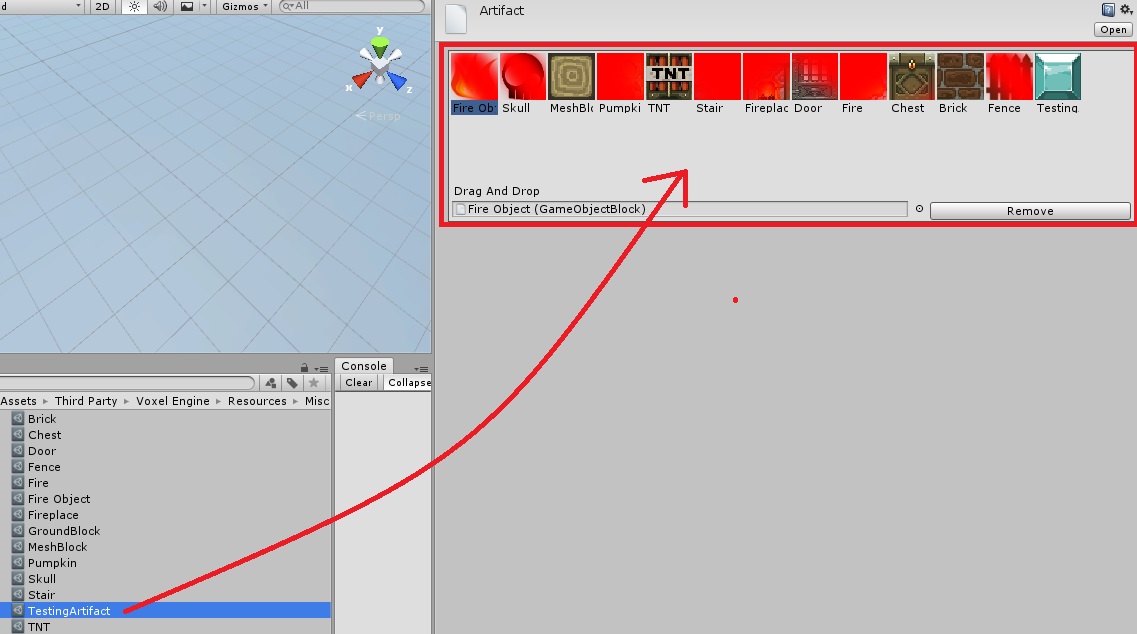
Import the new prefabs first before importing the data from an X code game.
Import The Game Data
Wait! Stop the presses. Didn’t we just import?
Yes, yes, we did. We imported assets into Unity.
Now, we will import all the enemies and game settings into our game. It is confusing that they use the same name — if you have a better term, contact your friendly neighbourhood dev team.
It is not a bad practice to clear the messages in the console before beginning. Find your console window (Window -> Console, from the menu) and hit the clear button.
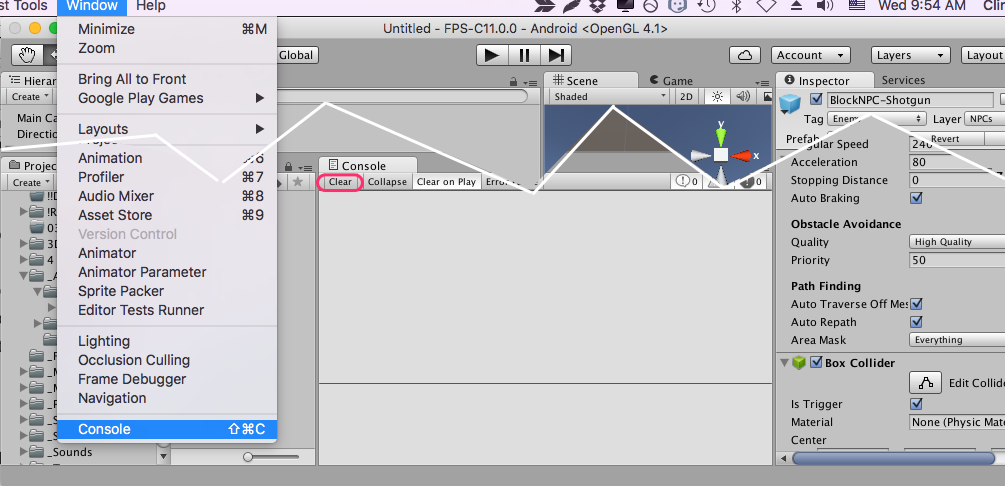
Now, go to Tools -> Enemy Exporter -> Import All Levels to kick off the process.

You’ll get a nice progress bar to show you what is happening.

Woohoo! This process just save you six hours of mind-numbing work!
If other prefabs are missing please refer to the C16.2.2 process for troubleshooting missing prefabs.
Rename the Exported Data Folder
Your game relies on the data in the “Assets/! Enemy Exporter Data !” folder, but you can’t leave it named like that, or you won’t be able to export from this project when it is time to update to “C37 now with added awesomeness”.
Therefore, rename the folder. Your hair is too valuable to lose!

I renamed it to “! Data for Assassin’s Freed”
I’ll refer to it as ‘your import folder’ from here on.
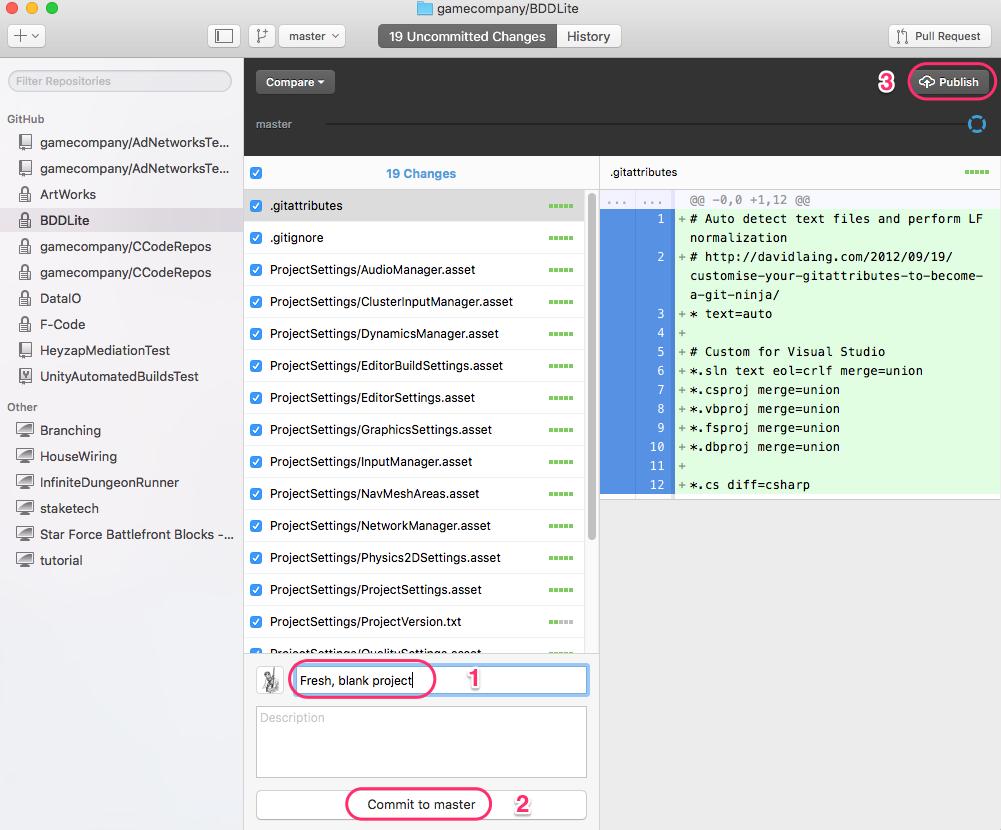
Save it to Version Control
You’ve done some great work. Save it – ’cause, hair loss!
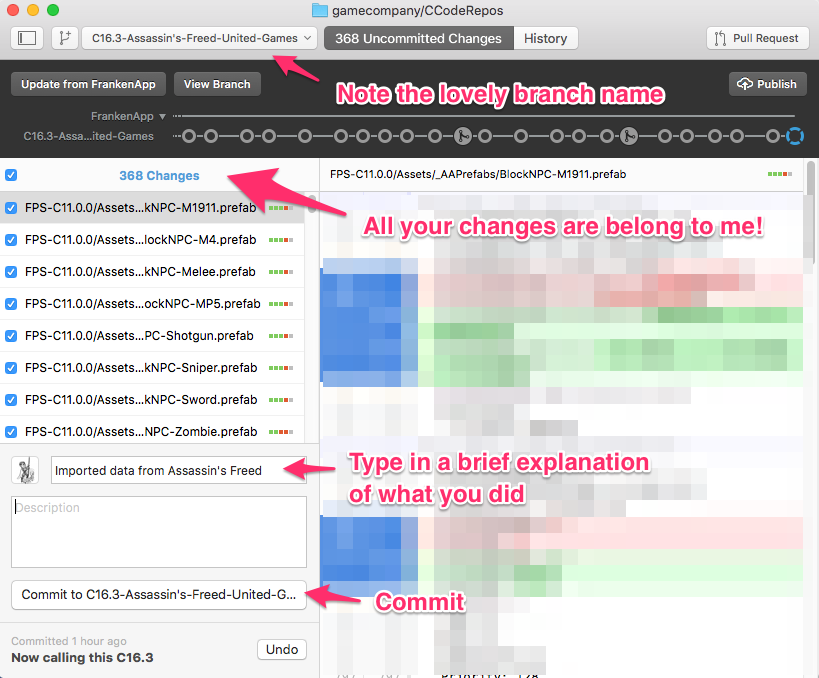
You may optionally ‘Publish’ and ‘Sync’. (You will need to do that later).
Additional steps to be done:
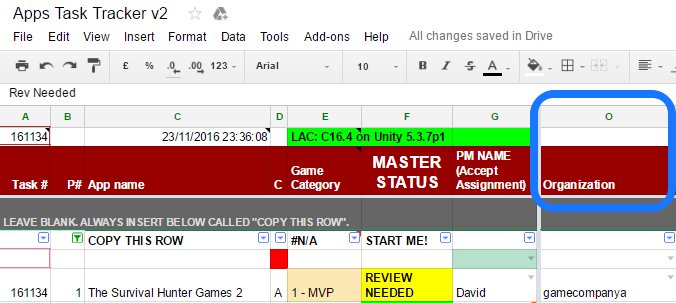
You can find the game organization at : Apps Task Tracker – Column O
Or the Ad Networks Master File – Column E

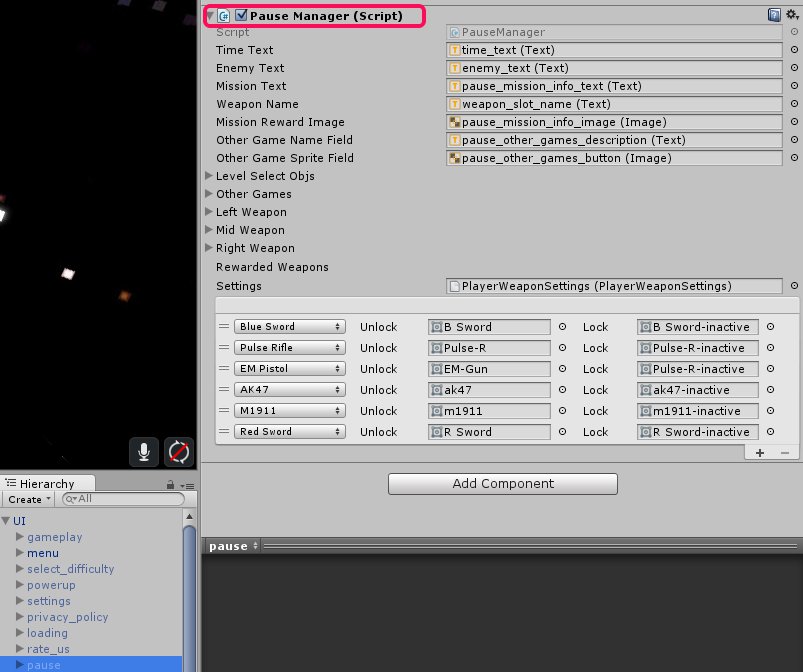
- Import proper pause menu games package for the correct organization. (refer to this link – C16.4 Pause Menu Packages)
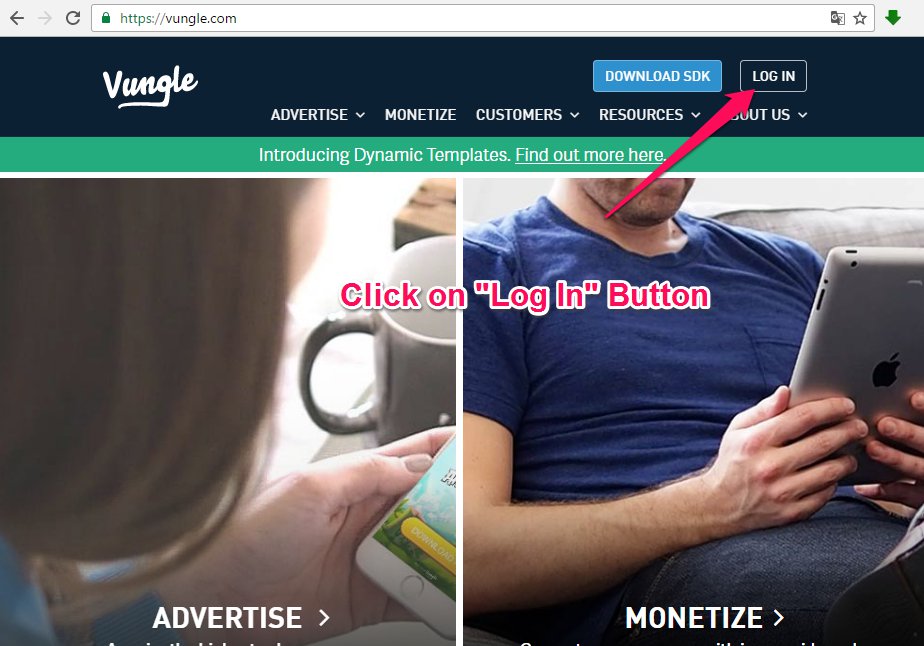
- Link Unity services. (log in to correct company, link to correct organization, turn off Unity Ads) (refer to this link – Linking the game in Unity services)
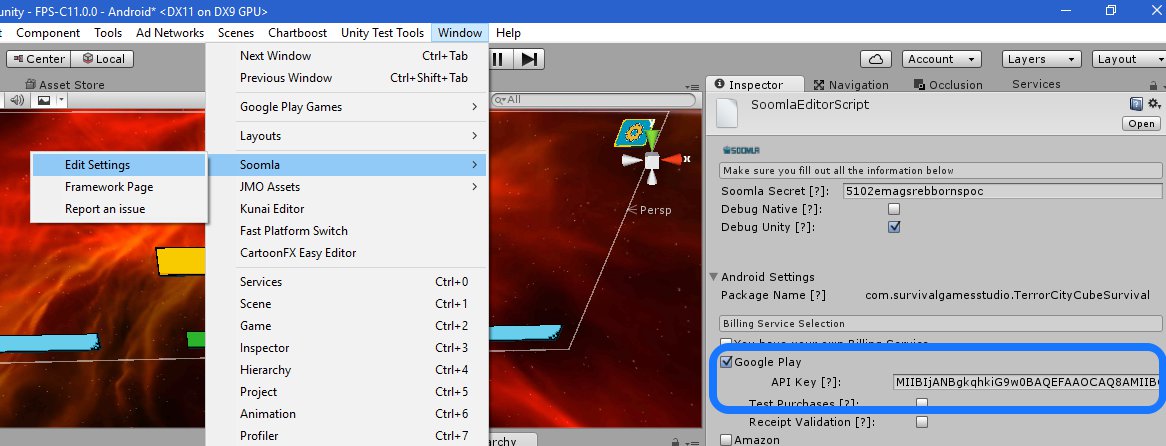
- Setup Soomla Key. (refer to this link – Soomla key is on column D of this spreadsheet)
- Get the latest icon. (refer to this link – Current icon is on column K of this sheet) Please disregard any instructions related to Heyzap Mediation.
- Setup Time Manager. DON’T FORGET TO HIT APPLY! (Note that enemies from enemy manager of each level is the correct enemy count, which should be the same count indicated on your Time Manager.)
- Setup Leaderboards script. Don’t forget to click SETUP. (refer to this link for additional ways to setup your leaderboards script – Leaderboard settings)
- SAVE, COMMIT, SYNC/PUBLISH.
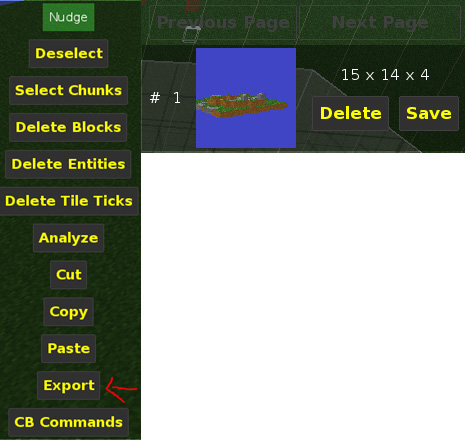
Export the Data and Upload
Export data from new project and upload it on corporate dropbox. (refer to this link for this last step – Export the Data)
HOLD YOUR HORSES!
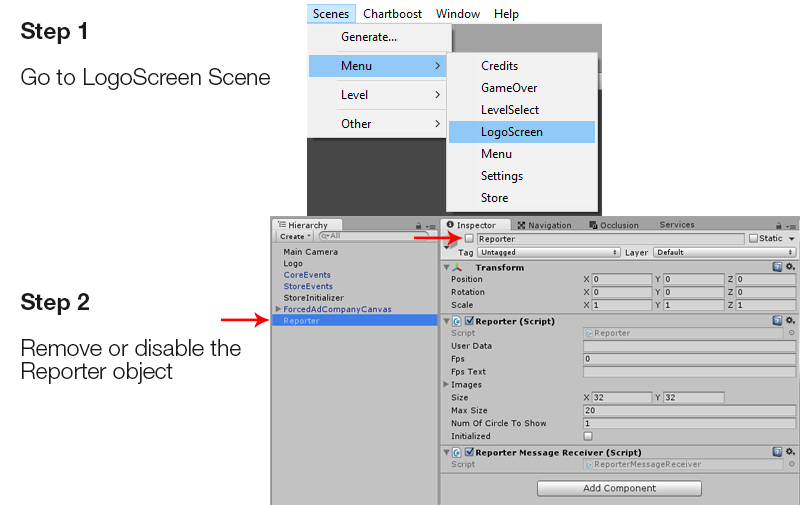
Before sending an APK for approval, check the logo scene and see if the reporter game object is enabled.
If it is, disable it or remove it on the scene, and then build your apk.
Send APK for Approval
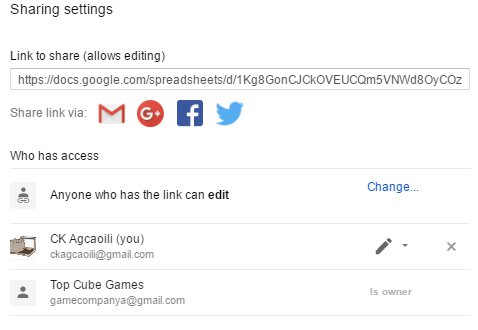
Follow the format for Approval email. Attach link of the spreadsheet of your game for the Ten Slot Ad Settings and transfer ownership to Top Cube Games (gamecompanya@gmail.com). If ownership is not transferred, the game will not be approved.
Balancing the game
After your game is published, you should check the game a day after it was published in Unity analytics after the update. Monitor and balance death and ammo watches based on analytics if needed.
Main factor for balancing are:
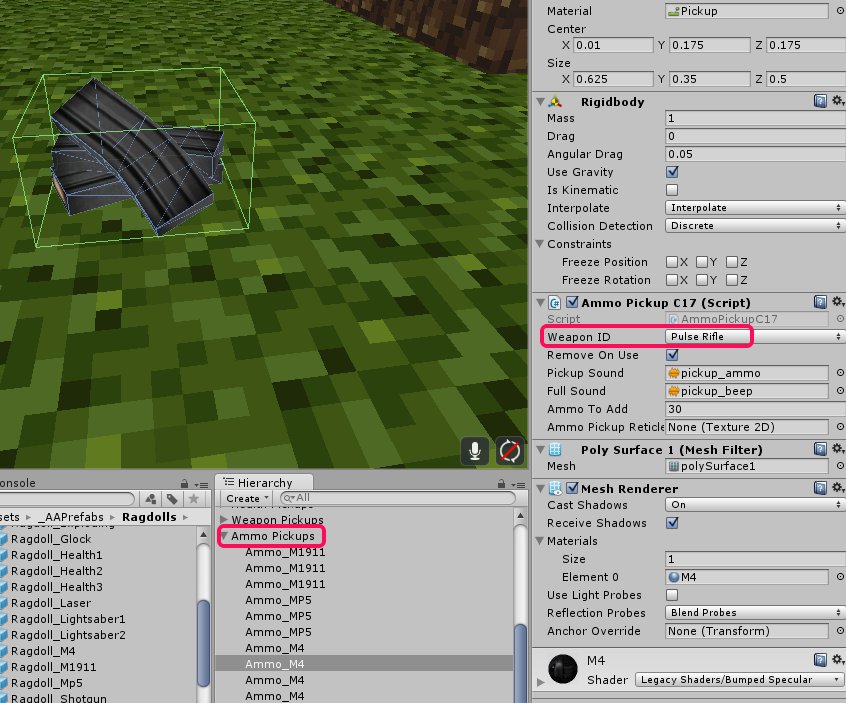
- Ammo pick ups for a level.
- Health packs for a level.
- HP of the NPCs.
- Number of enemies in a level.
Any questions or suggestions regarding this process, please do not hesitate to contact Production Team.