This post explains how to get a new team project on github.
First, log in to github with the company account (or, get someone with the password to do the first few steps for you 🙂
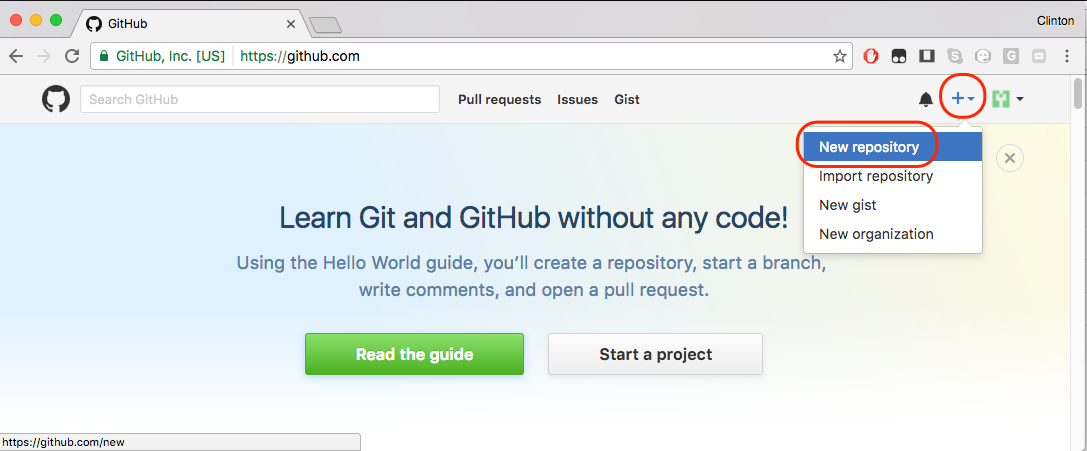
Click on the “+” button and create a new repository.
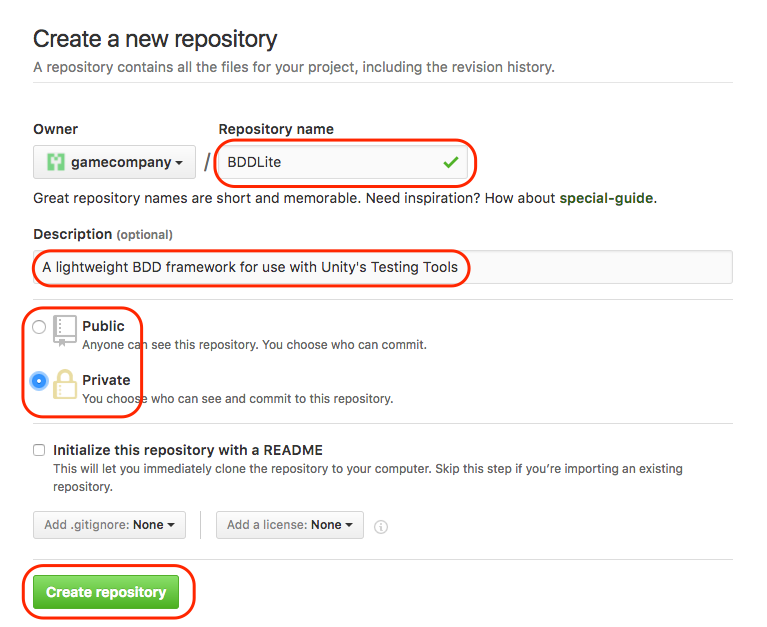
Set the name of the repo and a shot description. Mark it as private and create it.
You’ll get a nice page with instructions on setting it up, but you can’t do that yet …
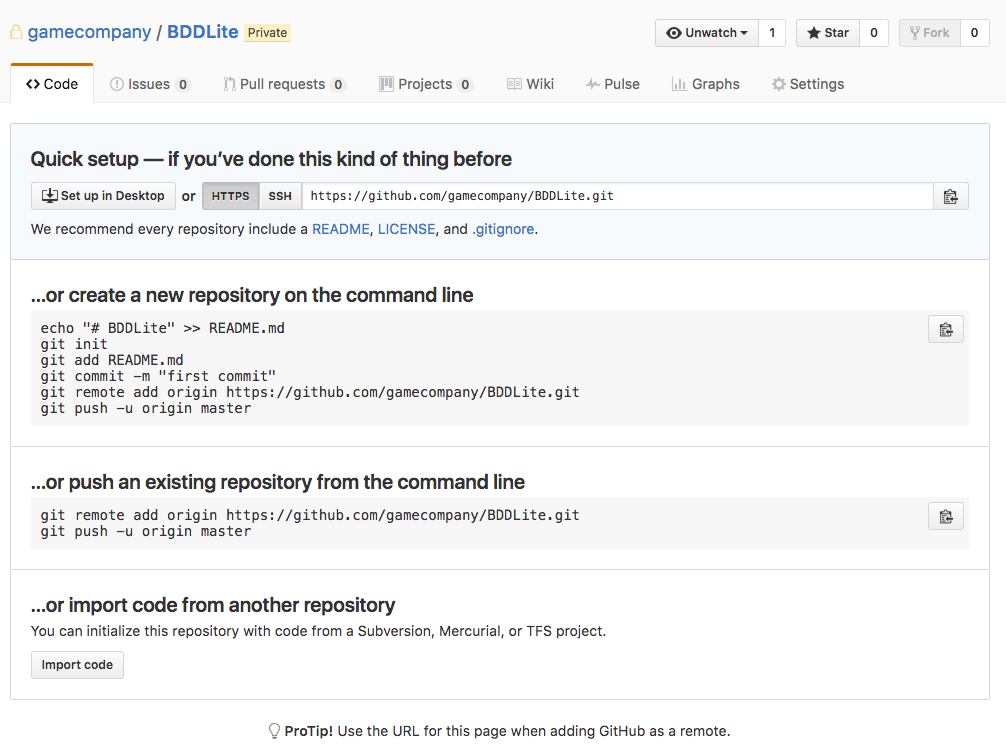
Click on Settings, and then Collaborators, and add accounts for the people who’ll actually work on the project.

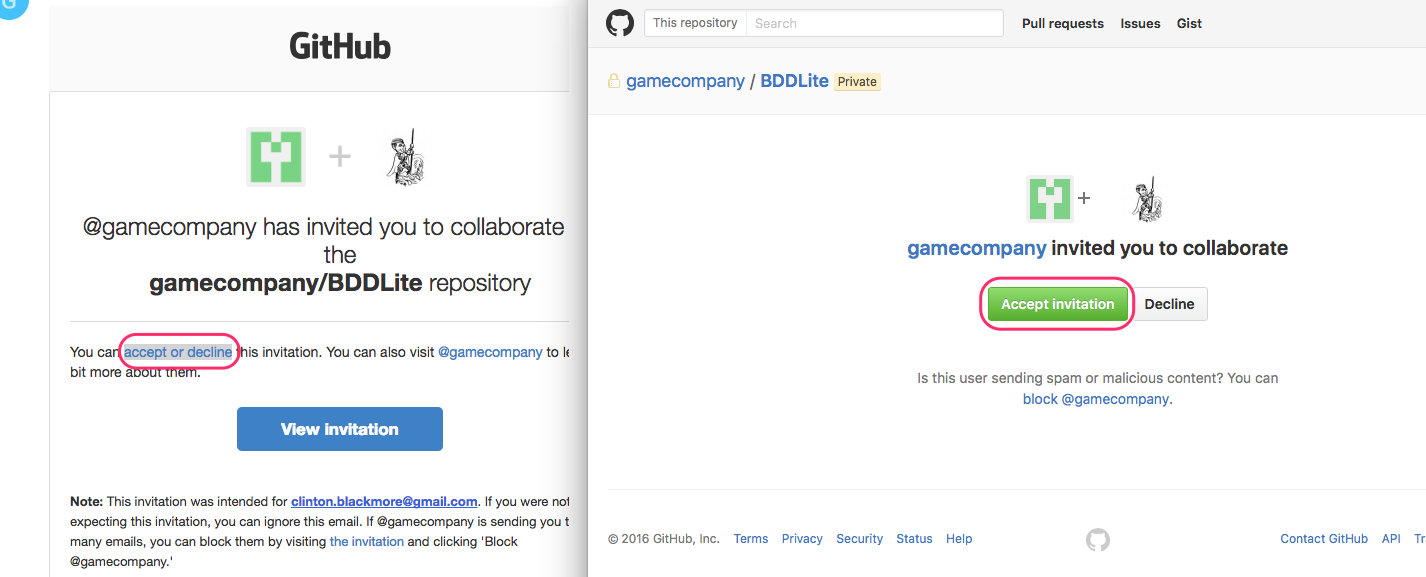
That person will get an e-mail invitation to accept.
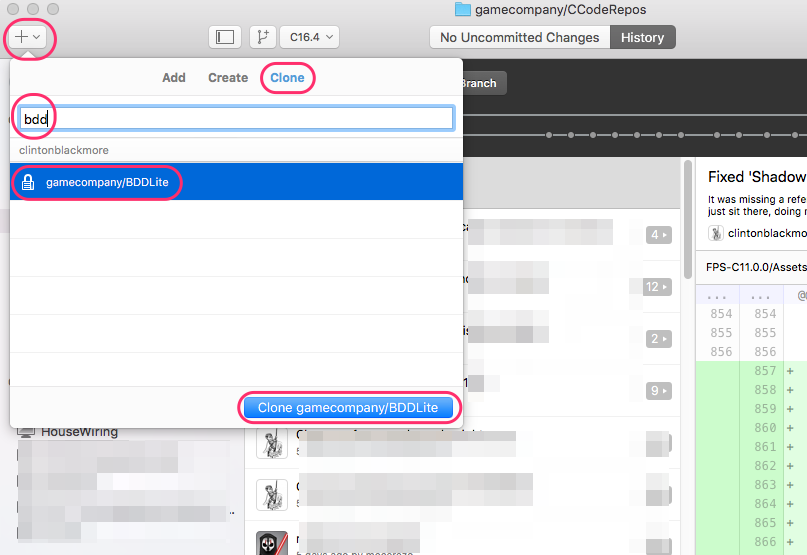
After they’ve accepted, and perhaps after waiting a few minutes, they can fire up GitHub Desktop, and clone the project.
They’ll be asked where to save the project on their hard drive.
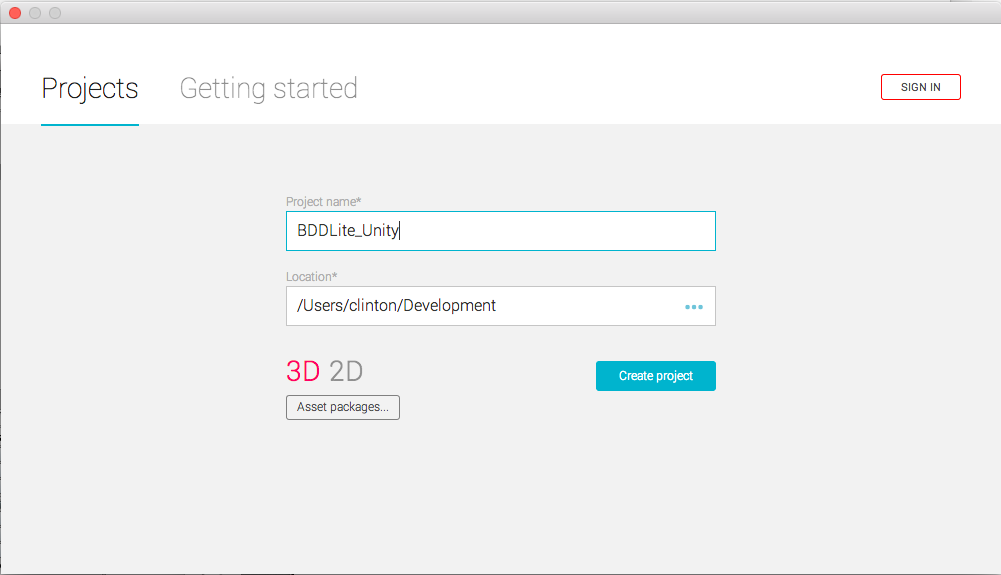
Then, they need to create the project in Unity. Unfortunately, they can’t use the same directory; Unity will complain a project already exists there. So, create a new directory.
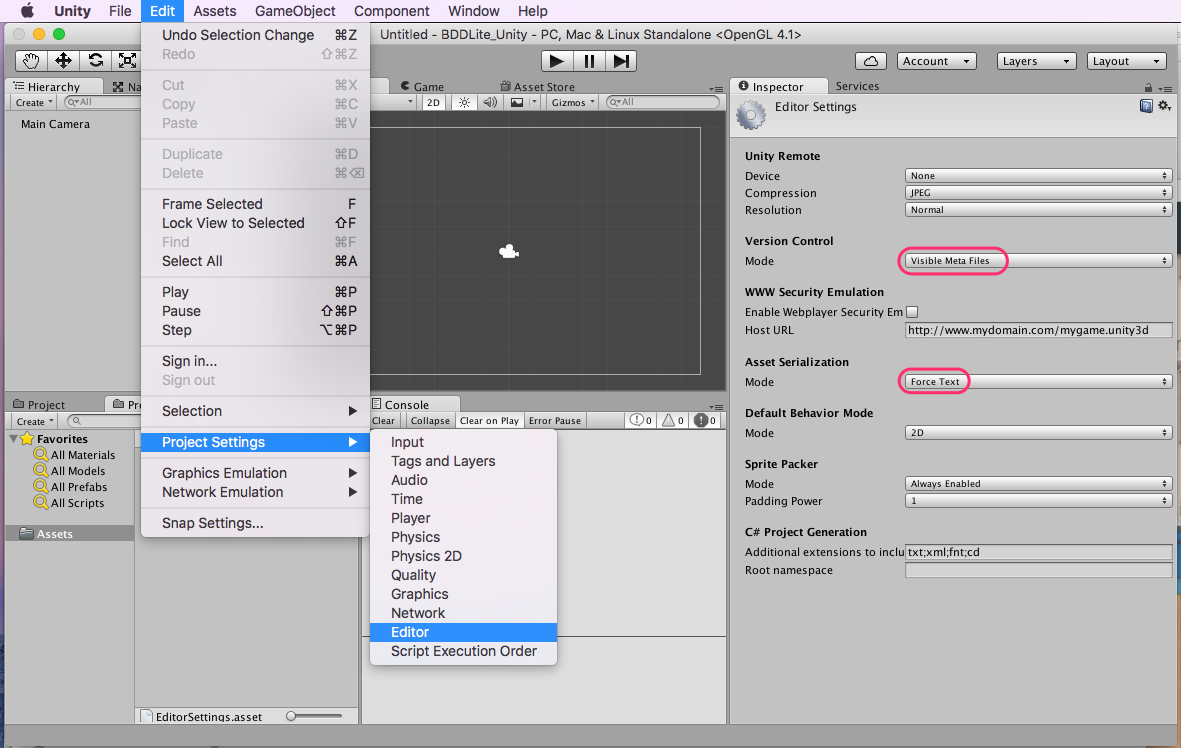
Then, set up Unity right for use with external version control. Go to Edit -> Project Settings -> Editor, and turn on Visible Meta Files and Force Text Mode for asset serialization.
Quit Unity.
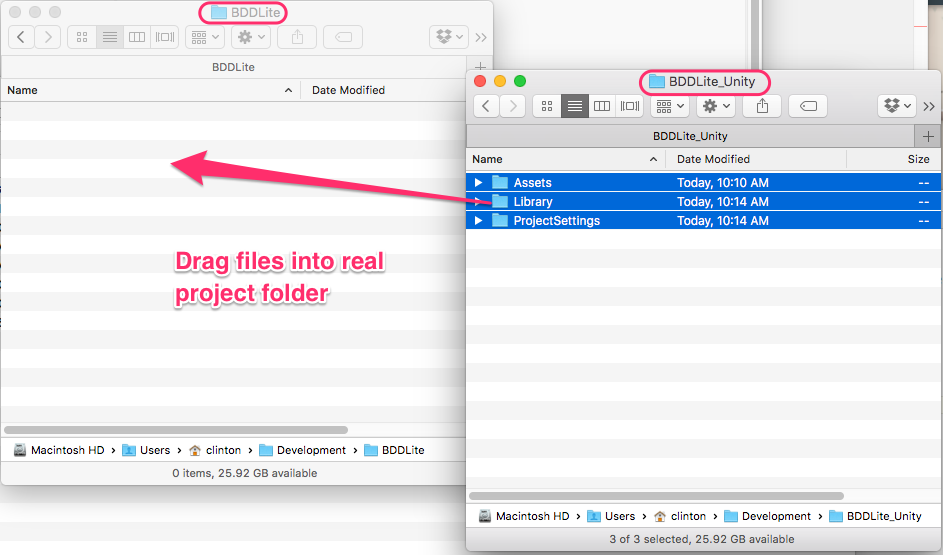
Go to your file manager, and copy all the files and folders Unity just created into the proper folder that is in version control.
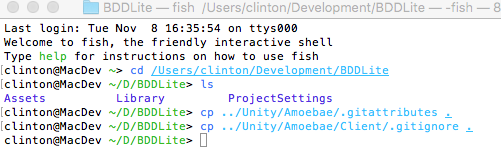
Finally, you need to create a .gitignore and a .gitattributes folder. The ‘.’ in front of the name hides the file on Unix-like systems (including the Mac), which makes them a little tricky to copy. Here I’m grabbing them from another repo on my computer. I suggest getting them from here.
The .gitignore file tells git to ignore things like the Library folder, and build you’ve made. The .gitattributes file helps deal sanely with the line endings on text files.
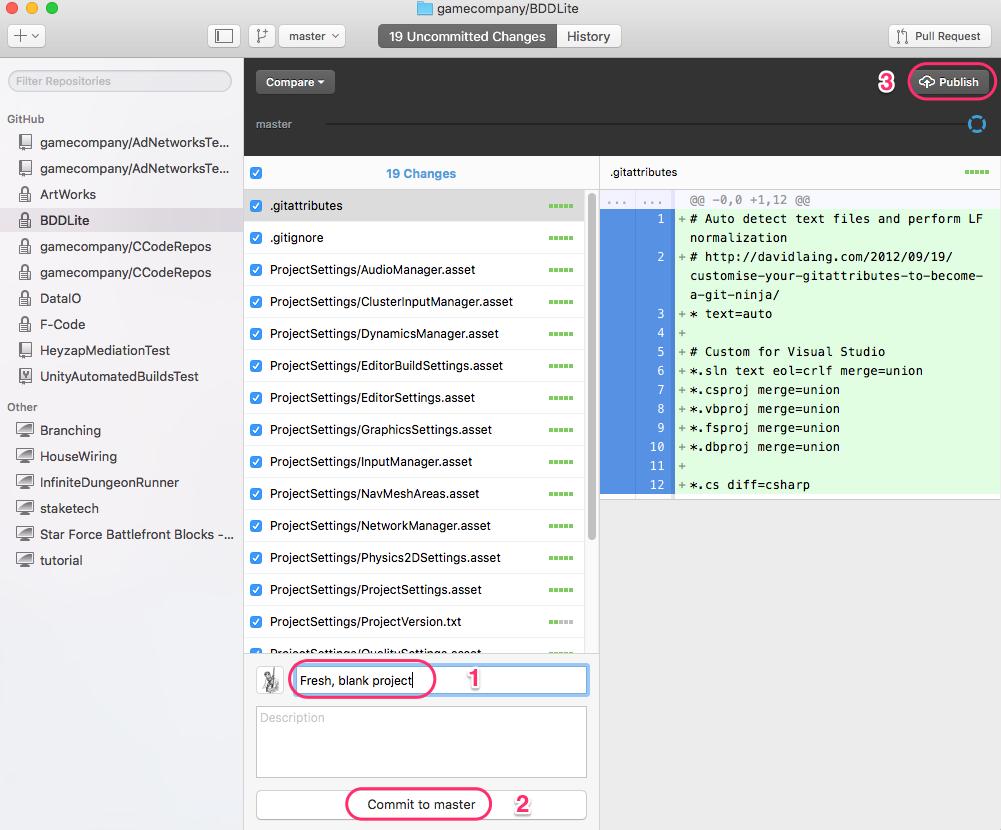
With all that done, you can make your first commit, and publish the branch, and start working on it.