Purpose
This post explains how to update existing games using the new Blockyverse packages. The instructions assume you are using the C18 or C18.1 code (there is a different package for each one of this versions). For C20 games the only change is that you don’t need to import any package, because it’s already imported in the main branch.
Get Your Project Folder
All existing projects have a project folder. You’ll be sent instructions on where to download it from. Please note that C18 games open with Unity 5.3.7p1; C18.1 and C20 games with Unity 5.6.2p1.
If the game you’re updating has already created a branch in Github, please use it. If not, please create a new branch and name it like this “Code-Game-Name” (ex. for a C18.1 game: C18.1-Most-Wanted-Jail-Break).
Create Rollback APK
It is a good practice to create a Rollback APK before you do anything else. In order to do this you need to login in Unity with the corresponding account of your game (company A, B, C or E). Ask for this access to any Project Manager.
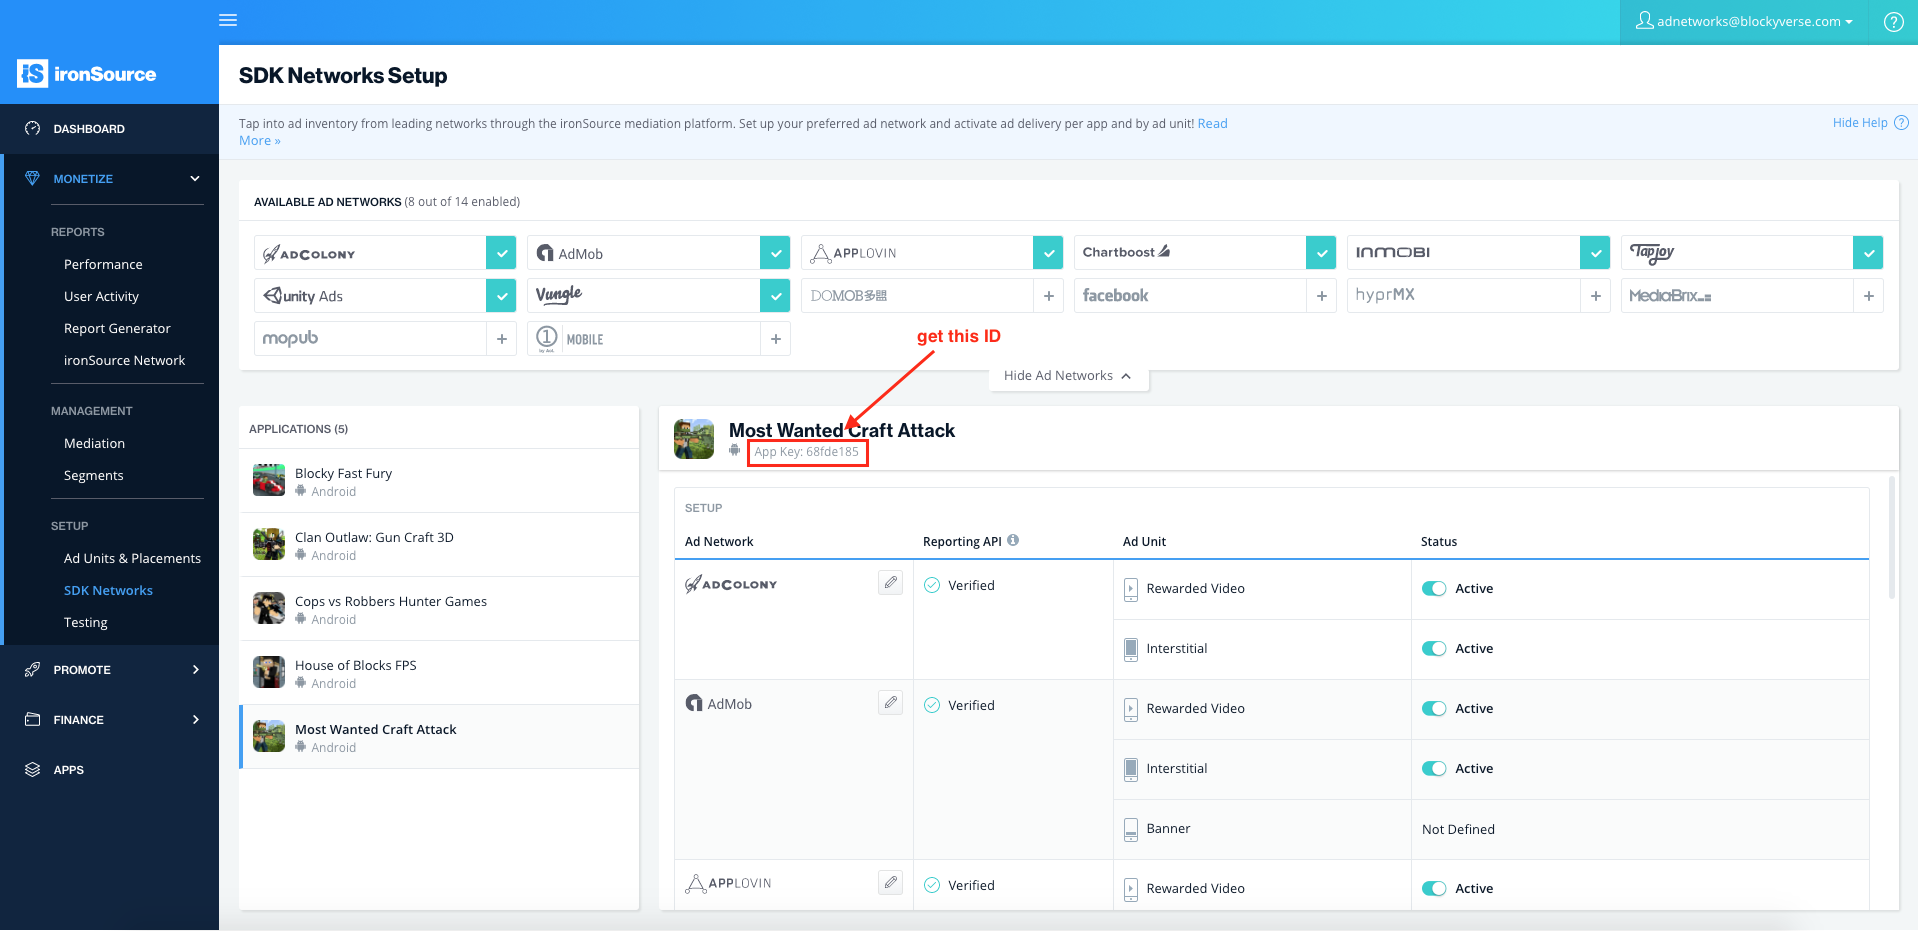
You can find the correct company for the game you’re updating in the List of Apps, Current information tab, column C.
You just have to create an APK when you finished opening the branch in the correct Unity version.
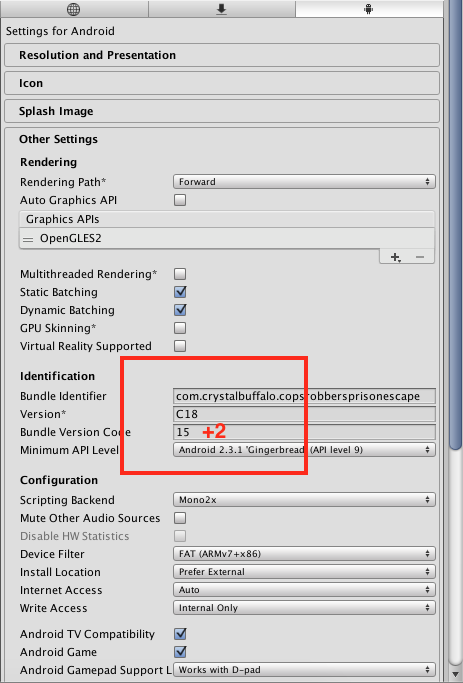
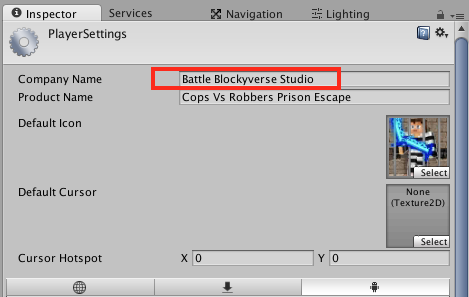
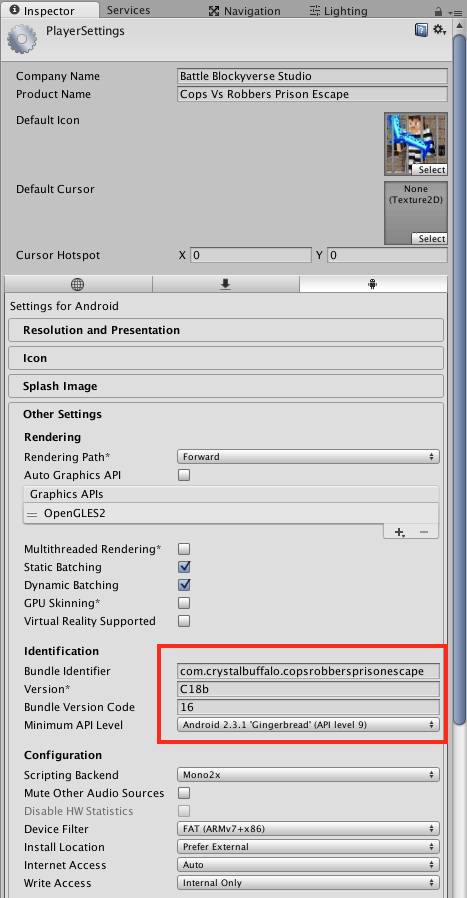
When creating Rollback APK’s please be sure to add +2 to the current Bundle Version Control (BVC). You can edit this in Edit -> Project Settings -> Player and then into the “Other Settings” tab you’ll find an “Identification” section. If the current BVC is 15, your Rollback APK will have BVC 17.
Login into Blockyverse account
You should ask for this access to any person from Production or Management, so you can login into the correct account.

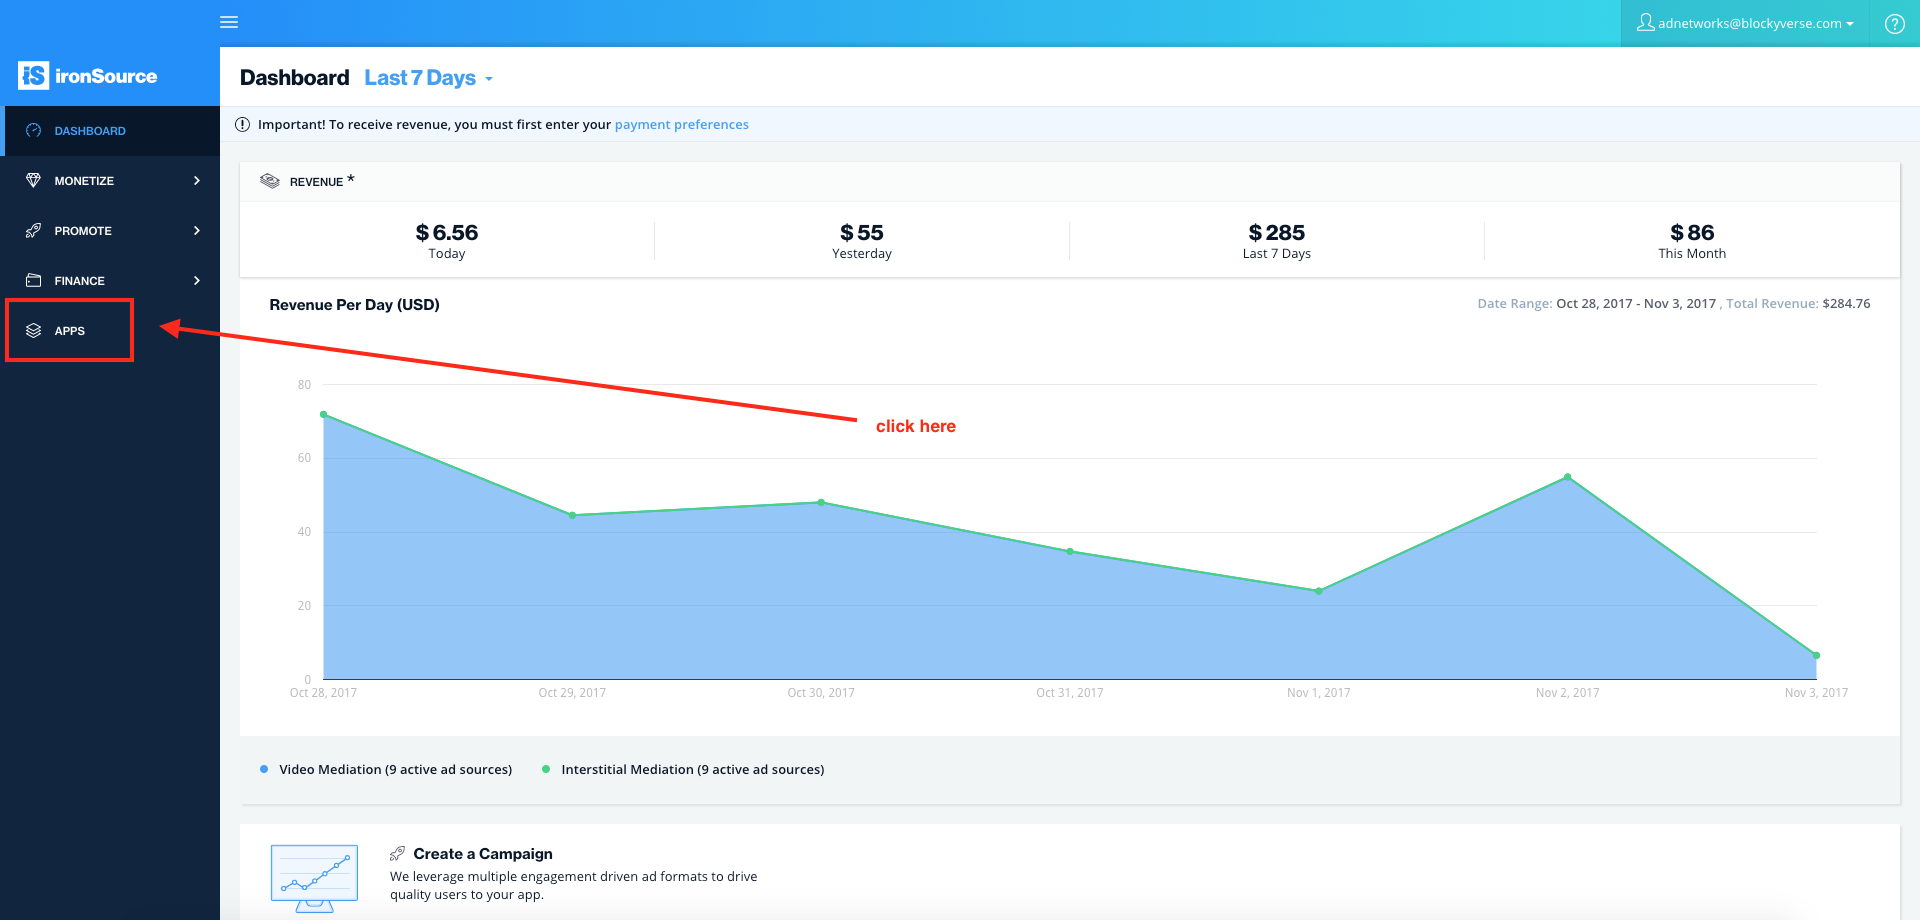
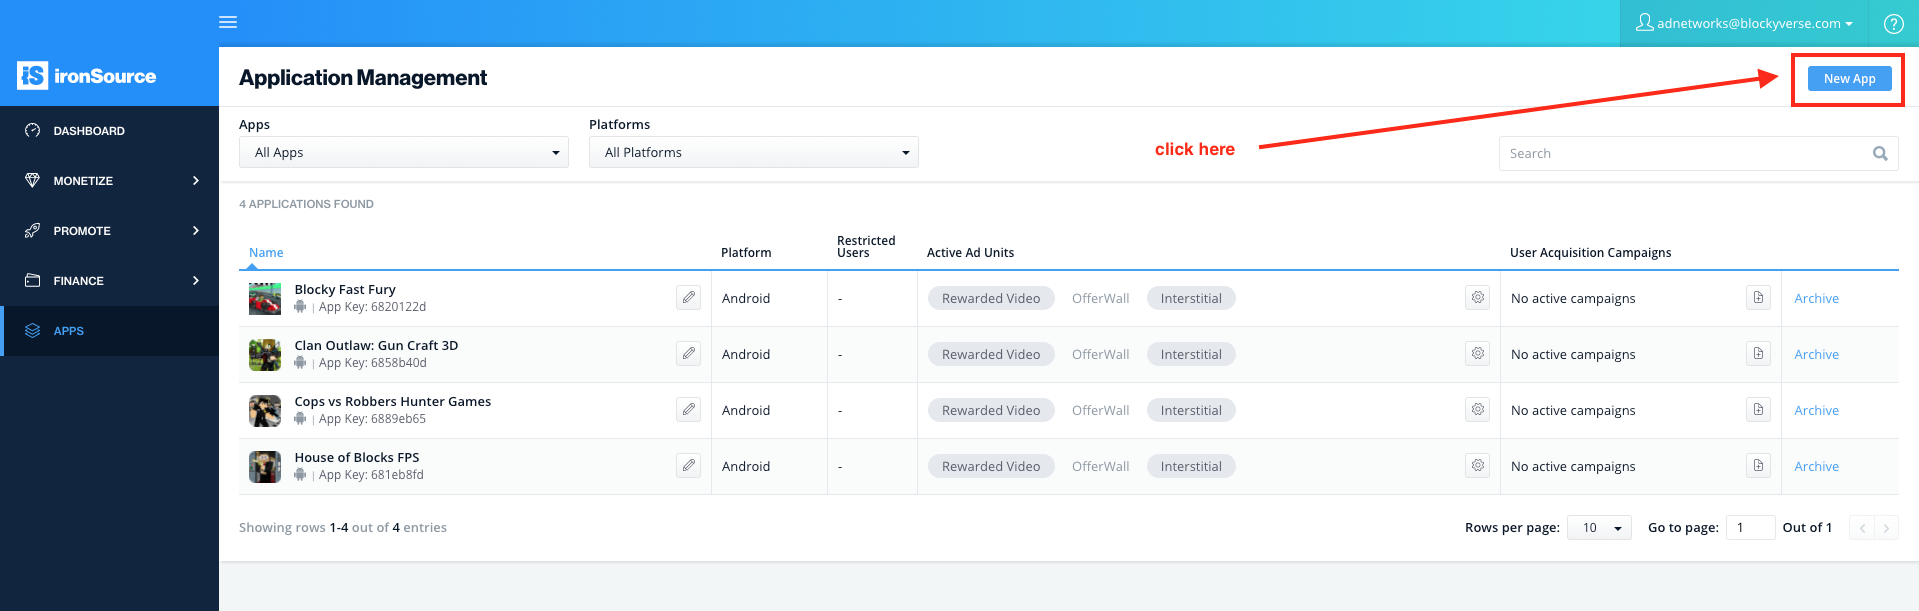
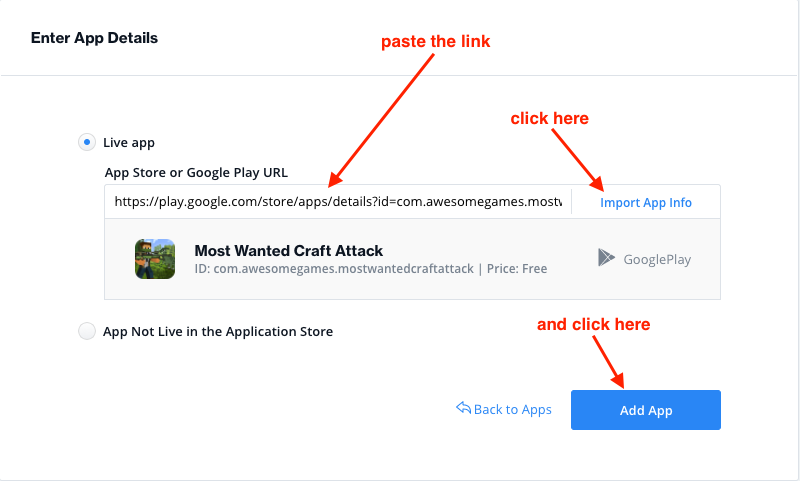
Import Blockyverse package
You can skip this step if your game is a C20
Login into your corporate Dropbox account and download the corresponding package for your game from this folder:
Blockyverse Packages
Import the package to your game inside Unity by double clicking on it and then click on the Import button.
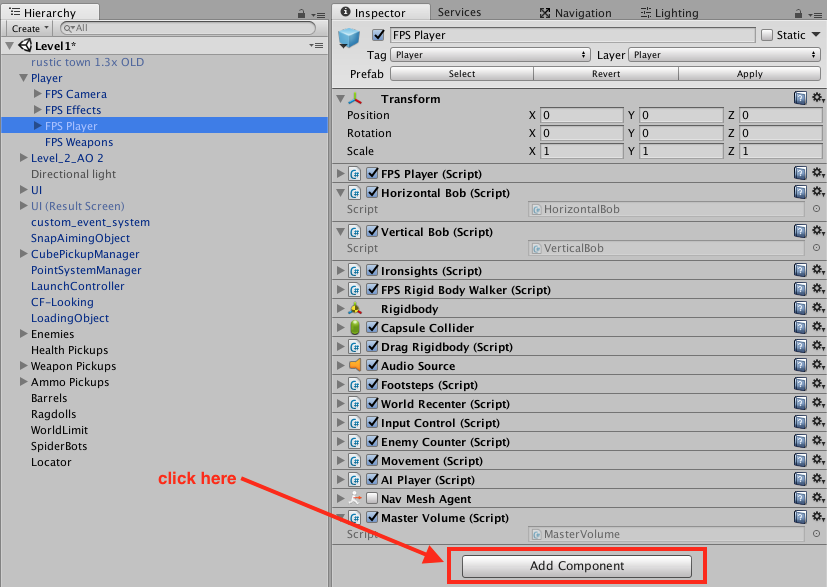
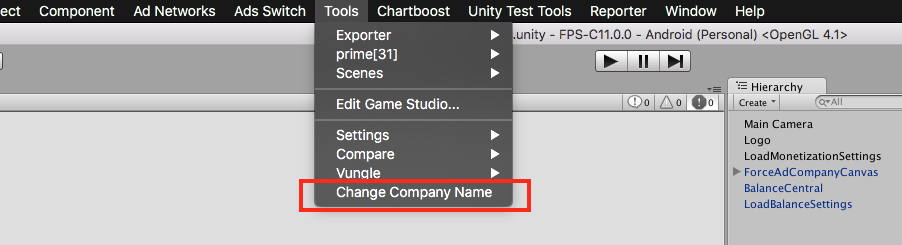
Apply changes
In order to do this, you need to go to Tools -> Change Company Name:
After doing this, you’ll receive this notification:
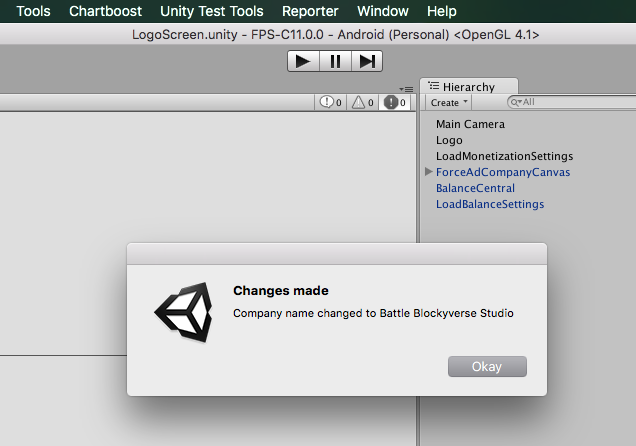
Please contact Production or FPS Team if you don’t receive this message.
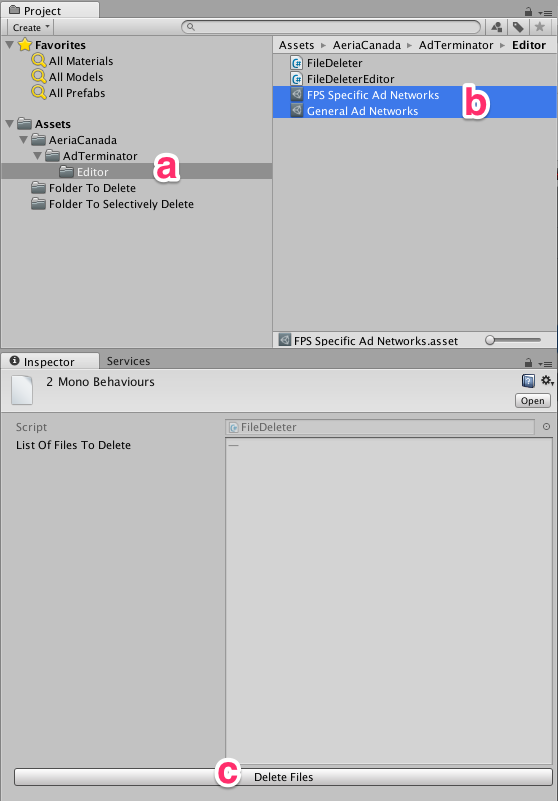
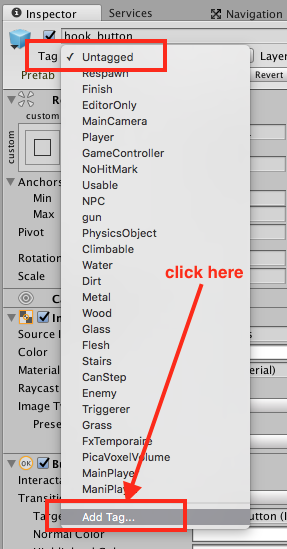
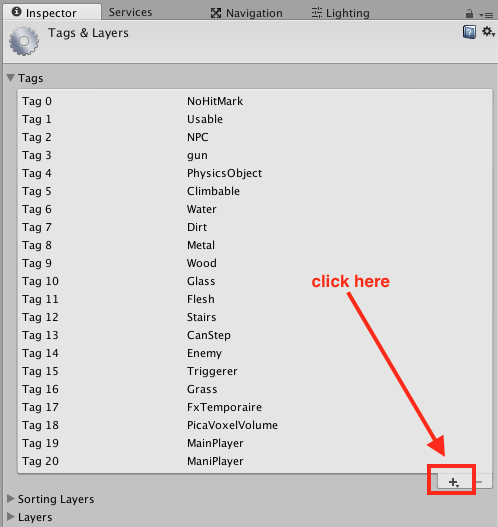
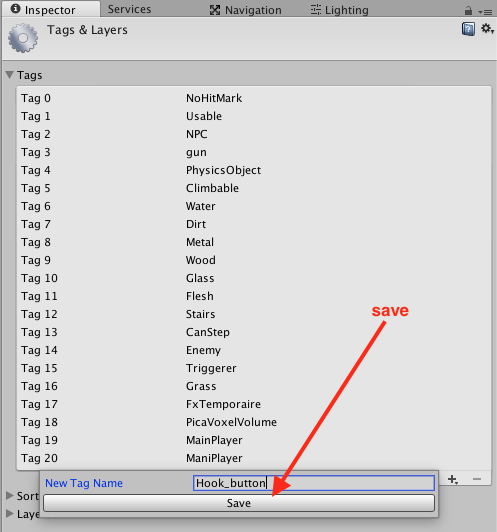
Fix possible issues
Please fix the possible issues that you may encounter after you apply the new package or during the update.
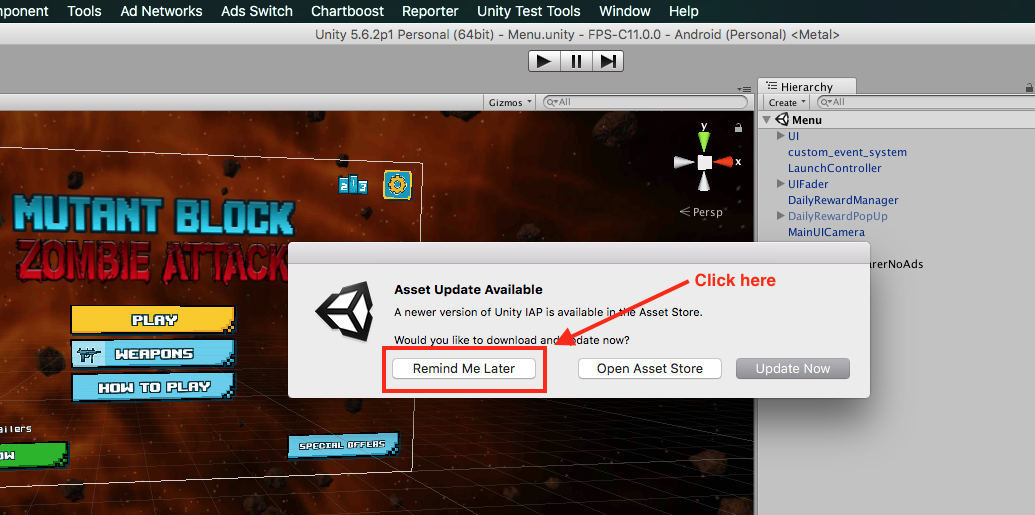
- If you see this alert (sometimes you will see this with C18.1 games), click on “Remind Me Later”
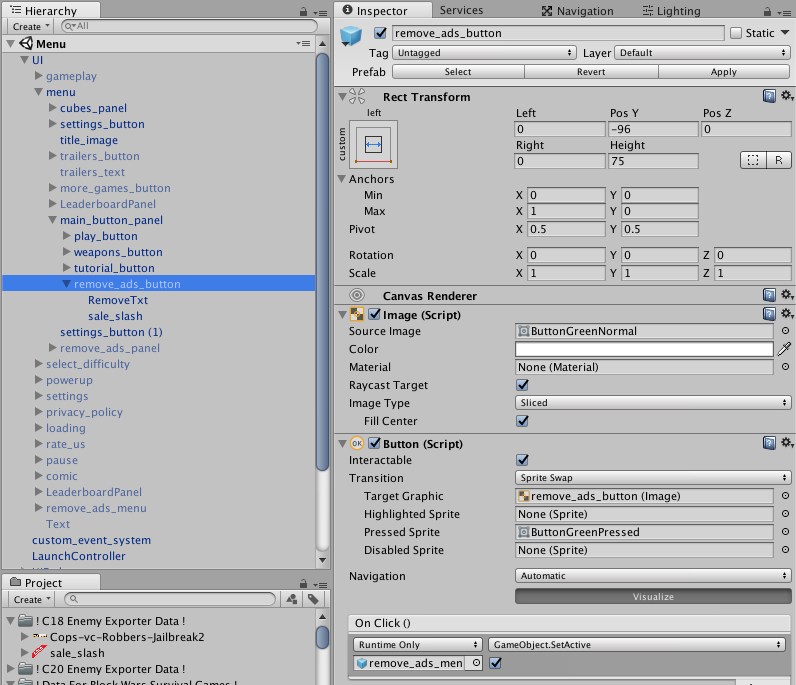
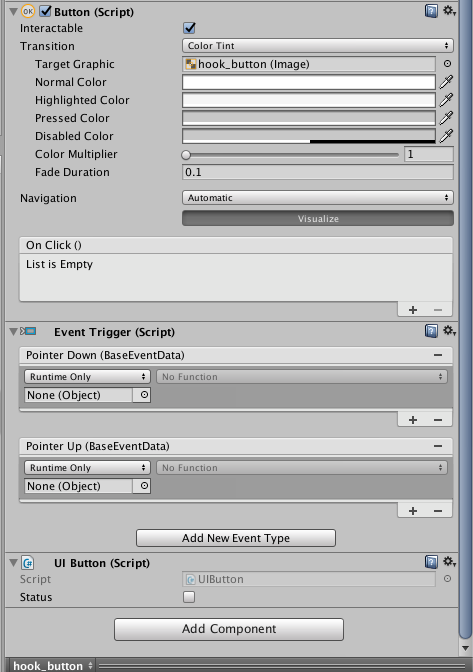
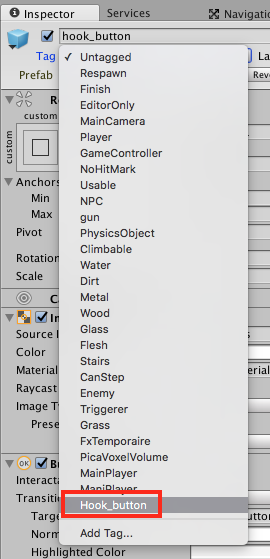
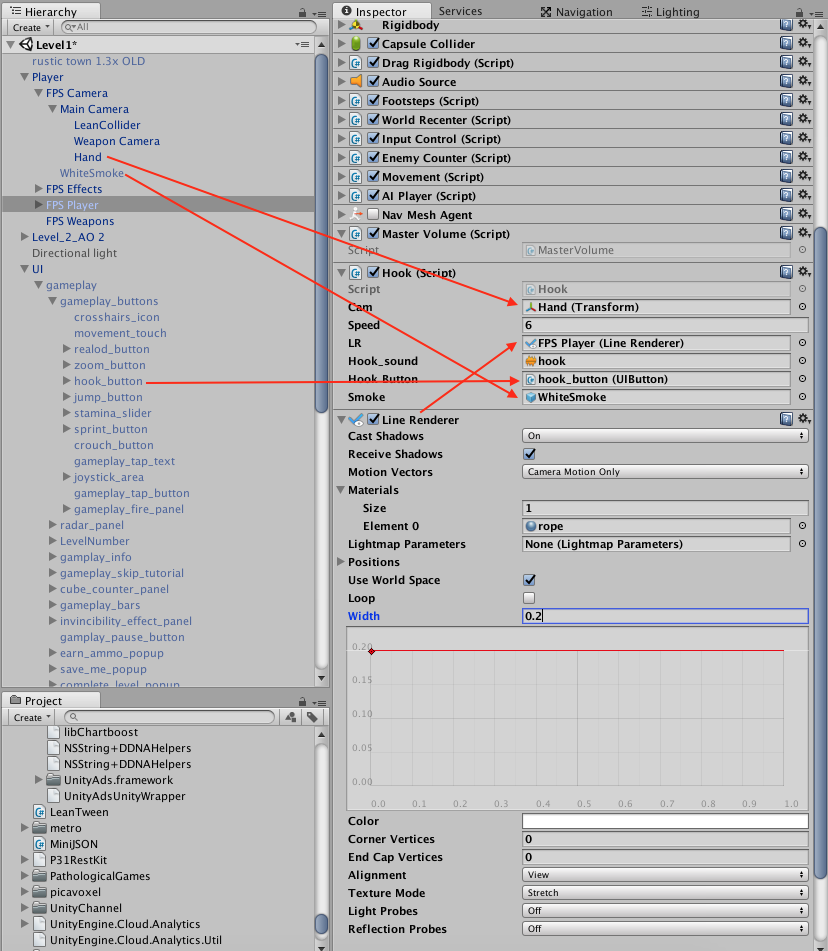
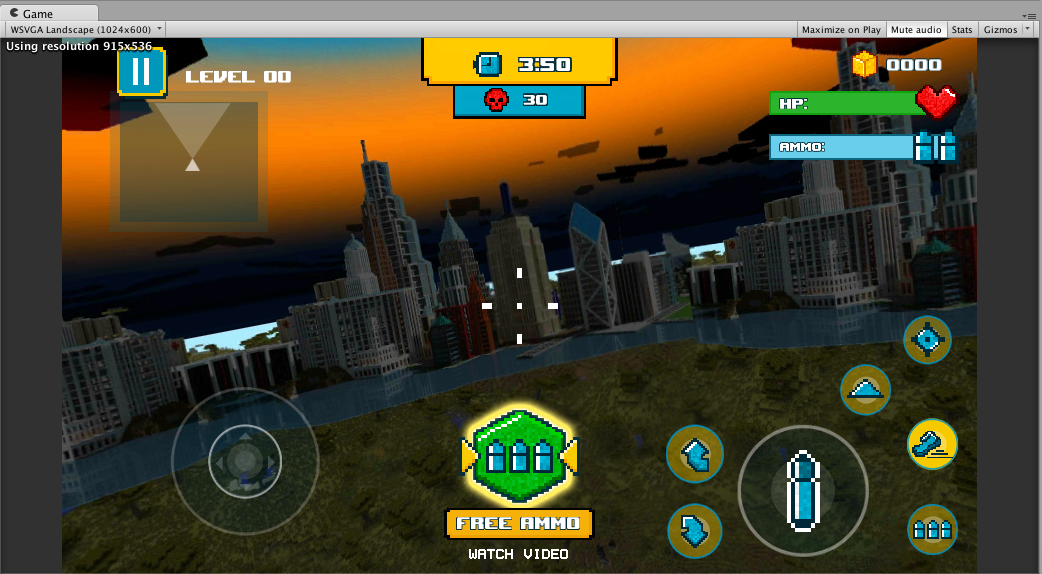
- Open your Menu Scene. You may see this UI there:
 If this is your case, then open the UI Prefab on your Hierarchy tab and deselect the “gameplay” object and select “menu”:
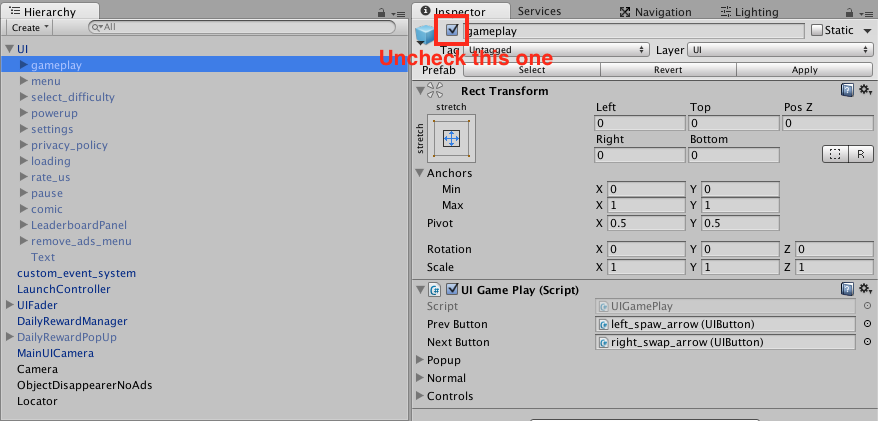
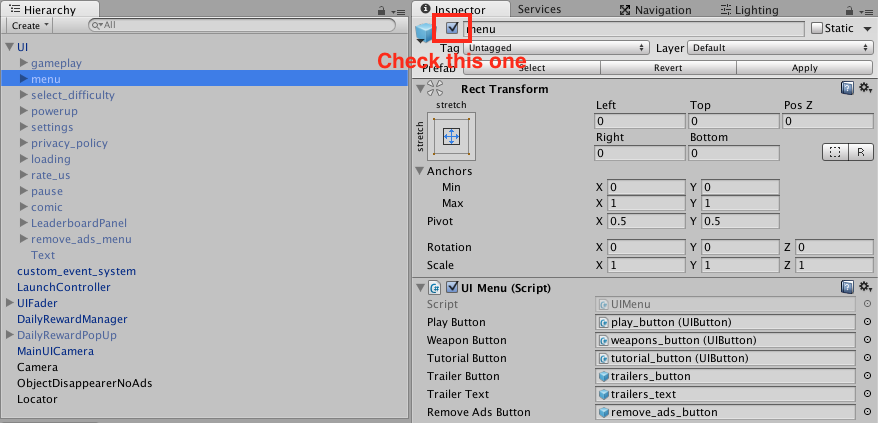 Finally Apply the changes on the Prefab.
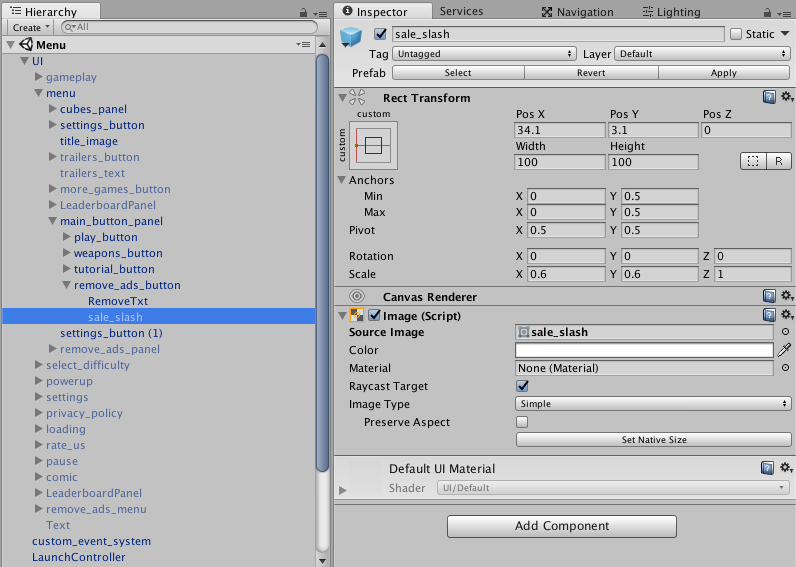
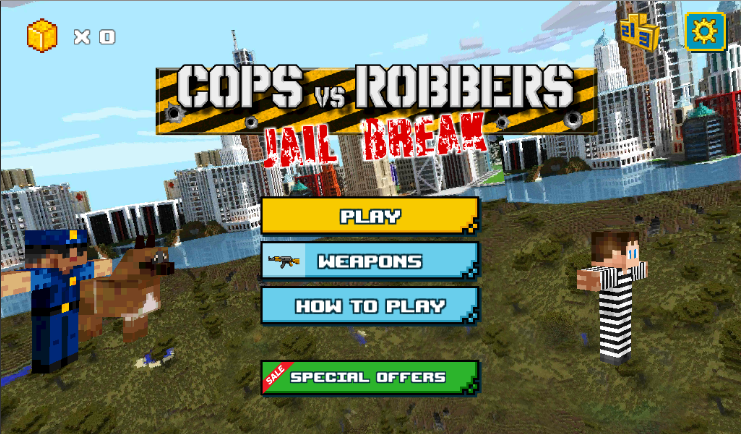
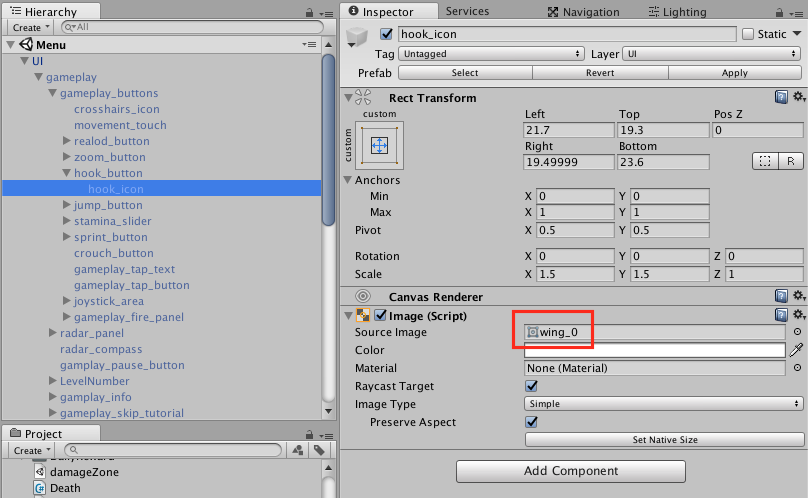
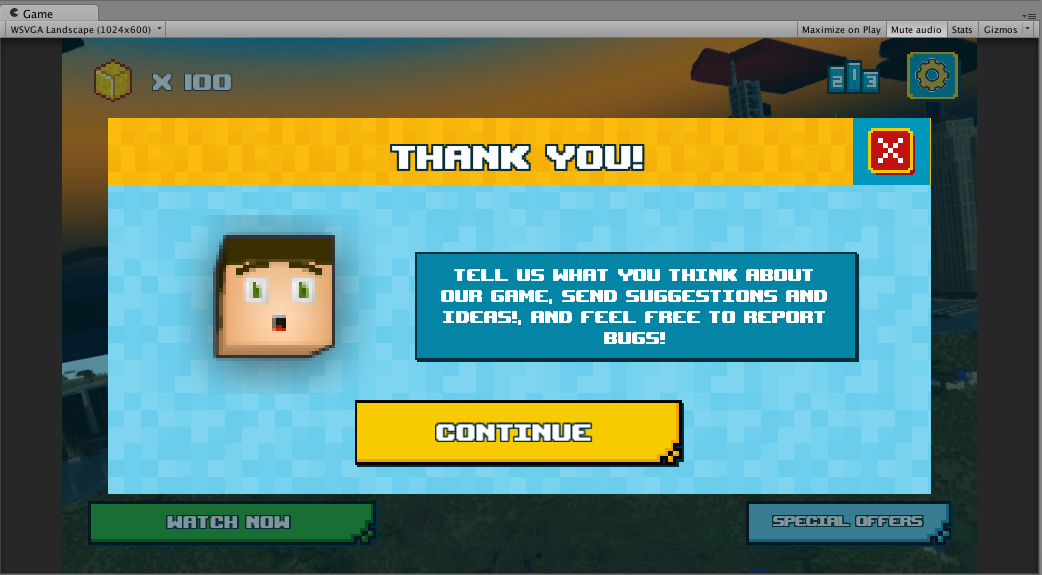
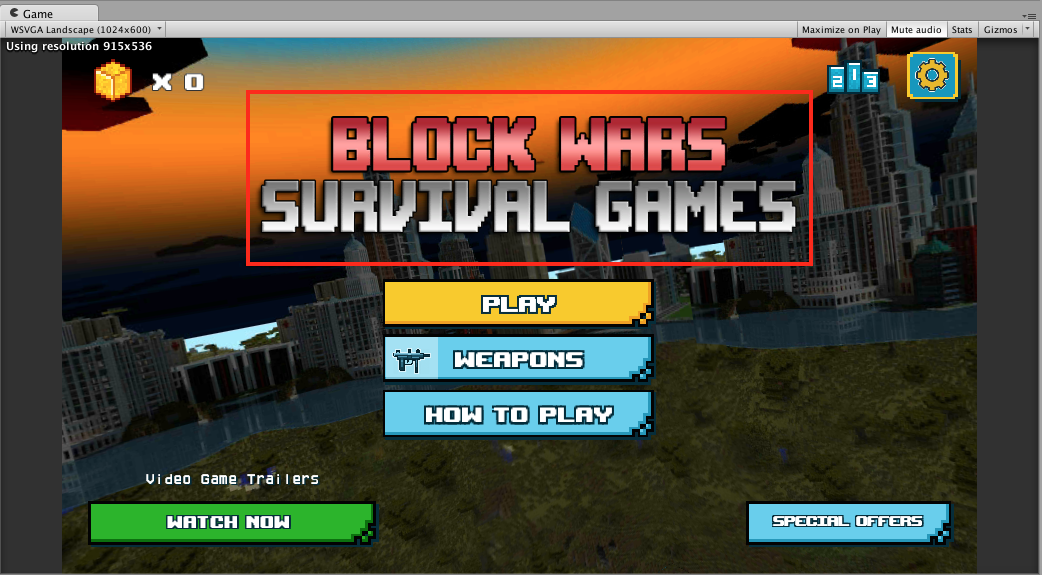
- May be when you finish importing the new package, the title image on your Menu Scene may change to the default image:
 Then, you should go to your UI Prefab on your Hierarchy and open UI -> menu -> title_image and under the “Image (Script)” section choose the correct image:
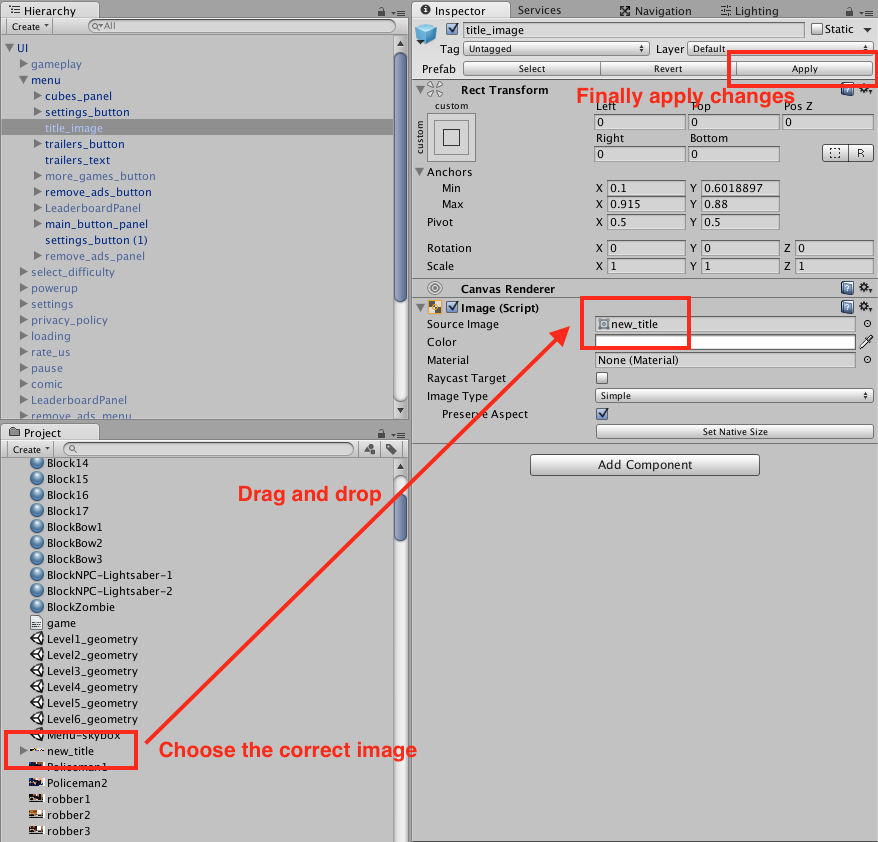 Finally Apply the changes on the Prefab.
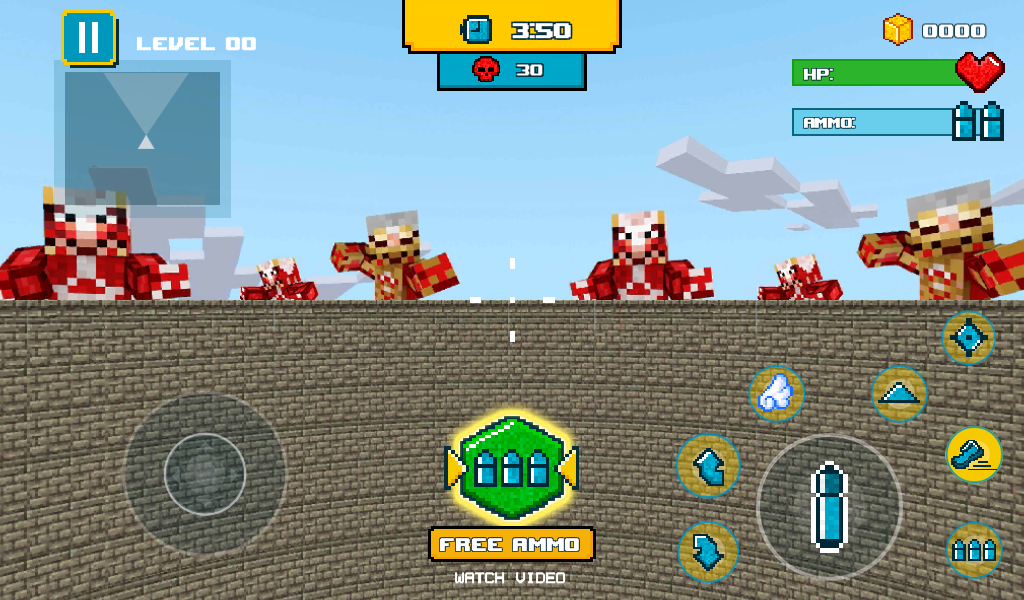
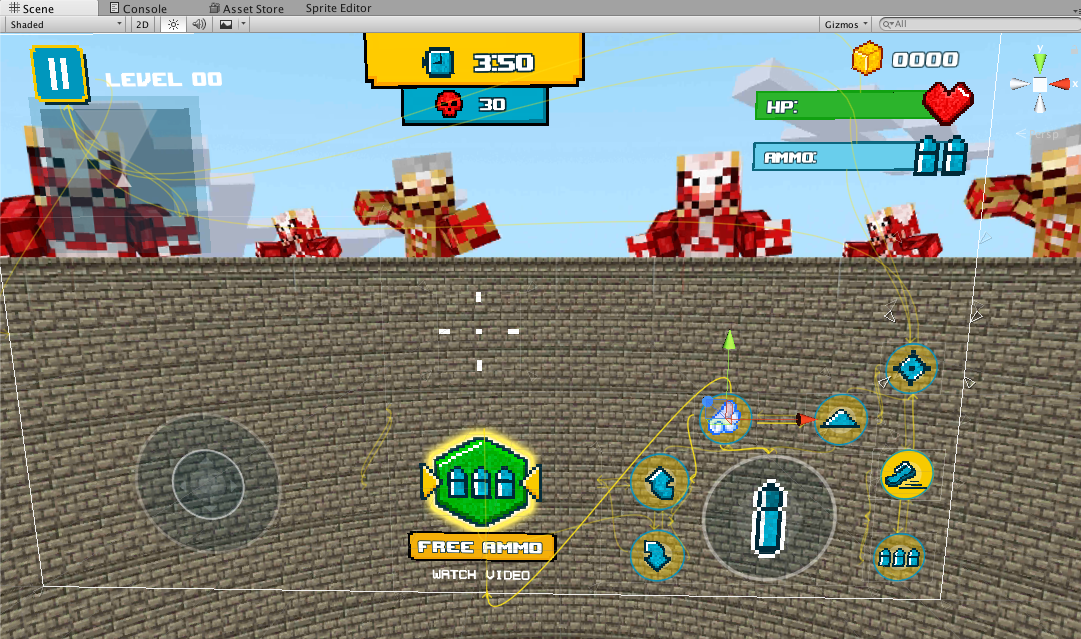
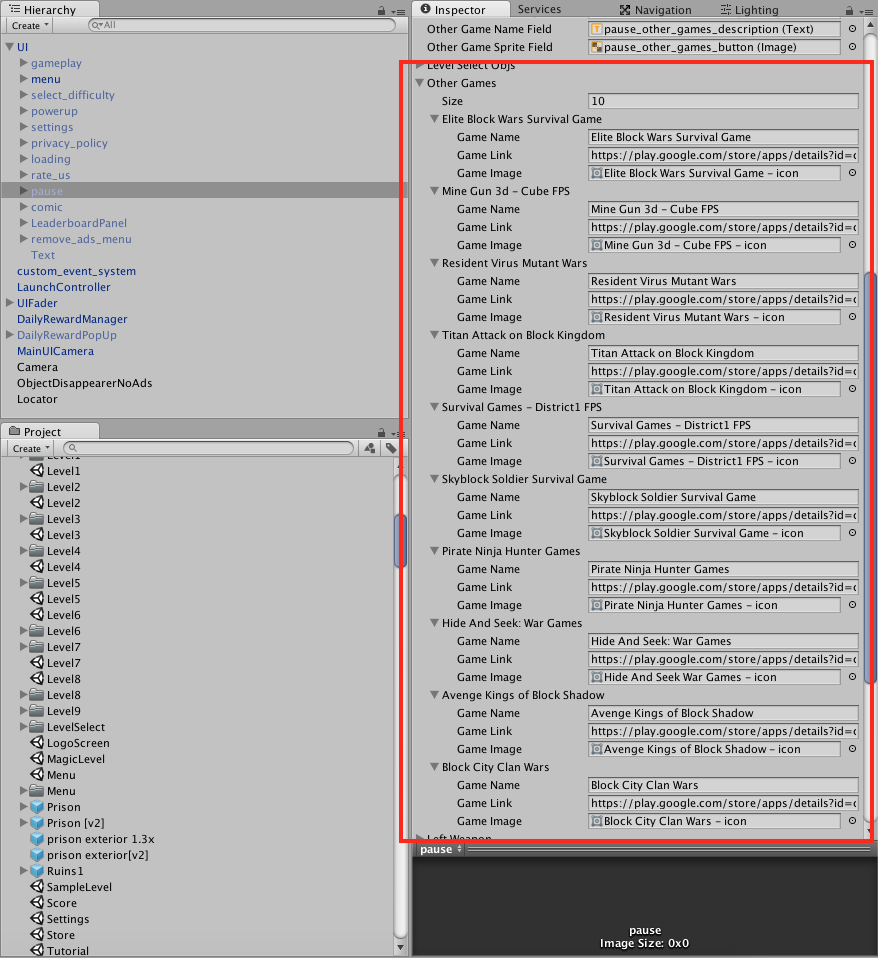
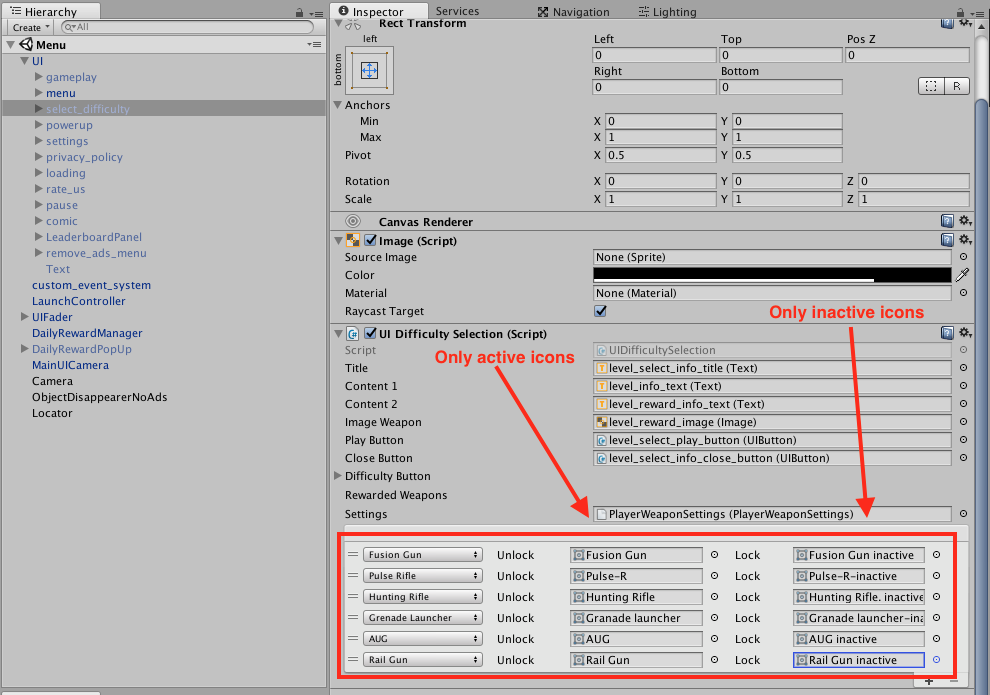
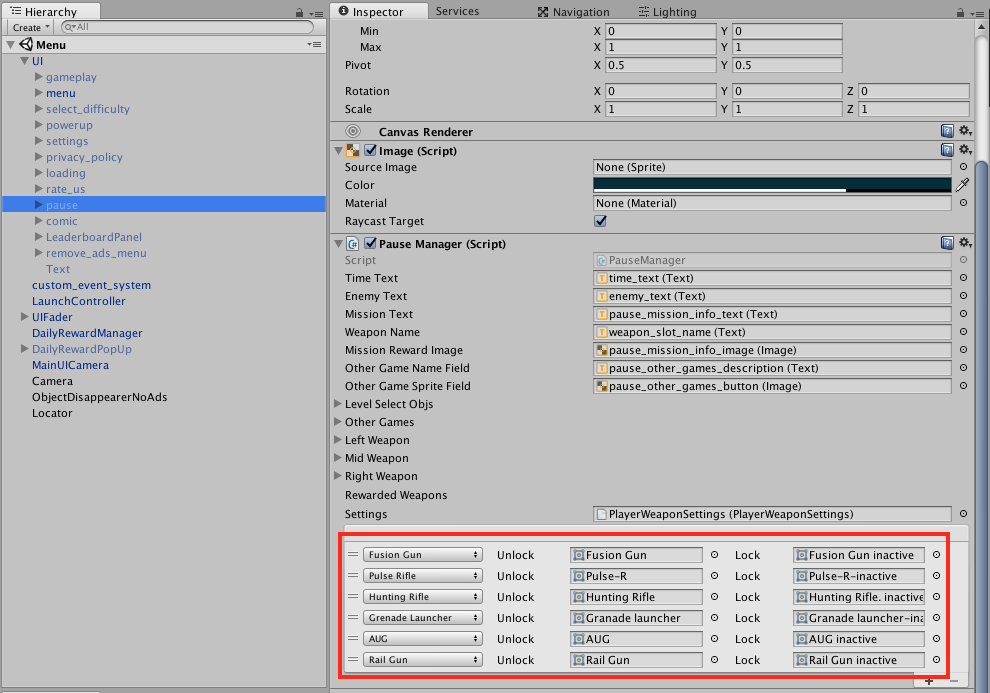
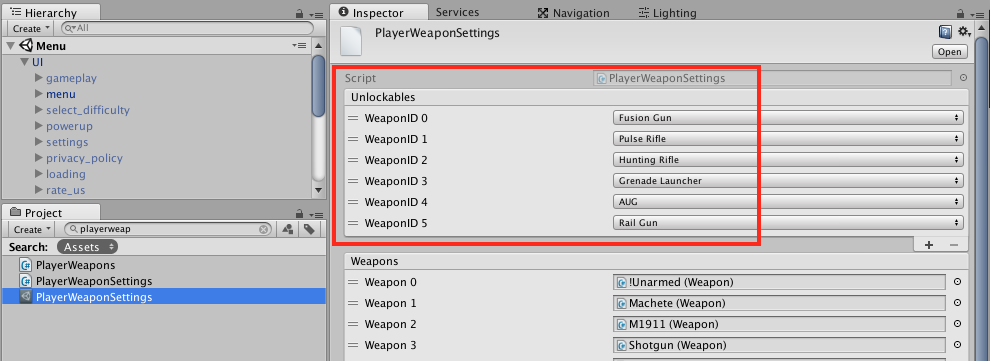
- Make sure that you have the same rewarded weapons in everywhere. You should look into 5 places:
1. Inside UI -> select_difficulty
2. Inside UI -> pause
3. Inside UI -> select_difficulty -> level_select_info_panel -> level_reward_image
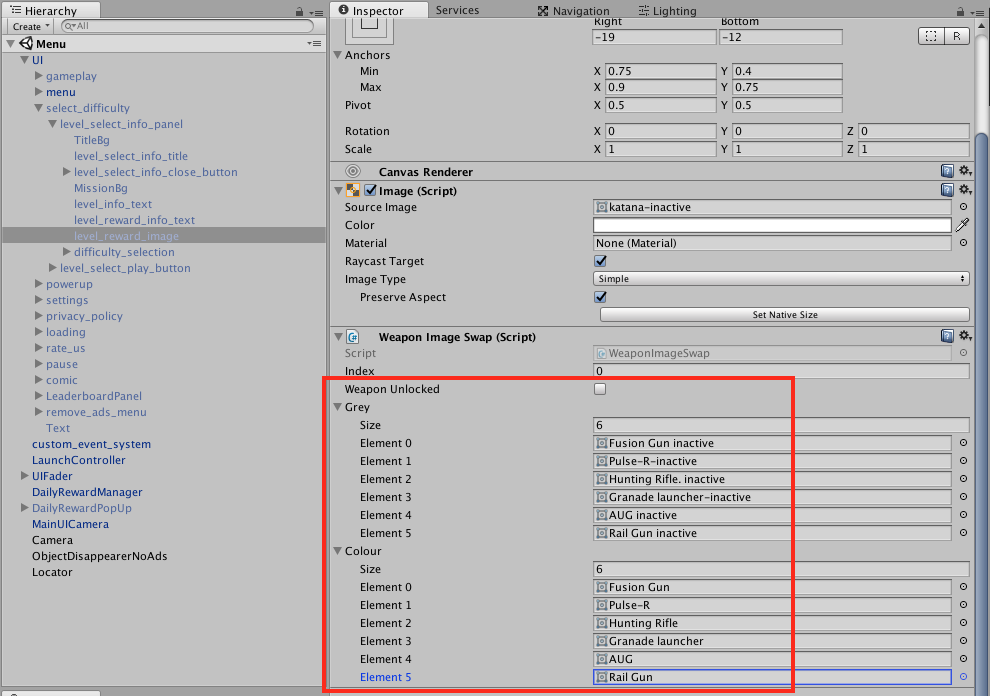
4. On PlayerWeaponSettings element (you can find it in the Project tab)
5. On LevelSelectCanvas -> LSMissionInfoPanel inside LevelSelect scene
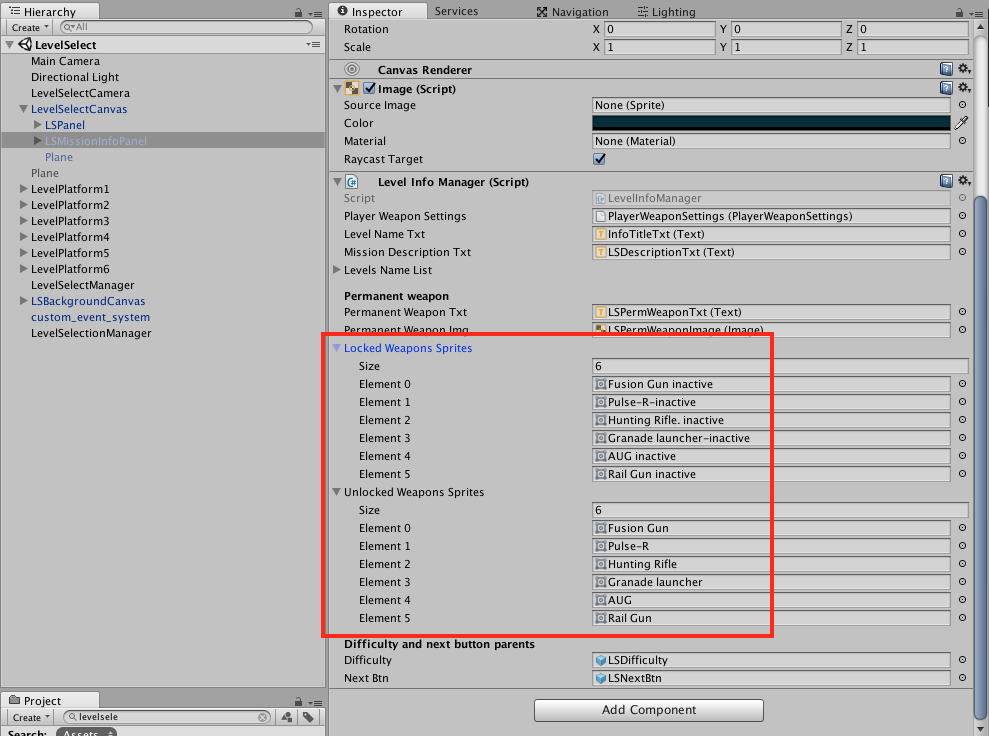
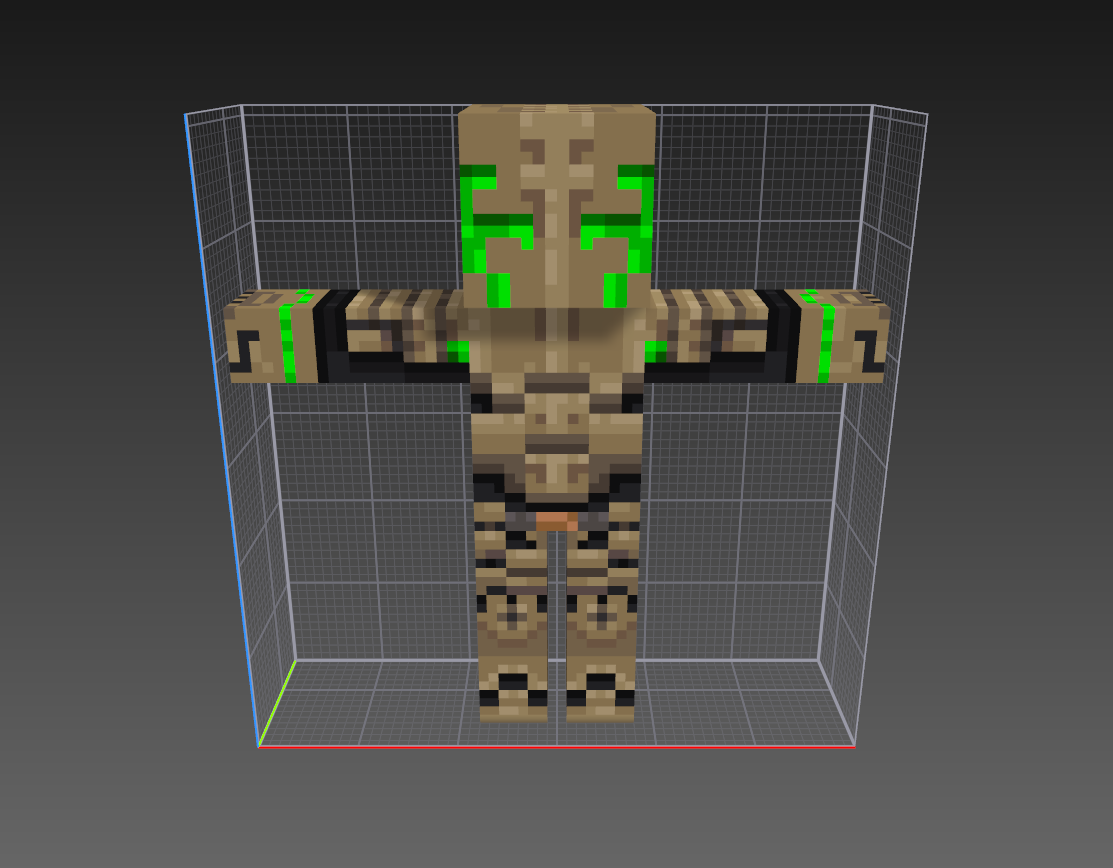
You’re free to use any rewarded weapons you want, just make sure that the weapons match the actual game. Also notice that not all the weapons have icons created and that the “inactive” icons should be in their correct places. Don’t forget to hit the Apply button every time you modify a prefab.
Verify changes
Verify that all the changes were made successfully.
- New company Logo for Battle Blockyverse Studio (Logo Screen)
- Check the correct Company Name under Player Settings
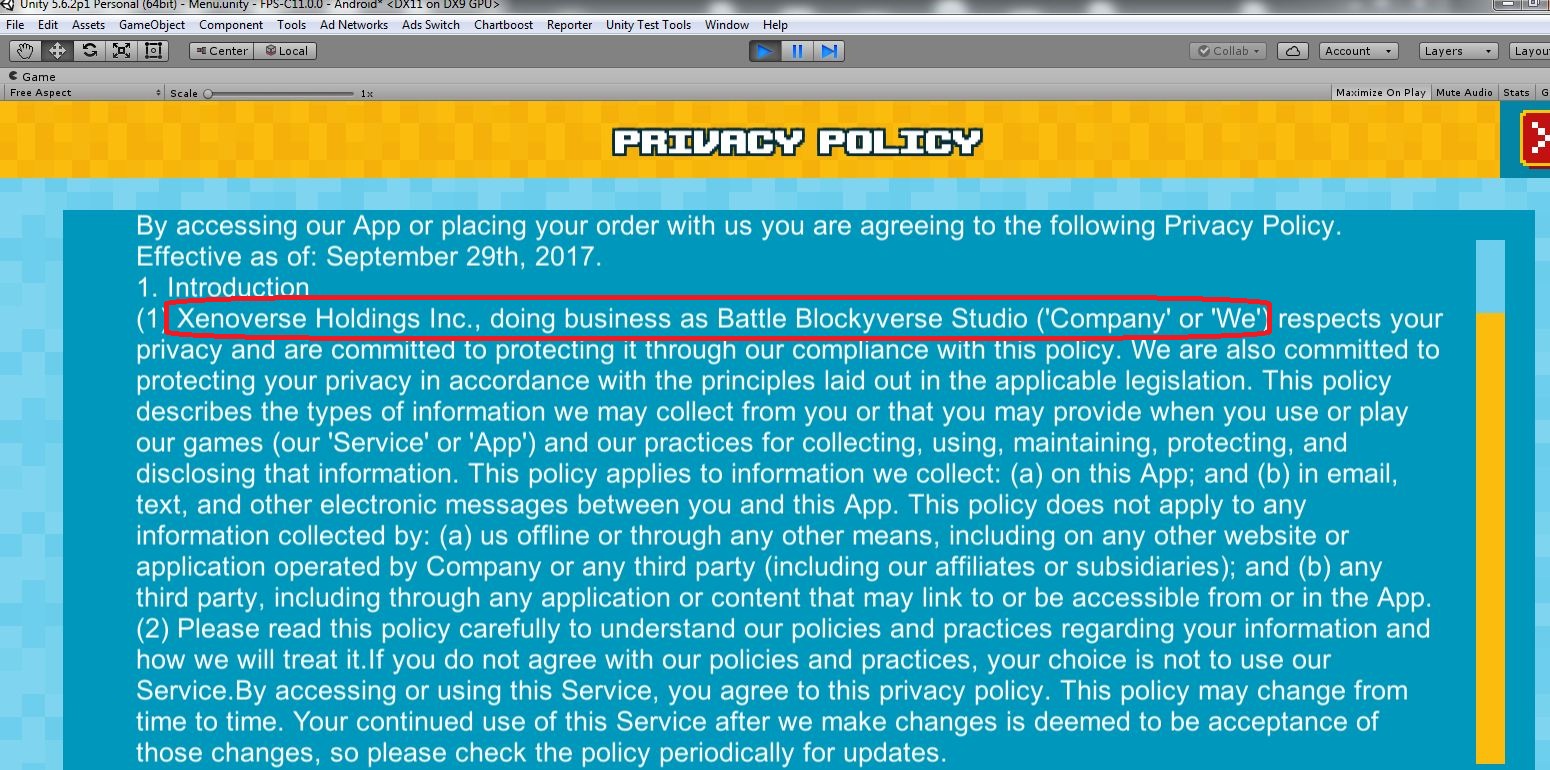
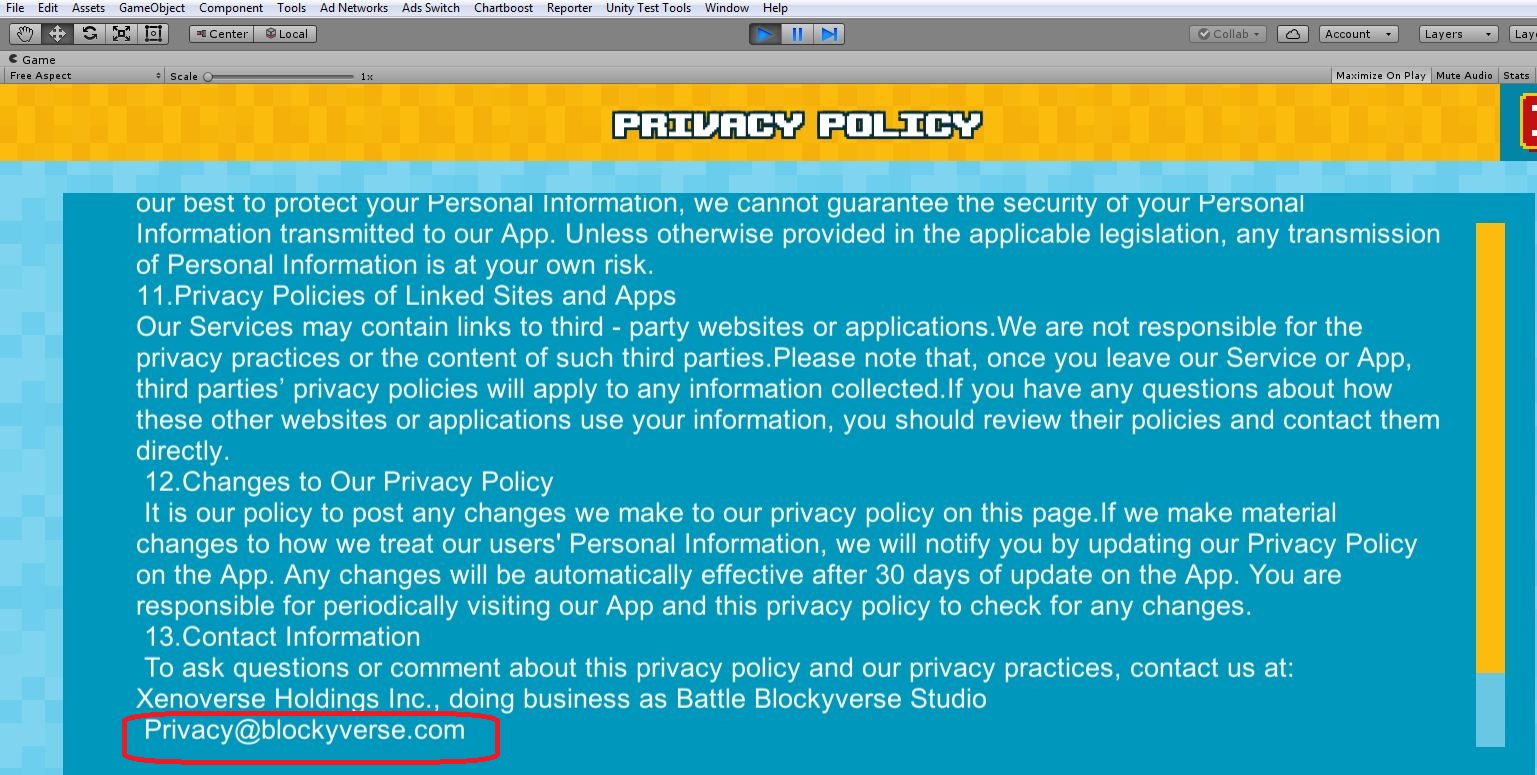
- Play the game inside Unity editor and check the new Privacy Policy
Configure your game
Finally you need to configure all your game settings and new adnetworks id’s.
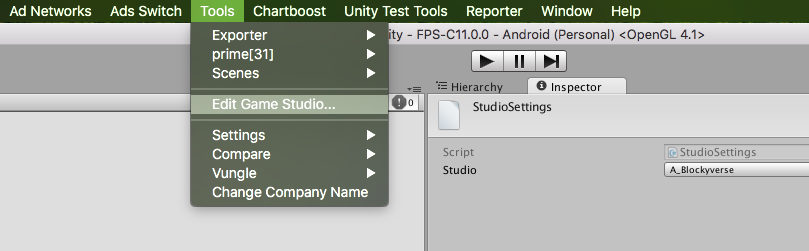
Change Studio
Go to Tools -> Edit Game Studio and choose “A_Blockyverse”:
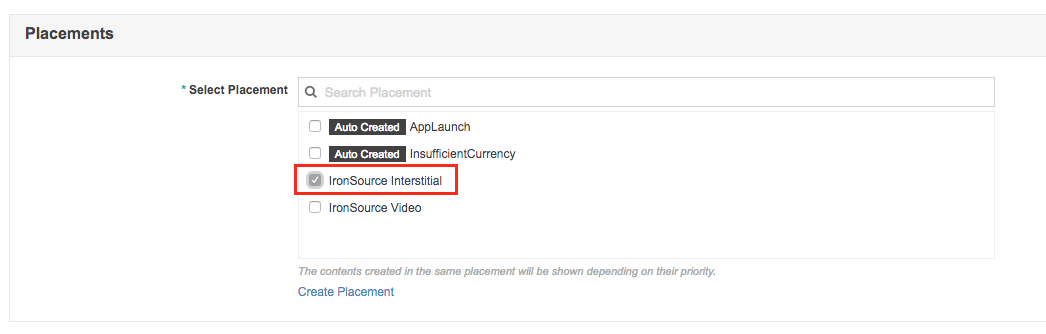
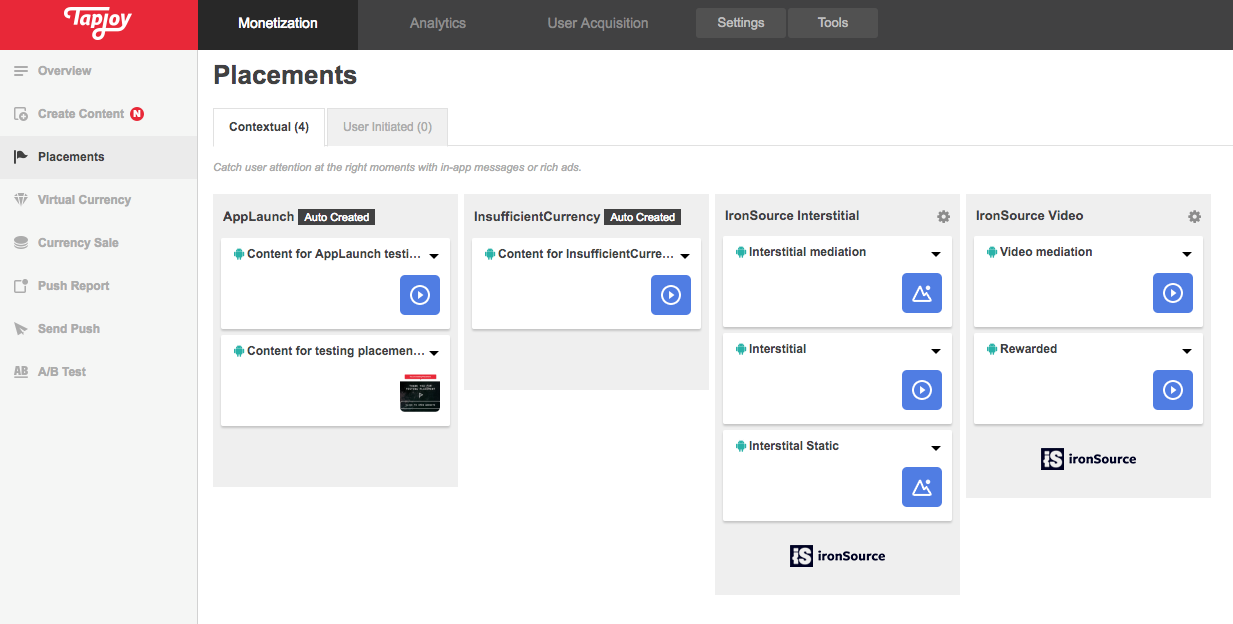
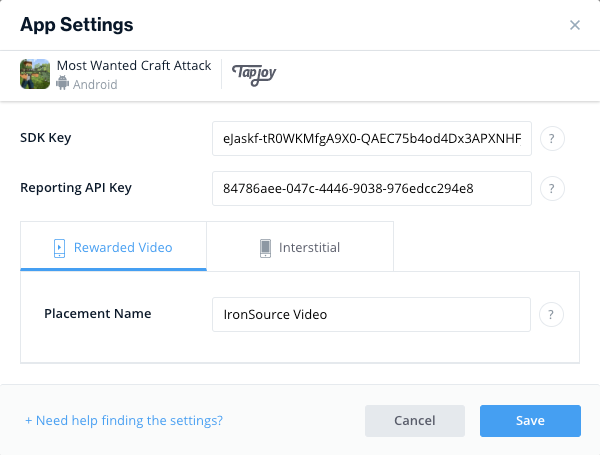
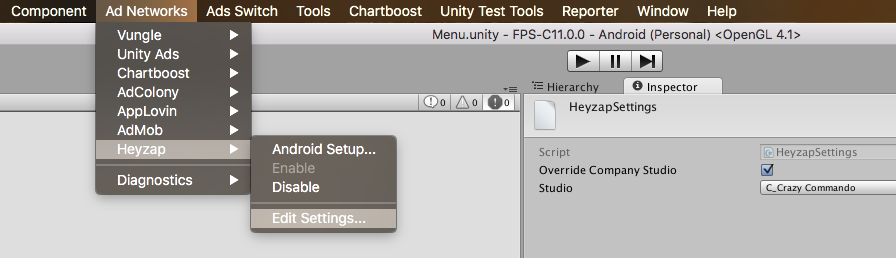
Heyzap settings
Go to Ad Networks -> Heyzap -> Edit Settings and choose the older company in which this game was linked (you can find the older company in the List of Apps). Also don’t forget to check the Override Company Studio button. Make sure to select only A, B, C & E from this menu. We didn’t have separate ad network logins for remaining companies as usual.
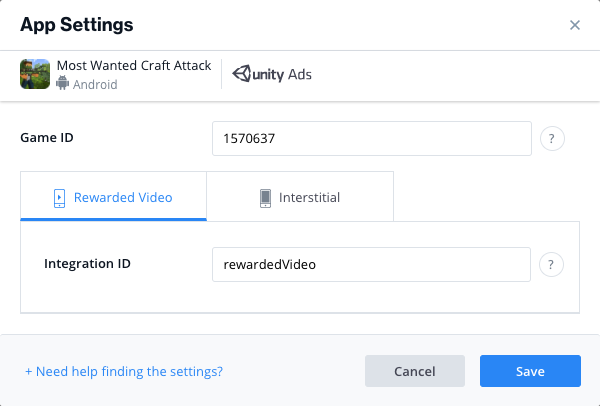
Unity Ads & Unity Analytics
In order to configure your game in Unity Ads, please make sure to complete this process:
Setup UnityAds
When you finish, please follow this steps to configure your game into Unity Analytics:
Setup Unity Analytics
If you see any error on the Console please contact to Production or FPS Teams.
Update Heyzap mediation
You can follow this process to update AppLovin into Heyzap mediation:
Set Up AppLovin Ads Under Heyzap Mediation
You can follow this process to update UnityAds into Heyzap mediation:
Set Up Unity Ads Under Heyzap Mediation
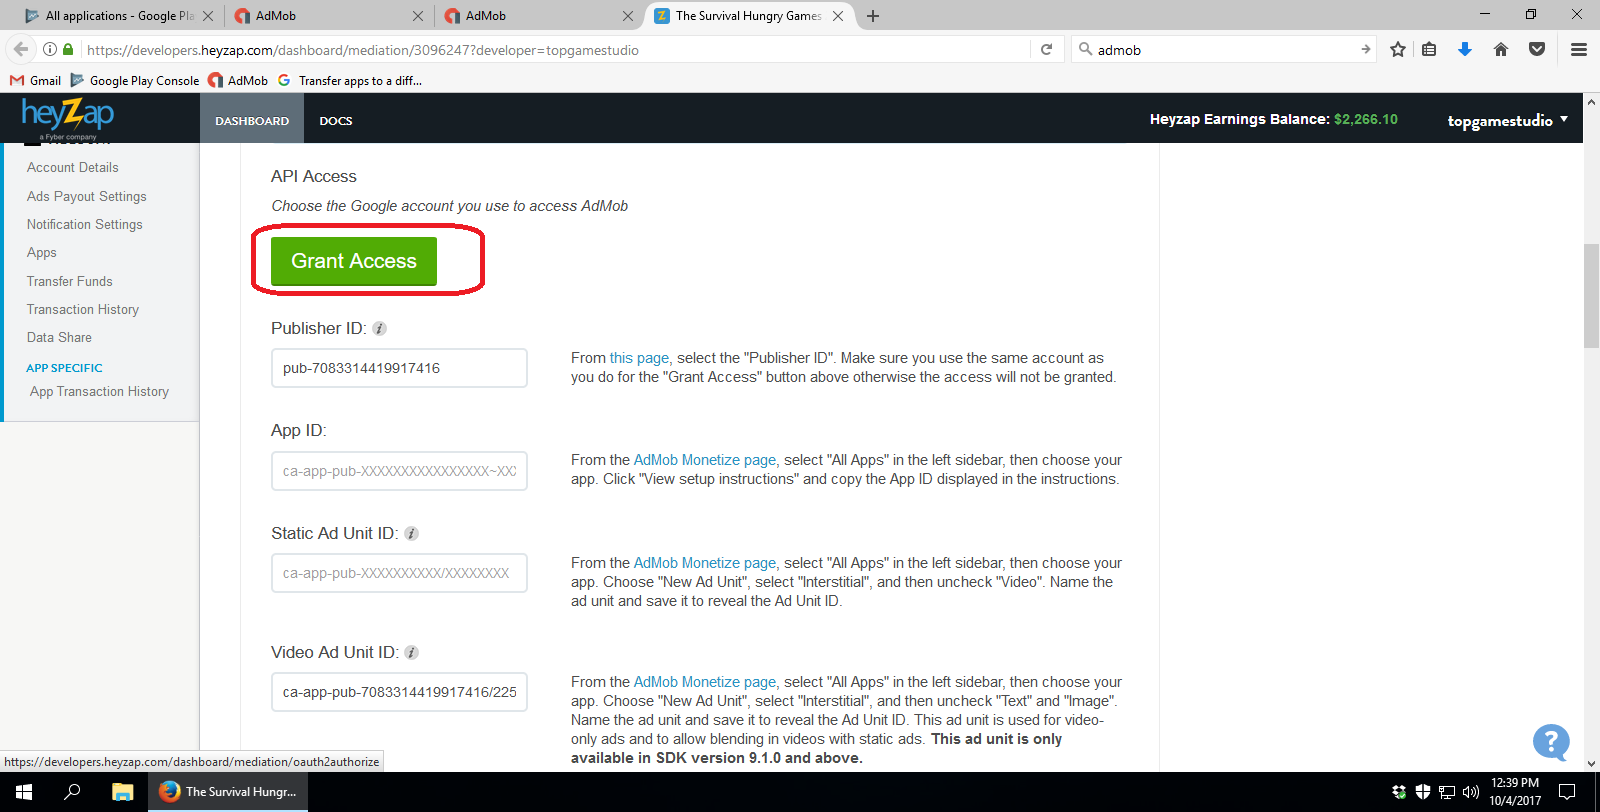
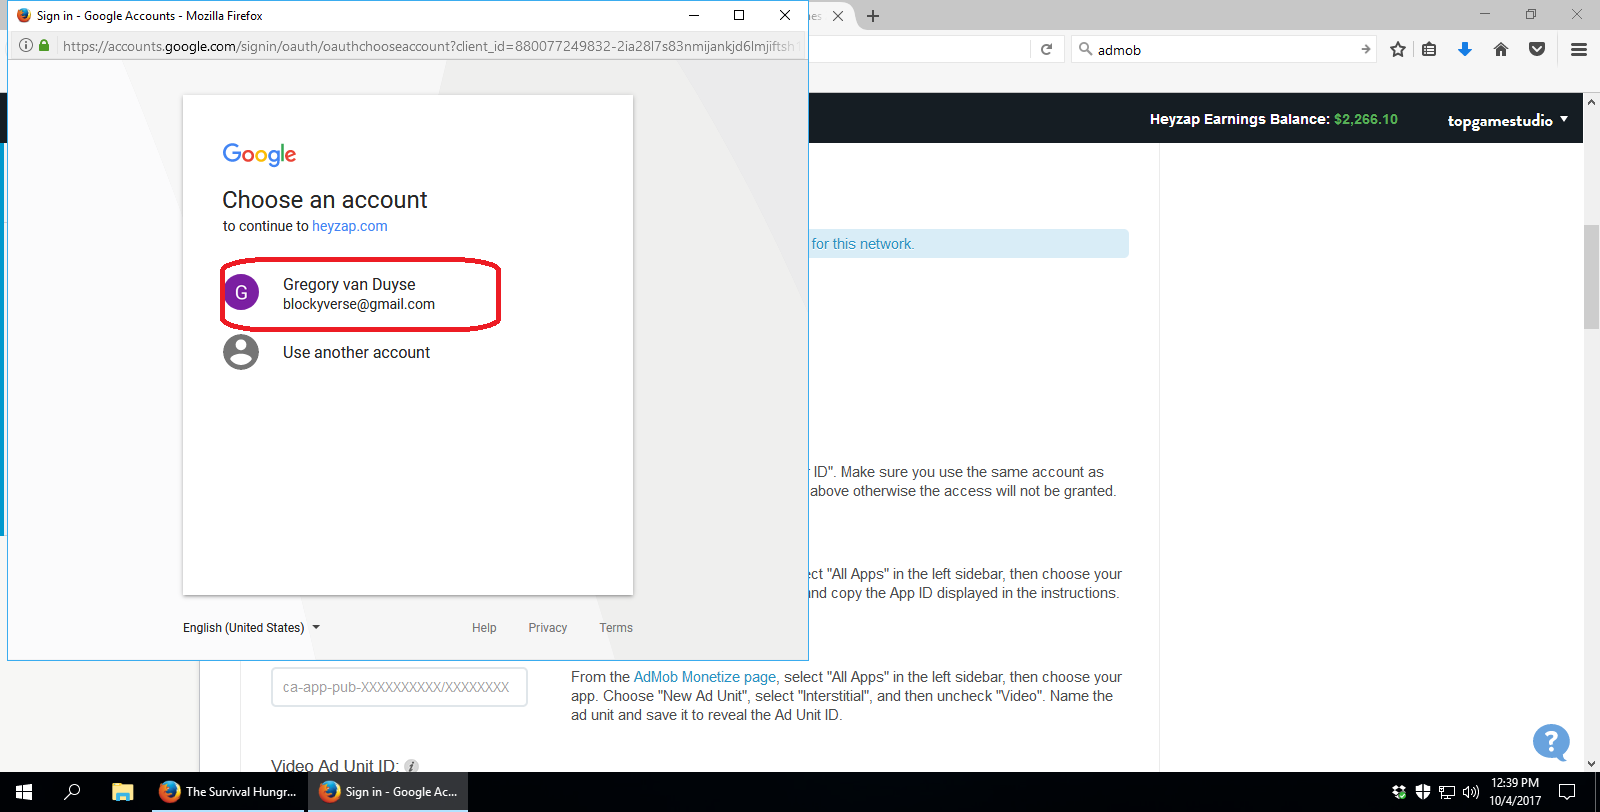
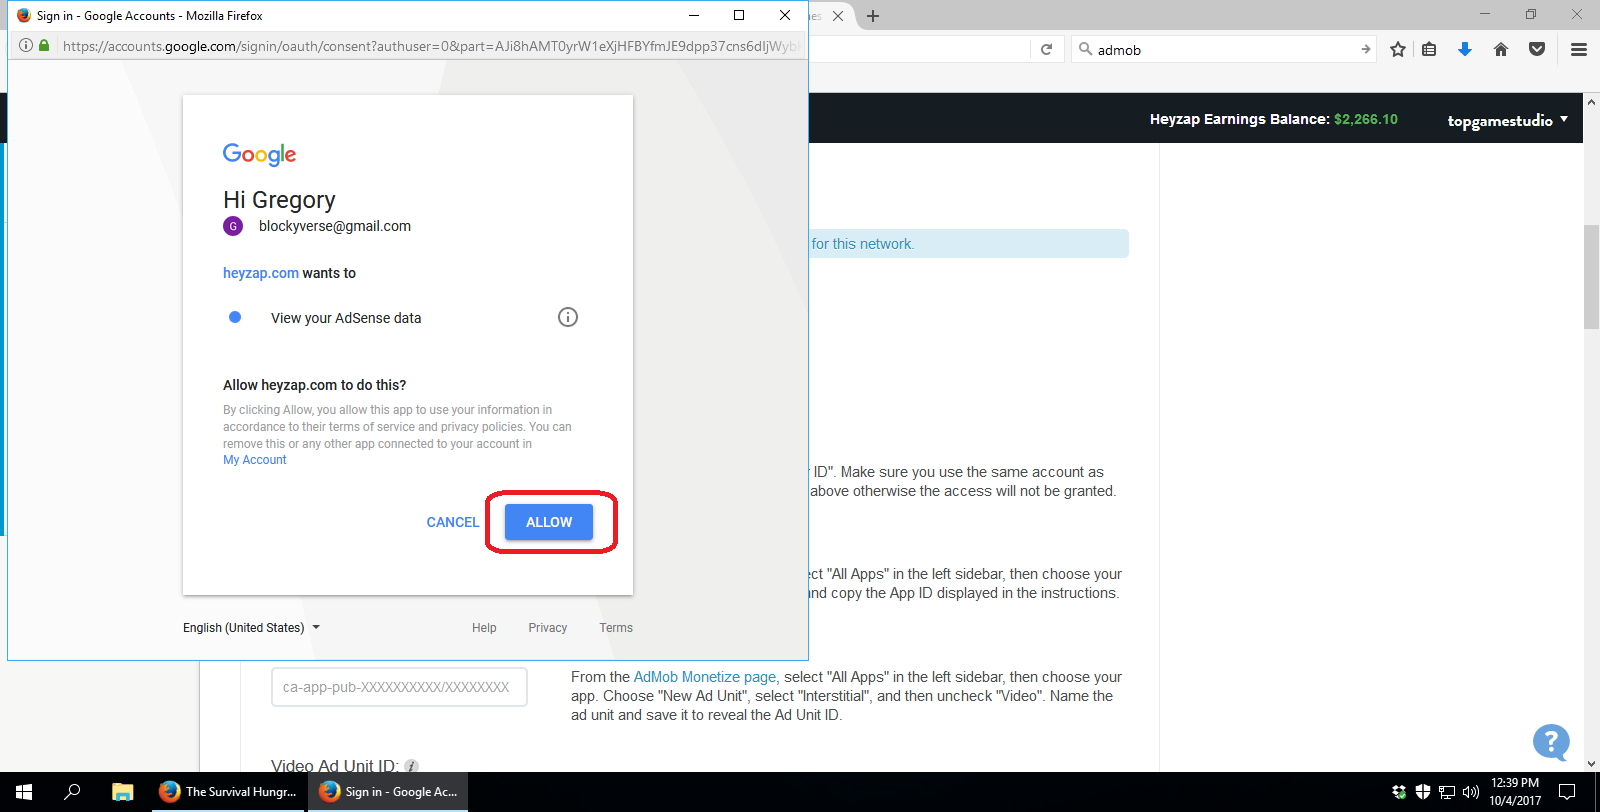
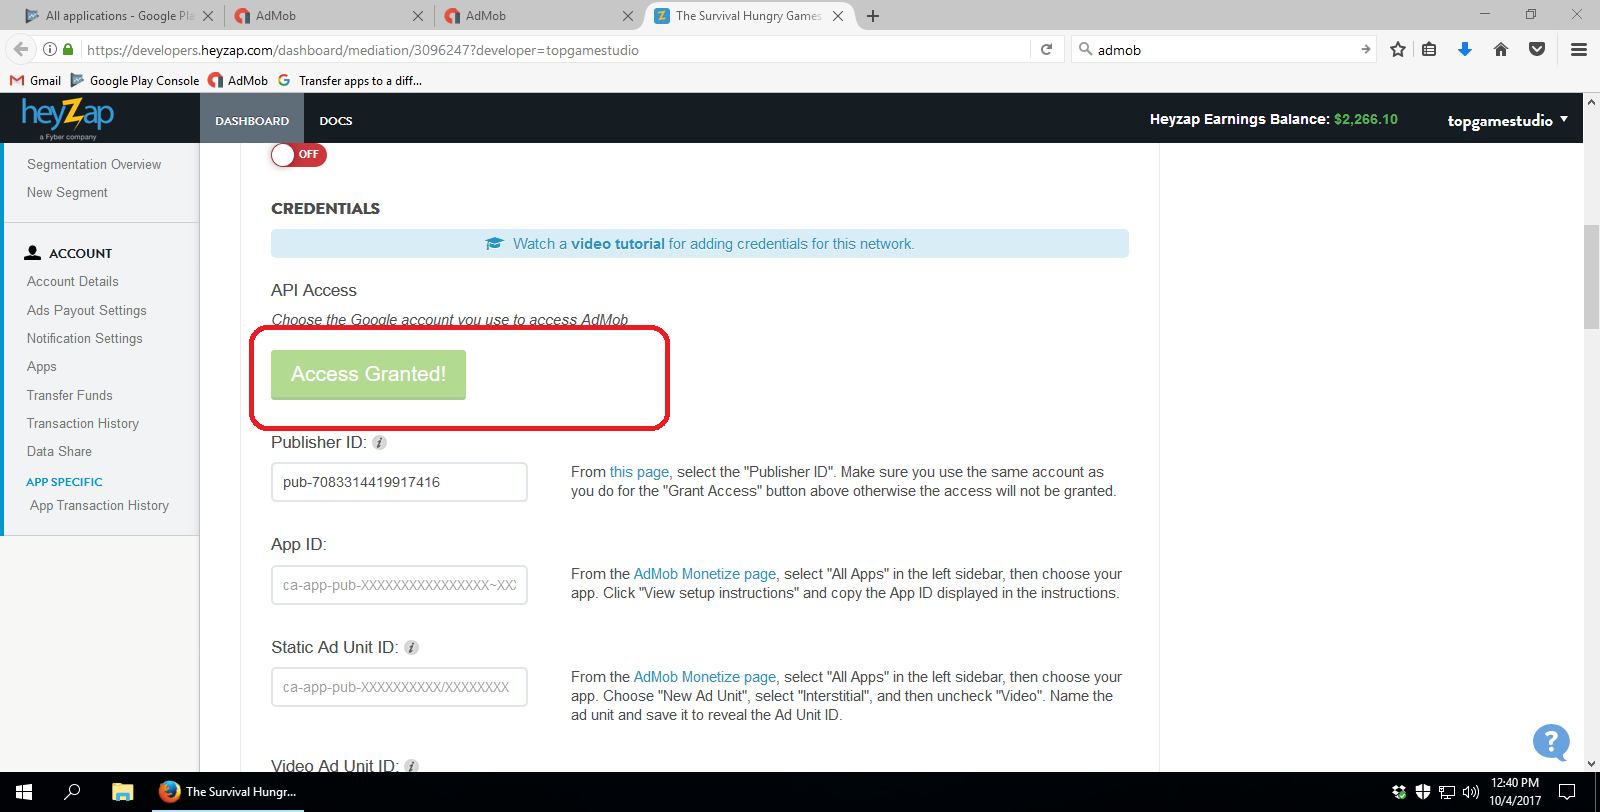
You can follow this process to update Admob into Heyzap mediation:
Set Up Admob Ads Under Heyzap Mediation
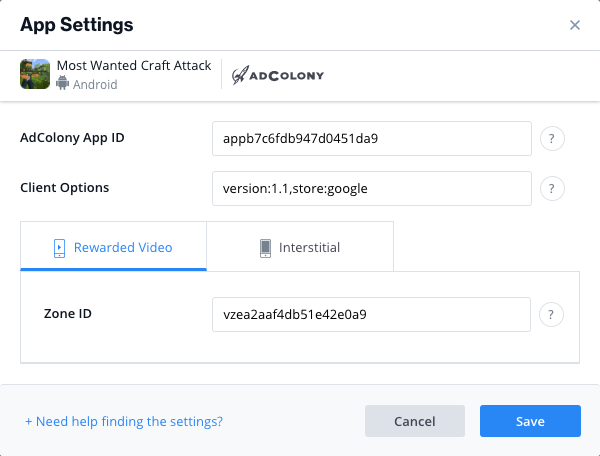
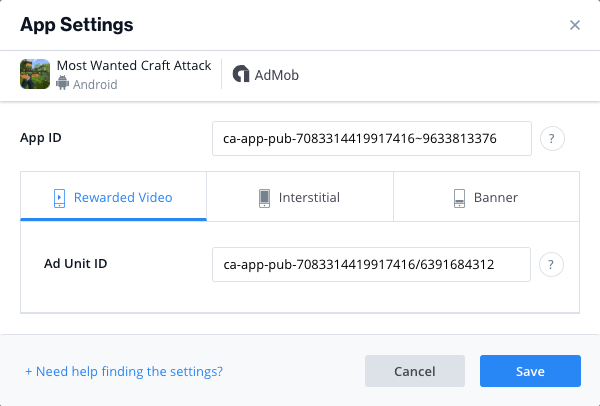
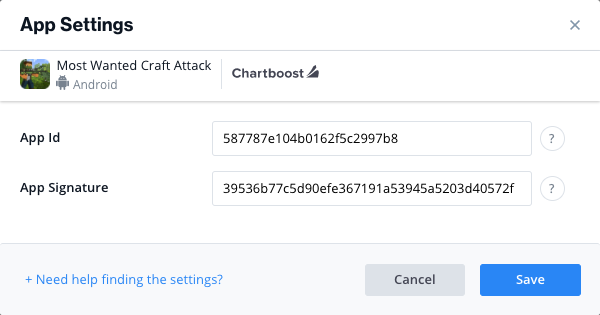
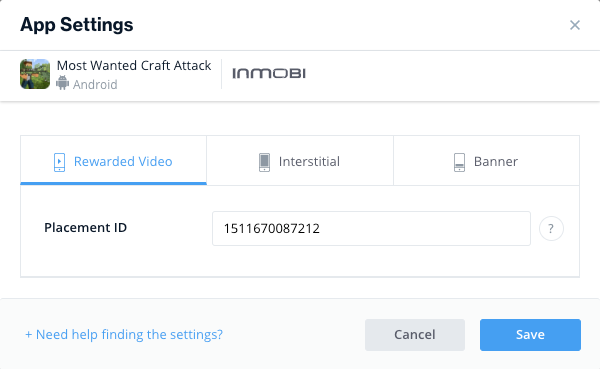
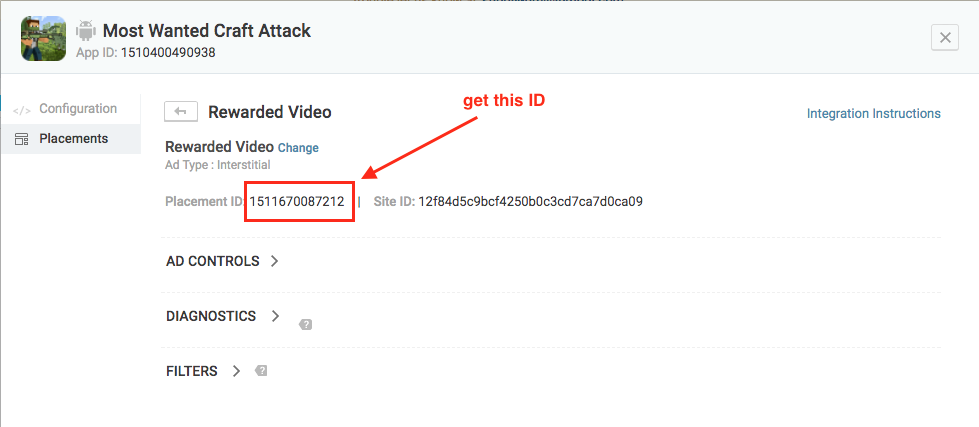
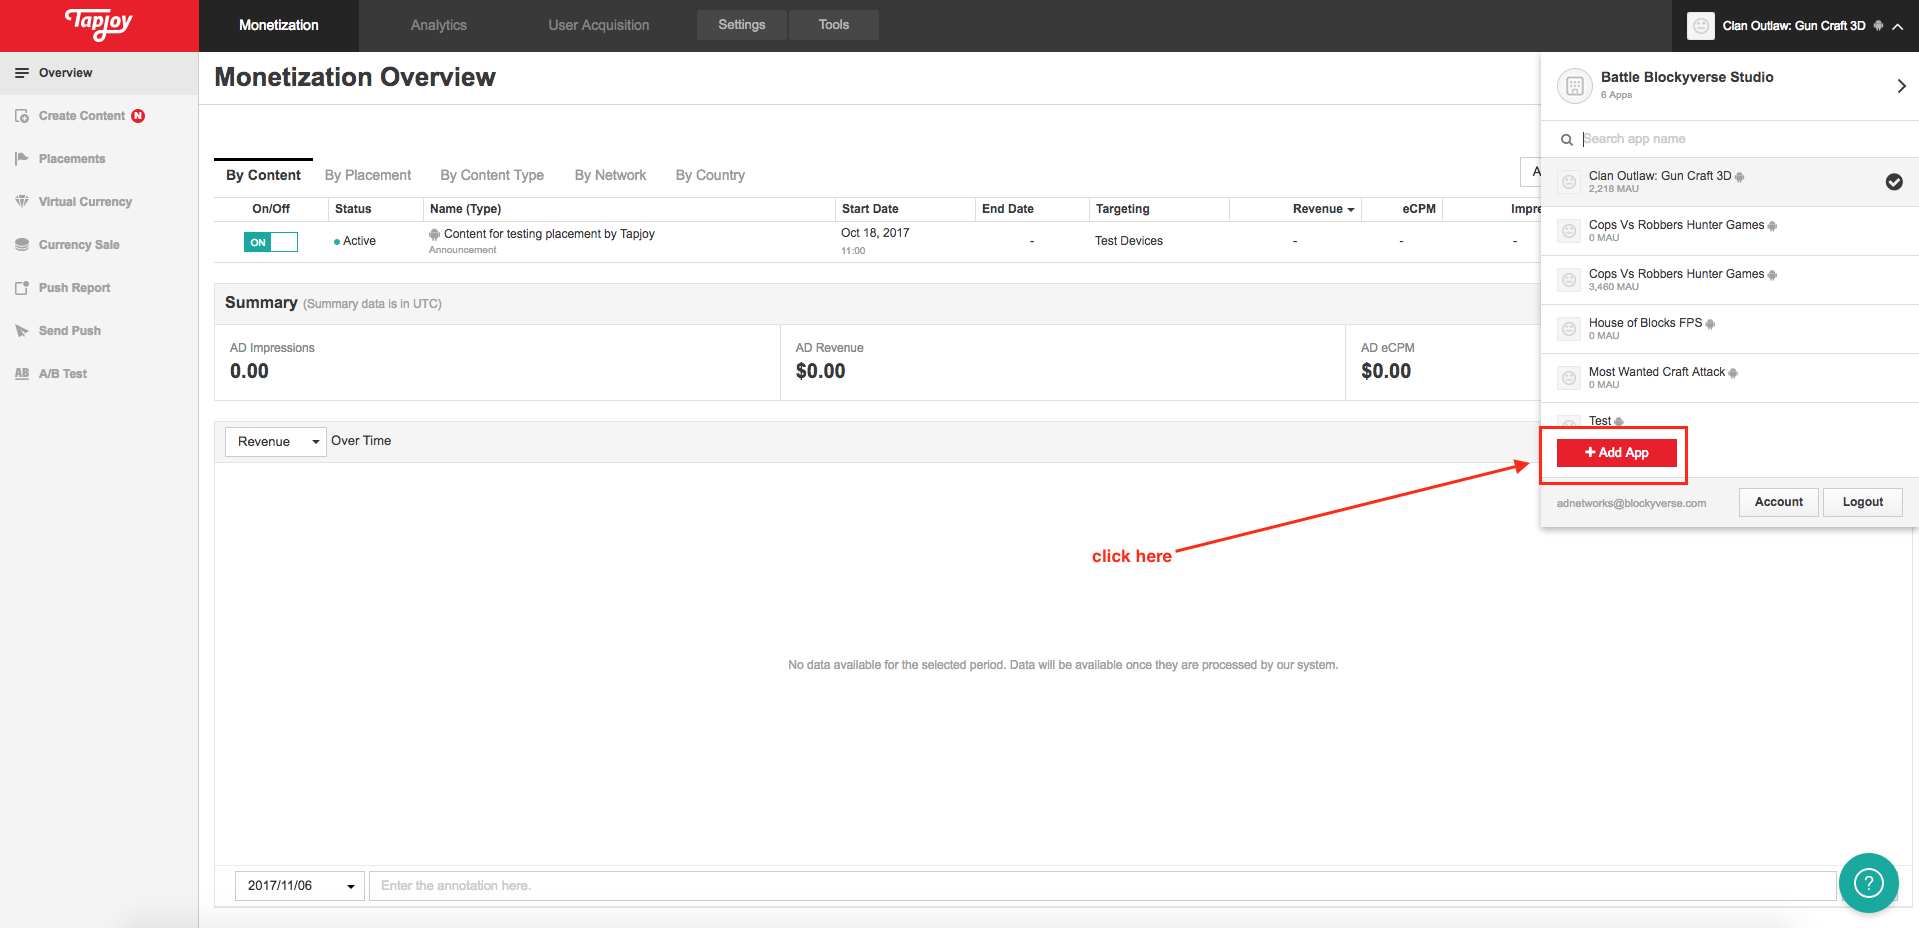
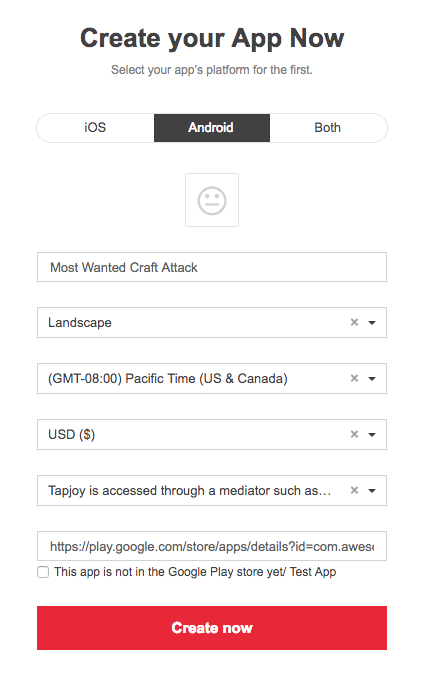
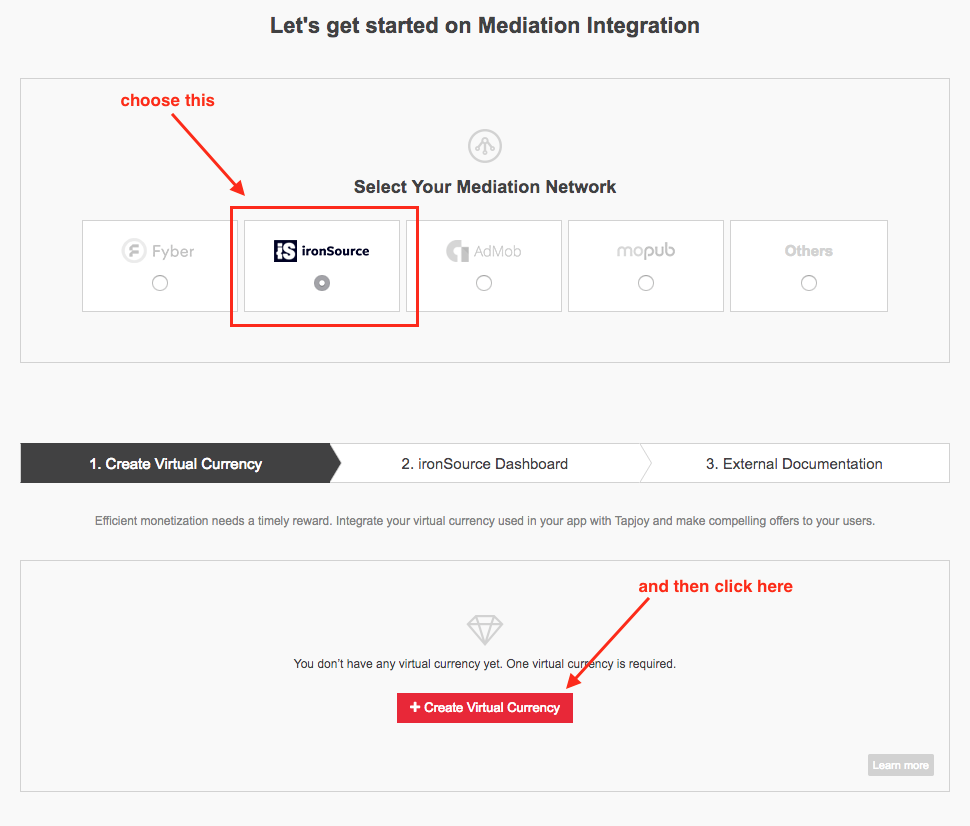
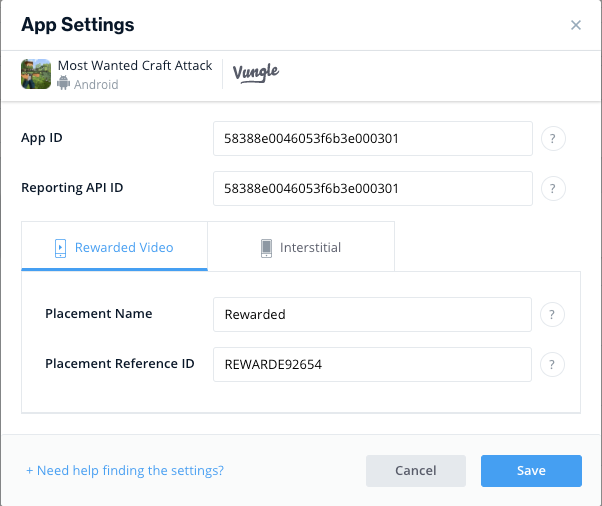
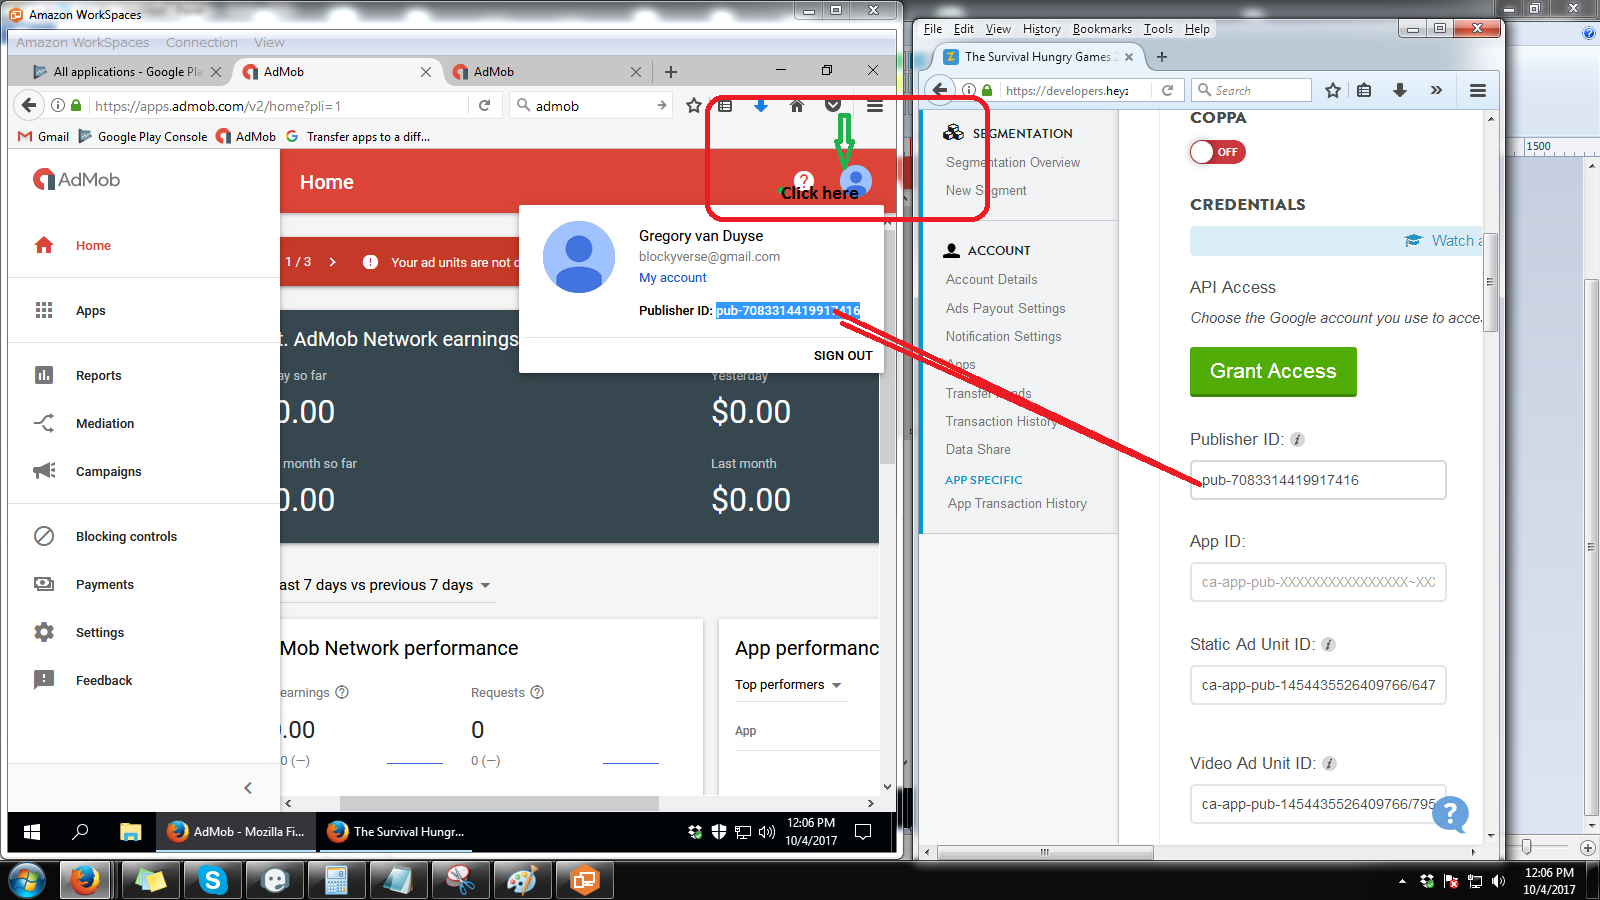
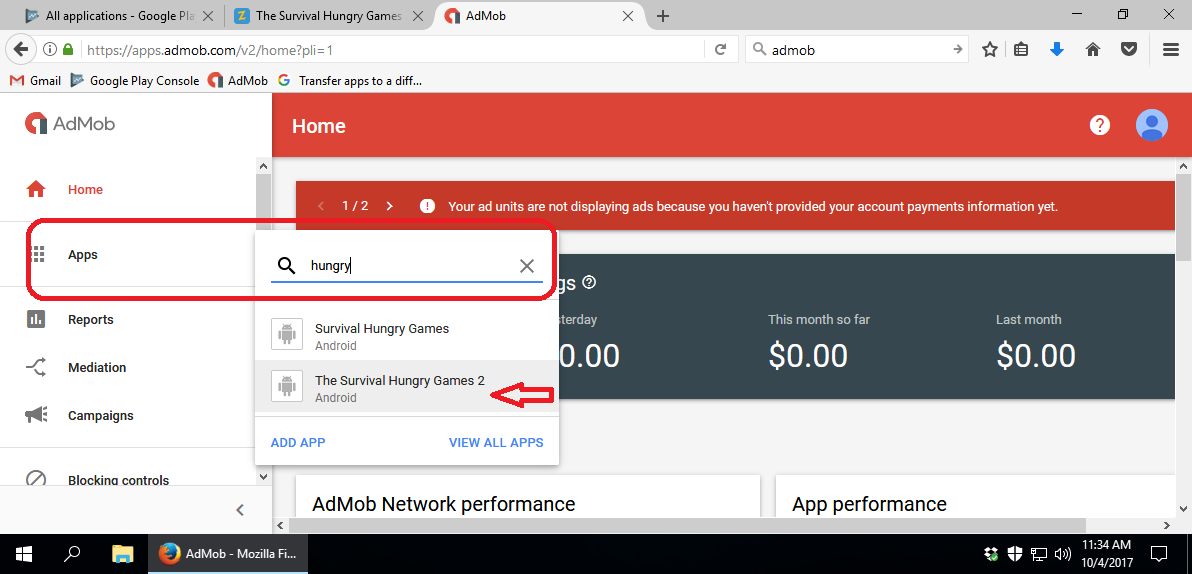
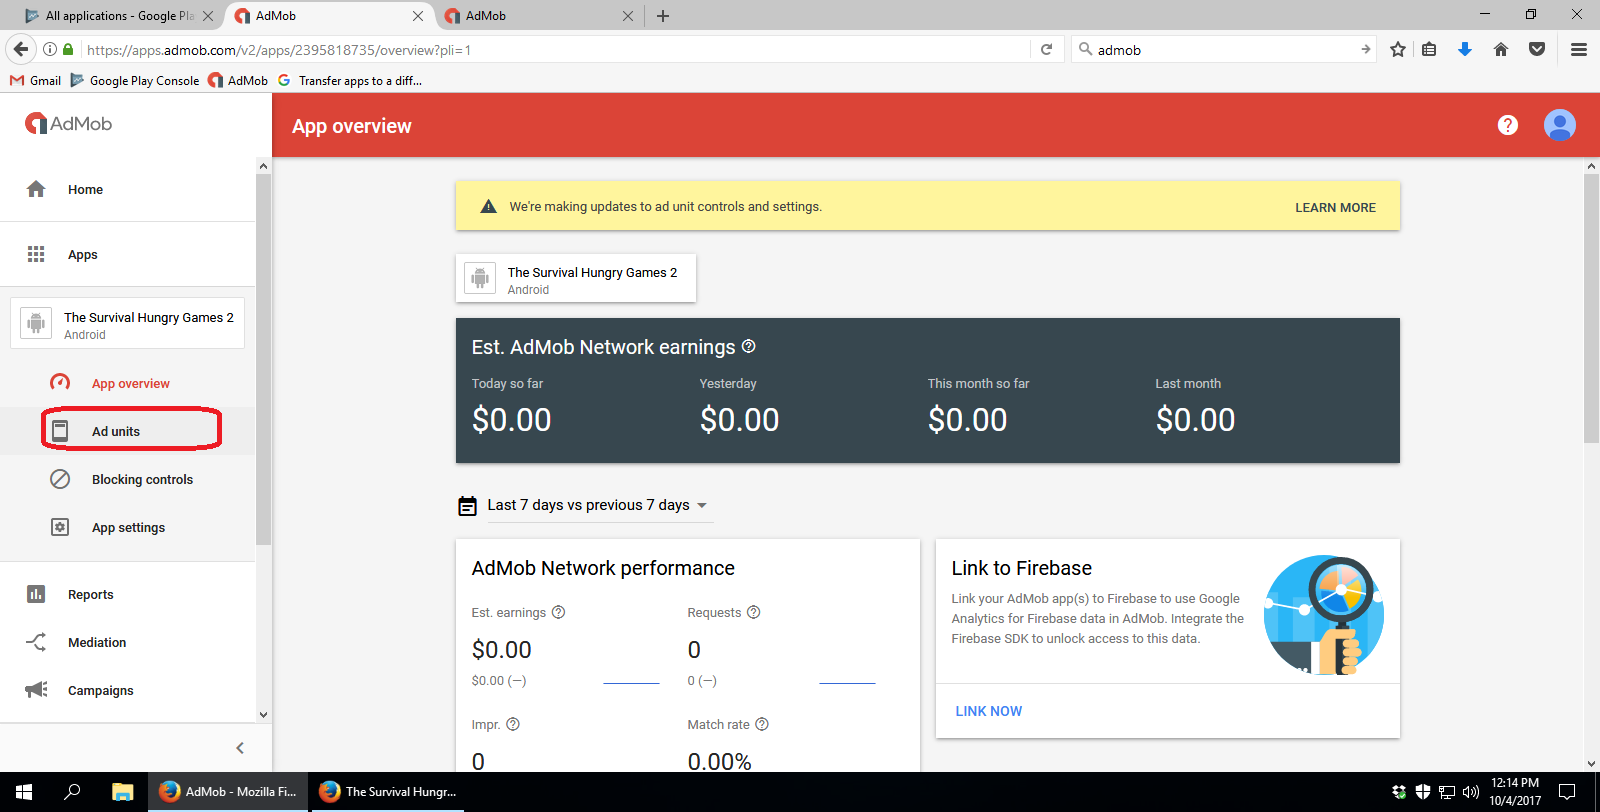
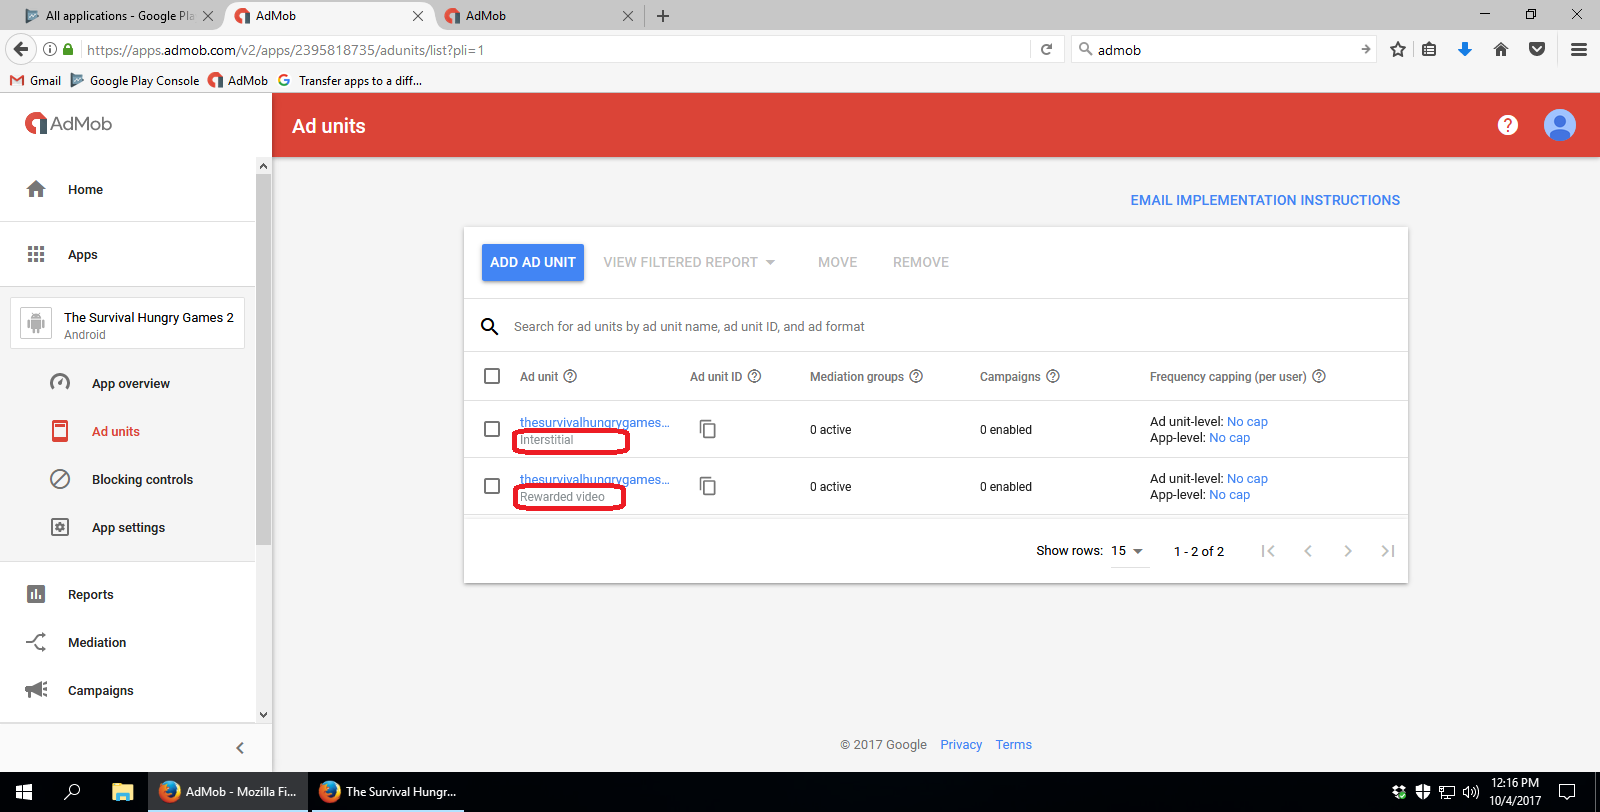
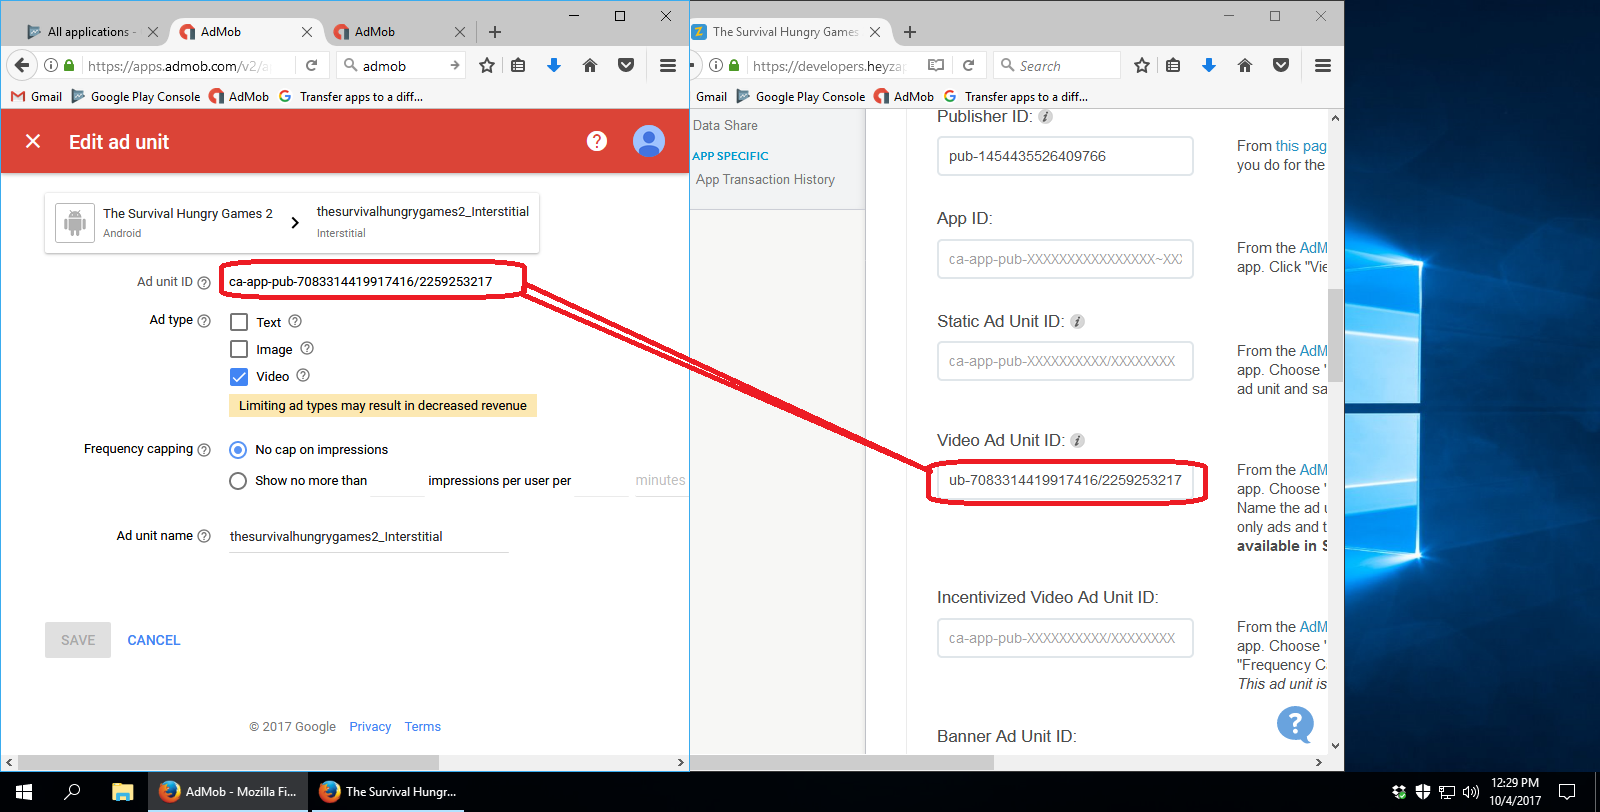
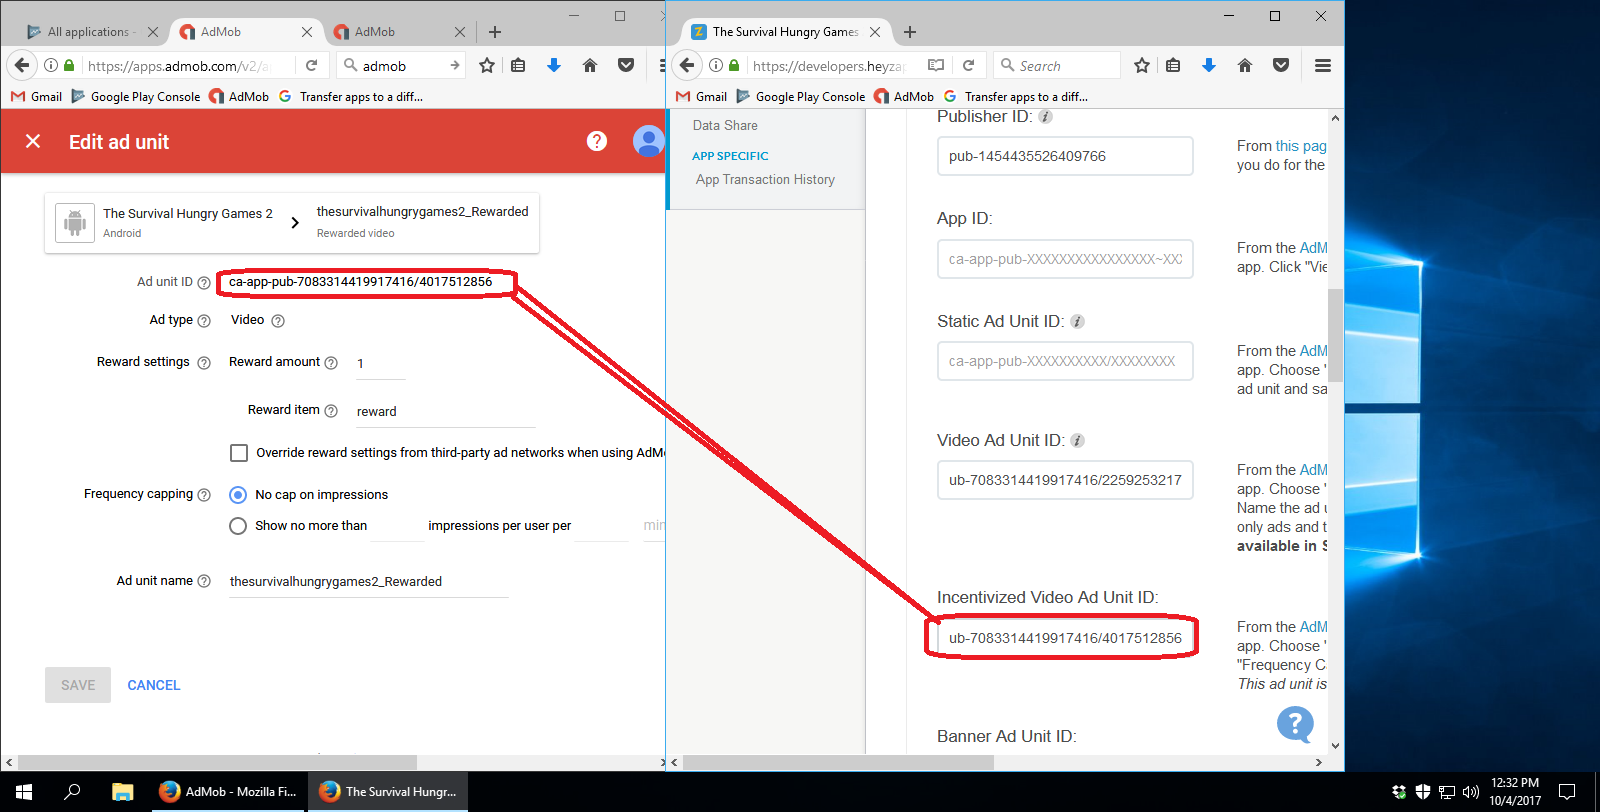
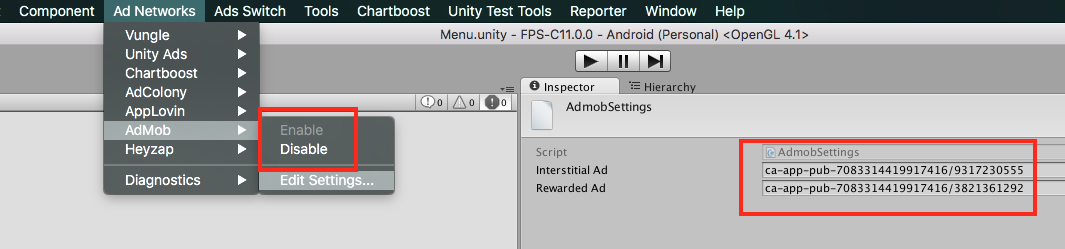
Change new AdMob id’s
You should find the Admob id’s for your game inside Blockyverse tab on Ad Networks Master File. Then go to Ad Networks -> AdMob -> Enable (if it wasn’t). Next on Edit Settings apply the new id’s:
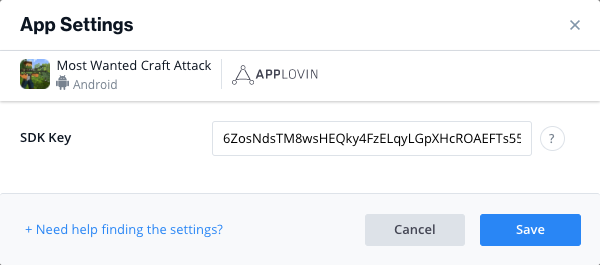
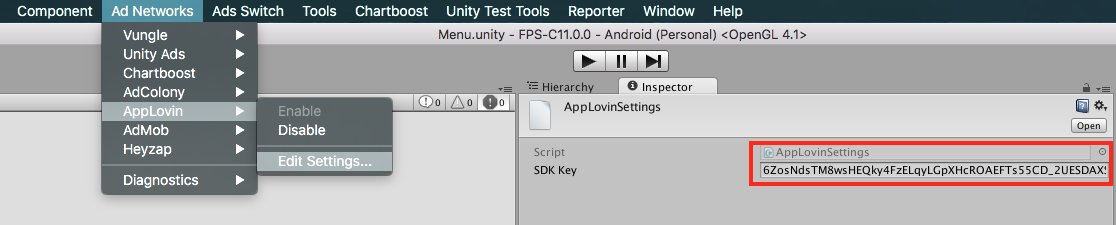
Change AppLovin Settings
You should find the AppLovin SDK key for your game inside Blockyverse tab on Ad Networks Master File. Then go to Ad Networks -> AppLovin -> Edit Settings and apply the new SDK:
Then update the same AppLovin SDK on the following files:
- Plugins/Android/AndroidManifest.xml
- _Scripts/AmazonSwitch/Manifest/AndroidManifestAmazon.xml
Also check that the Bundle ID is the correct one on both xml files
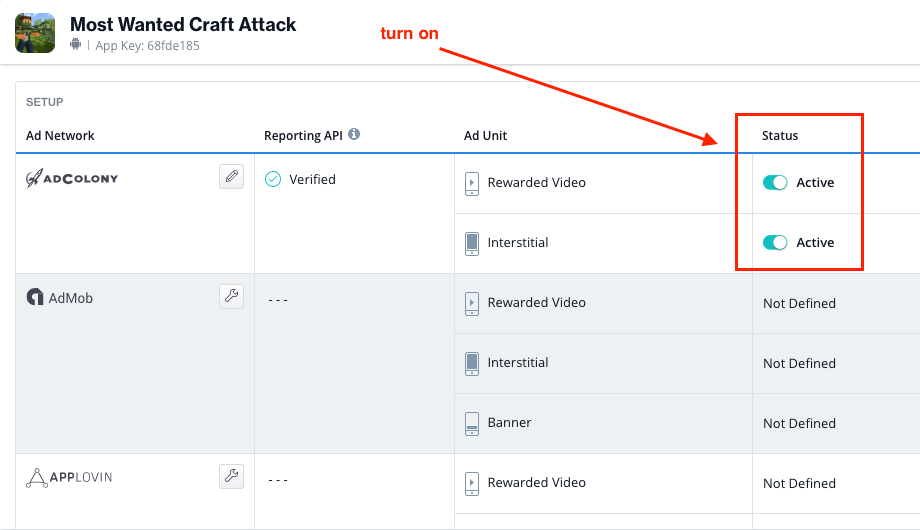
Verify the rest of the Ad Networks
The rest of the Ad Networks stay the same, so you need to double check them on the Ad Networks Master File on the oldest Company tab and copy those ids into the new Blockyverse tab in the corresponding row.
Last steps
Finally you can test the game inside Unity editor and see if there is any error in the Console.
If everything looks fine, you can go to Player Settings and update the Version and BVC. For the Version just add “b” at the end (ex: C18.1b, C18b).
Build your new APK and that’s it! Congrats!