
Purpose
This post explains how to update an existing game to add it the Hook shot feature. The instructions assume you are using the C18.1 or C20 code. The tutorial use a C20 game.
Get Your Project Folder
All existing projects have a project folder. You can either download the offline project folder or sync the github branch on your own local repository. Please note C18.1 and C20 games should be opened with Unity 5.6.2p1.
Import package
First thing to do is import this package. You can find it on your Dropbox company account on 0-Assets > GUI > Blockyverse Packages. This package includes all the sounds, images and scripts that you will use for the hook.
Create prefabs and elements
There are a few prefabs that you need to edit and create from scratch:
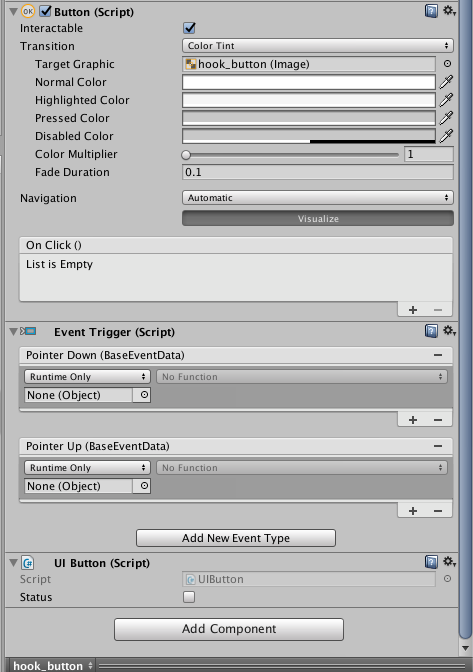
- The first thing you need to edit is located on UI > gameplay > gameplay_buttons. You need to create a new object at the same level than jump_button (you can just duplicate that object and then edit it). The new object should be named hook_button. Please edit EVERYTHING with the same values that this image:
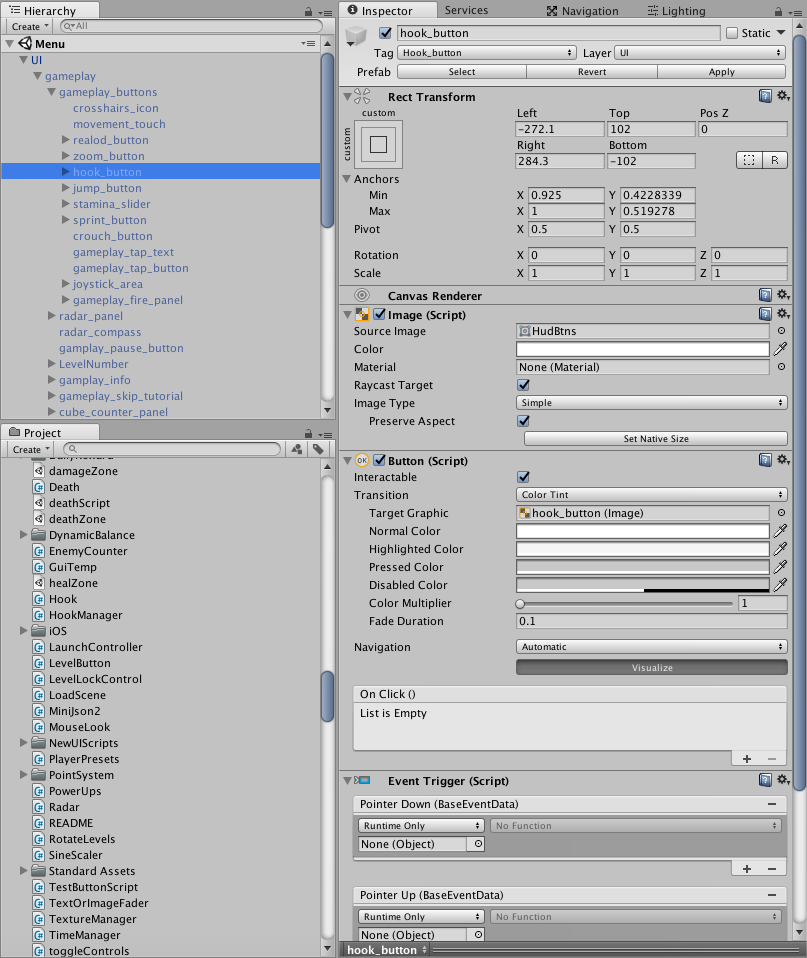
(This is the image with the details on the right:)
Please note that you should create a new Tag for this object. You can do that by clicking on Tag (below the object name) and then Add Tag…:
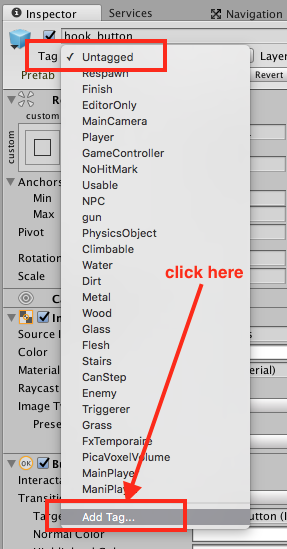
Then you will see this tab:
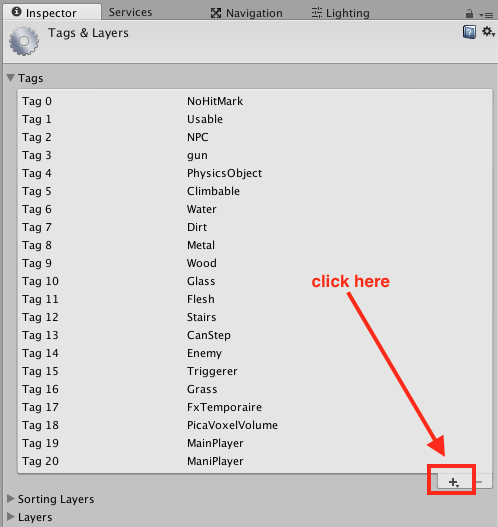
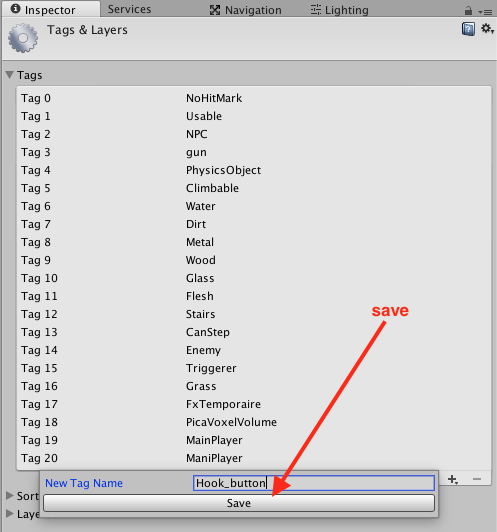
Finally you will be able to chose the correct tag for your new object:
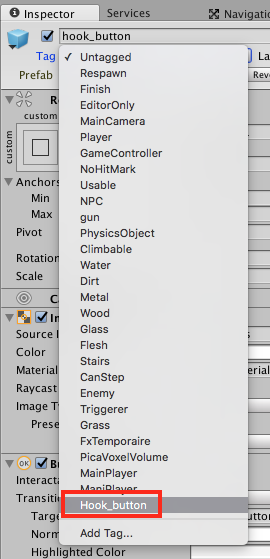
Absolutely EVERYTHING should be as the images show.
- Inside hook_button object should be the hook_icon object and it should has the same values as this image:
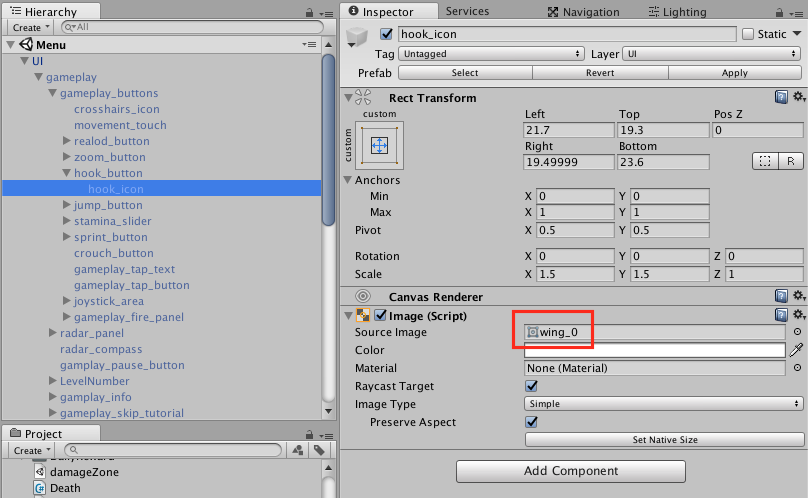
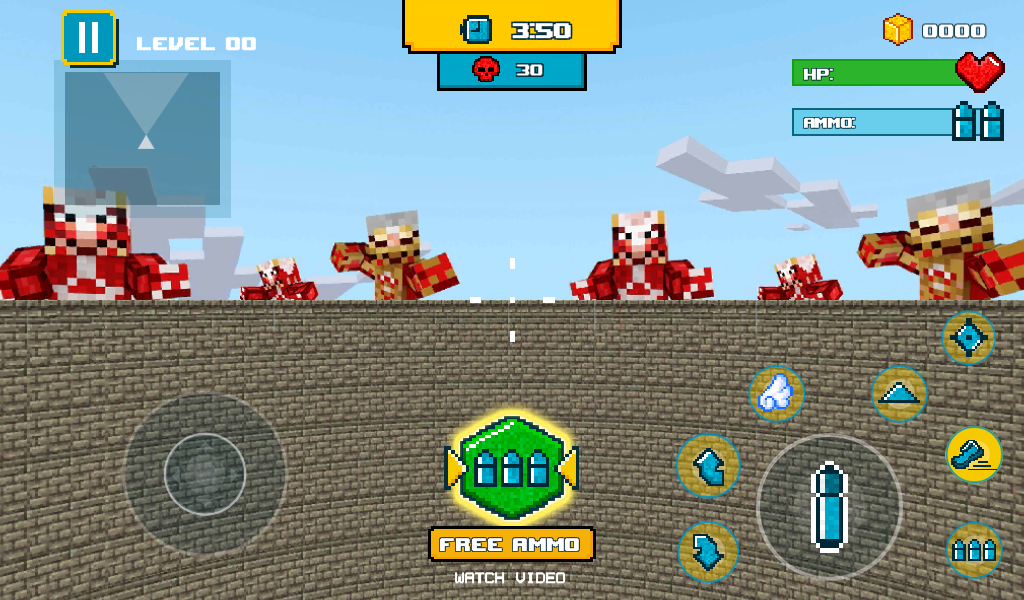
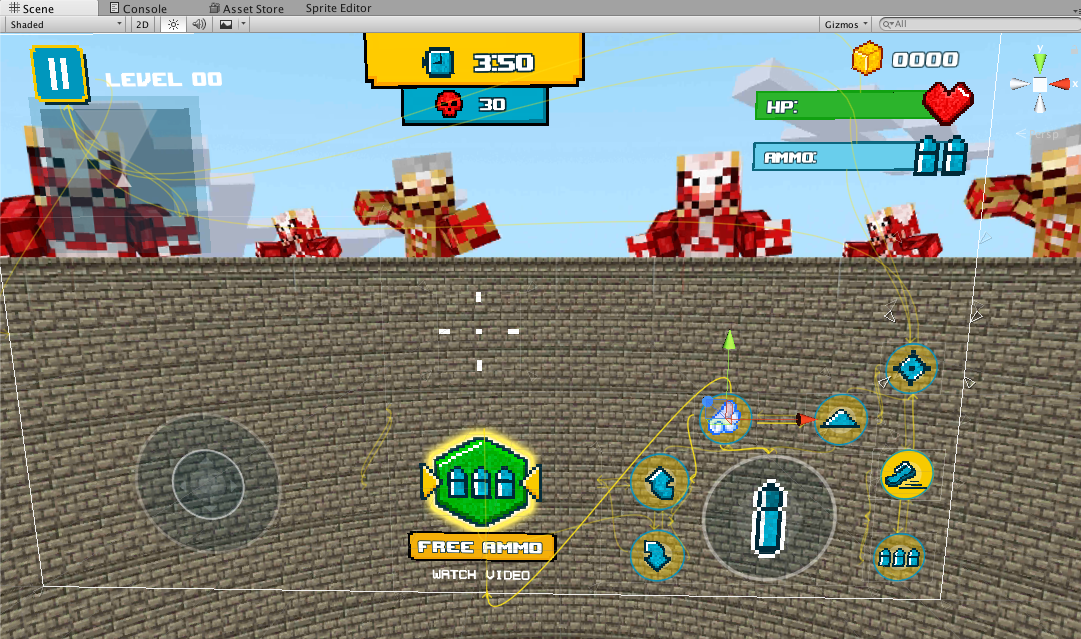
Note here that you will need to chose the new wing_0 Source image. This image was already imported in the package from the beginning. - Please check again that all the values remain the same as the images above. If everything is ok, you will see something like this on your UI > gameplay screen:
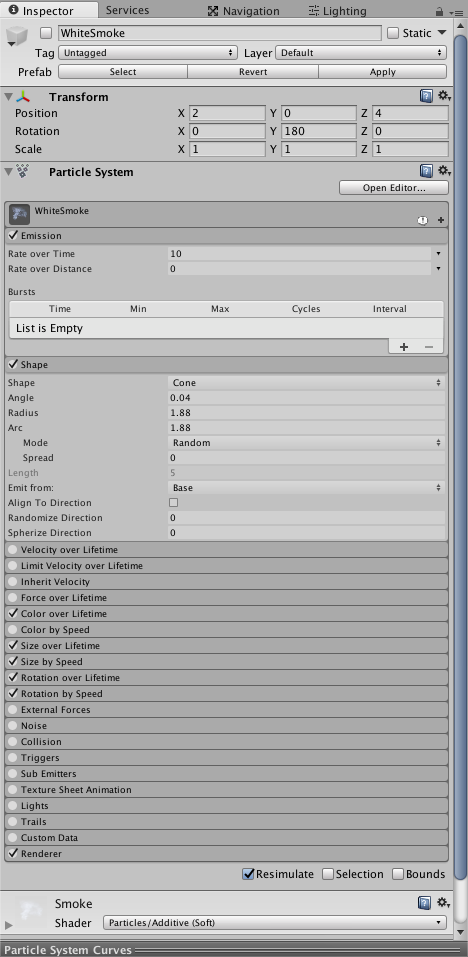
Finally Apply the changes to the UI prefab. - Open Level 1. Go to your project tab and search the Whit Smoke prefab. Drag and place it inside the FPS Camera object. Make sure that all the values are the same to these images and the object should be disabled:

Finally Apply the changes to the Player prefab. - Inside the same FPS Camera object open the Main Camera object and create inside the Hand showed in the image. As usual, check that all the values are exactly the same.

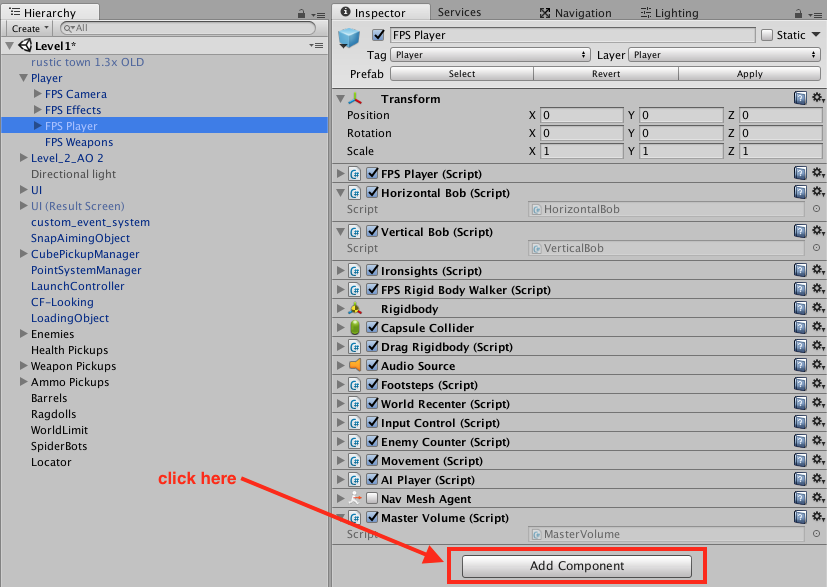
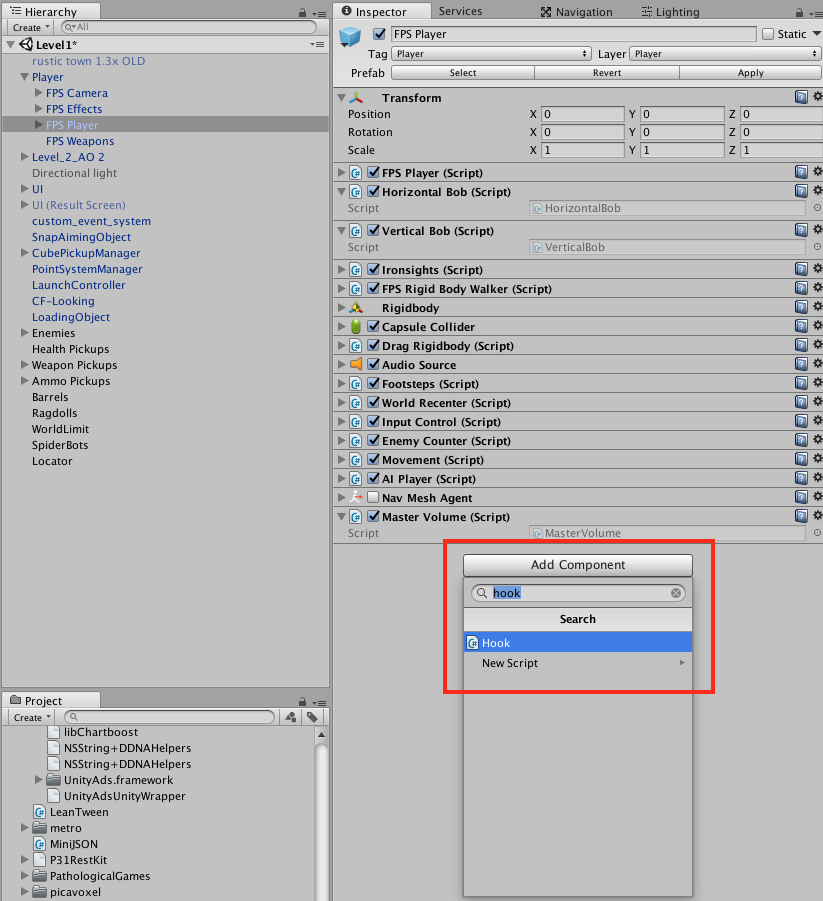
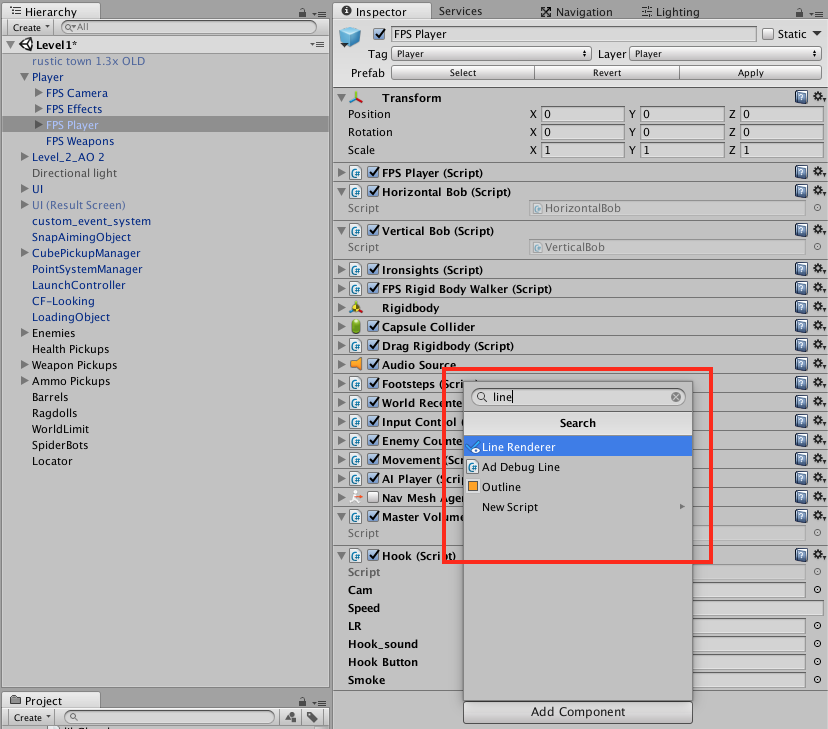
Finally Apply the changes to the Player prefab. - Go to the FPS Player object and click on Add Component. Then write “hook” and select the Hook script.
Then do the same but select instead a Line Renderer.
Finally check that everything in your FPS Player prefab looks like this image. Drag and drop everything as the image shows and search for the remaining elements.
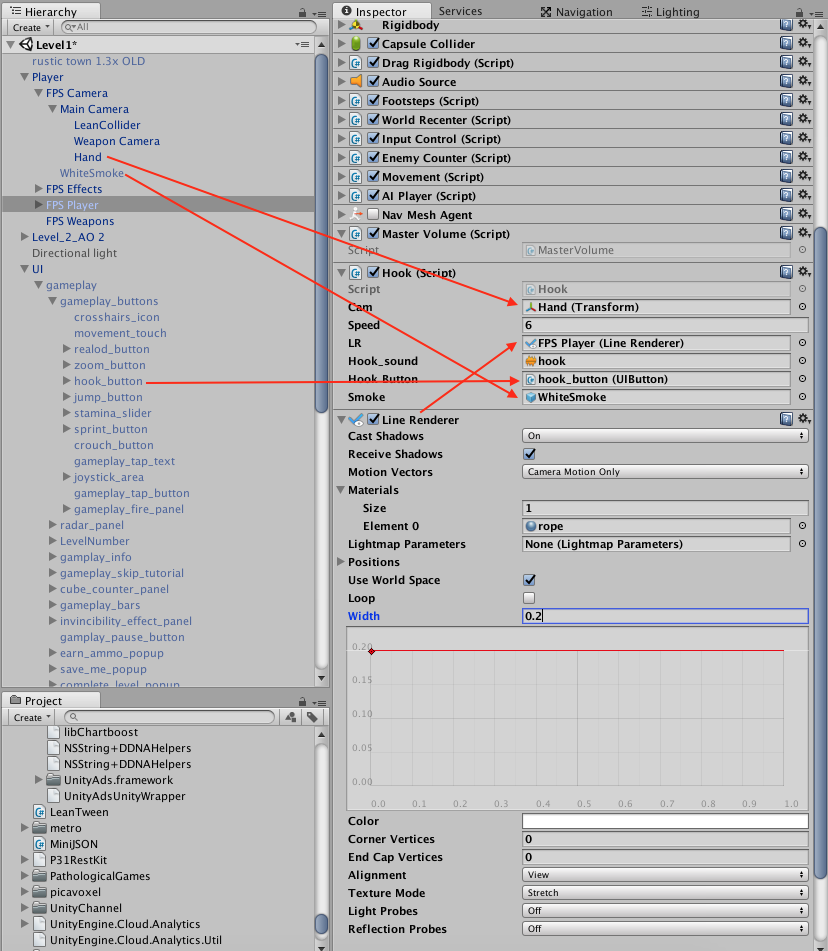
Save all the changes and apply them to the FPS Player prefab. Make sure everything is set correctly in all the levels (you just need to drag and drop the hook_button on every level, all the other changes should be applied already to all the levels).
Last step
You are almost done! You just need to turn on the Grappling Hook. In order to do this go to Tools > Grappling Hook > Enable > On. Right here you can decide if turn this feature on or off, so you can see the hook or not in the game.
The last step is build an APK and try the hook feature in your device. If everything is ok, you have finished!